Pull-Up Treats

by Beate Johns

Create a cover for your treats. When you pull on the ribbon on top of the cover, the treat will appear.

Supplies
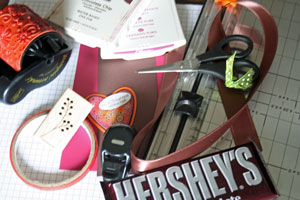
  • 6" x 7" piece of cardstock for candy cover
  • 2 1/2" x 6 1/2" piece of cardstock for belly band (optional)
  • Scoring tool
  • Sticky Strip™
  • Ribbon (about 30" needed)
  • Big Hershey™ bar
  • Stamps
  • Scissors
  • Ink
  • Hole punch
  • Additional cardstock for decoration
  • Embellishments

Step-by-Step

  1. Step 1

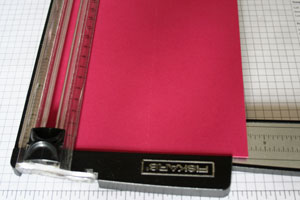
    Score 6" x 7" piece of cardstock at 2 3/4" and 5 1/2" on the 6" side.
  2. Step 2

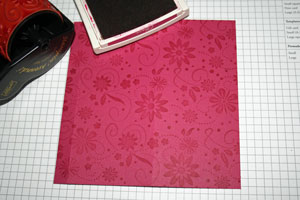
    Stamp or wheel entire cardstock front.
  3. Step 3

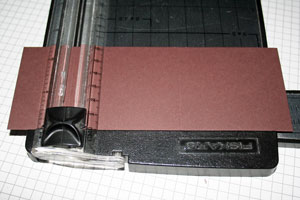
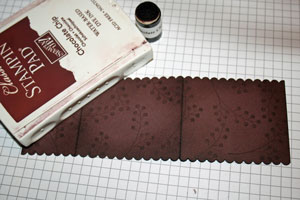
    Score cardstock for the belly band at 2 3/4" and 5 1/2".
  4. Step 4

    Decorate the front of belly band.
  5. Step 5

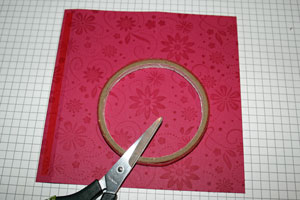
    Apply Sticky Strip™ to the 1/2" strip on front cover.
  6. Step 6

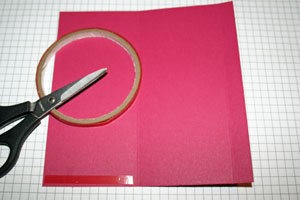
    Turn cardstock cover so the inside is facing up and add Sticky Strip™ to the bottom of the 2 3/4" wide outer panel.
  7. Step 7

    Remove the red liner from the adhesive. Fold the thin glue tab, then the 2 3/4" panel over the middle panel to create a pouch.
  8. Step 8

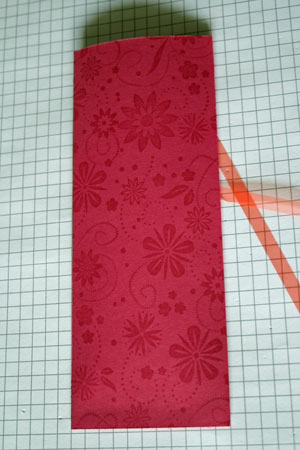
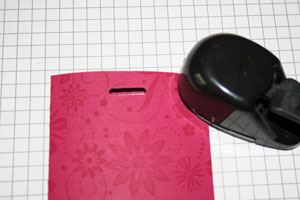
    Punch a hole/slot in the middle of top part of your pouch. Choose your punch according to the ribbon size being used.
  9. Step 9

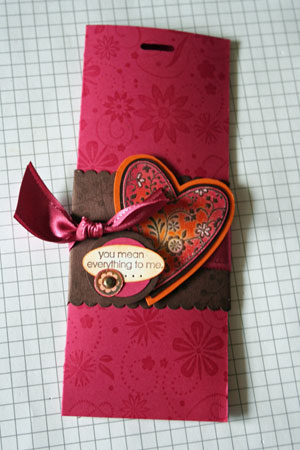
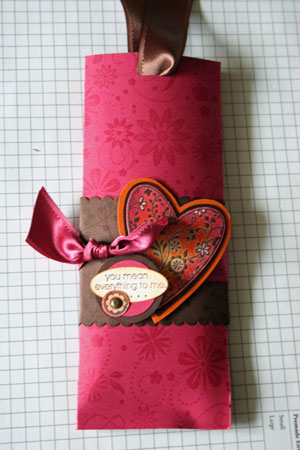
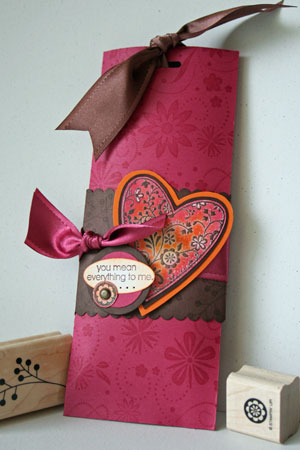
    Finish decorating the pouch. Here, the belly band was adhered to the pounch, then ribbon and additional stamped images were added.

    (For a close up of the heart and instructions on how it was colored, please check in my gallery.)
  10. Step 10

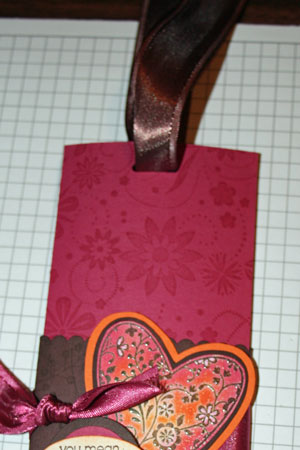
    Thread the ribbon through the hole on top of the pouch. Make sure the ribbon is the same length on both sides.
  11. Step 11

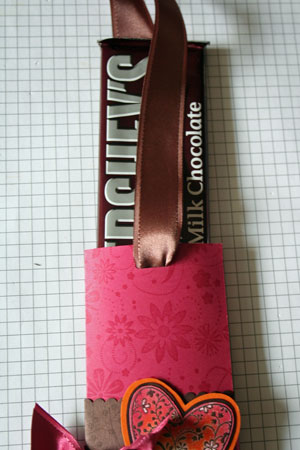
    Center the candy bar between the ribbon ends, on top of the ribbon running through both holes.
  12. Step 12

    Push the candy bar all the way into the pouch.
  13. Step 13

    Tie the ribbon and the Pull Treat Pouch is done.
    Simply pull the ribbon (no need to untie) and the candy will appear.
Video!

Variations

    Make a pouch for different sized candy
    Measure the width of your candy. Add an inch to it. That will be your pouch front. You will need 2 x pouch front inches plus 1/2" for glue tab.
    Measure the length of your candy. Add 2 1/4" to the length.

    Alternate treat ideas
    Other Chocolate Bars
    Popcorn
    Gum
    Hot Chocolate Mix

    Leave it open
    Leave out step six and leave the bottom of your pouch open.

Your Turn

You've seen the tutorial, now you try it! We've got a section of the gallery set aside for Pull-Up Treats. Try this technique, then upload your artwork to the gallery. Show us your creations!

***Please note - Internet Explorer/Edge is not a supported browser, and will not allow you to see the videos. Please use Chrome, Firefox or Safari to view our tutorial videos.

Questions and Comments

We'd love to get your feedback or questions. Leave your comment below.

Beautiful work
How did you scalloped the card stock?
Fanny  |  Wed Jan 23, 2008 at 9:40 AM
How stinkin' cute! What a great hostess gift idea.... Thanks so much Beate!
newstampinaddict  |  Wed Jan 23, 2008 at 9:42 AM
I think that this is so darling and can't wait to try it. I am thinking this would be great for all sorts of little impromtu gifts. Thanks for the great ideas!
RememberMe  |  Wed Jan 23, 2008 at 10:47 AM
thank you sooooooooooo much i know i will use it often rally cute god bless
linda  |  Wed Jan 23, 2008 at 10:55 AM
I think this would be great for a money card also!
Creativedesign  |  Wed Jan 23, 2008 at 10:57 AM
Oh my goodness. I know what I will be making for nieces and nephews this Valentine's Day. Great tutorial.
Carey  |  Wed Jan 23, 2008 at 10:58 AM
Soooo cool!! I gotta try this, too.
glitter-bug  |  Wed Jan 23, 2008 at 10:58 AM
Love your treat pouch!!!
My stamp set will arrive today and I can't wait to recreate yours....for my daughters!!!
Silke Ledlow  |  Wed Jan 23, 2008 at 10:58 AM
fabulous Beate!!
Dawn  |  Wed Jan 23, 2008 at 11:03 AM
can you tell me what size oval punch was used to make this project? thank you
Betsy  |  Wed Jan 23, 2008 at 11:08 AM
That is so beautiful, I'm going to make one of these for a girlfriend instead of a thank you card!
craftyvegan  |  Wed Jan 23, 2008 at 11:14 AM
it does not say which oval punch was used in step 9 it only states (then ribbon and additional stamped images were added.) and the stamped image of (you mean everything to me) is stamped on an oval punch piece........no mention as to which size oval punch was used............thank you
Betsy  |  Wed Jan 23, 2008 at 11:19 AM
How did you color the heart embellishment. It is the most interesting shading technique I've seen in awhile, and was wondering whether you used markers, colored pencils, plain ink? Please share!
Laura  |  Wed Jan 23, 2008 at 11:28 AM
that response was not to my question and as i stated before the tutorial does not state which size oval punch was used
Betsy  |  Wed Jan 23, 2008 at 11:33 AM
This is so pretty. What a great combo of colors. I might make some for my friends for Valentine's Day.
Jennie Portonova  |  Wed Jan 23, 2008 at 11:41 AM
I can't tell from the pictures - does the 'glue tab' go on the inside or the outside of the back panel? Thanks!
Theresa  |  Wed Jan 23, 2008 at 11:41 AM
I would love to know what technique was used for the heart punch. That is stunning!
Leigh Anne  |  Wed Jan 23, 2008 at 11:45 AM
I saw another project like this except they took their crimper and put a few crimps on the bottom giving it a more finished look. you might have to have a bigged peice of card stock to do that though.
Brittany  |  Wed Jan 23, 2008 at 11:47 AM
I was wondering about the Heart coloring too! Please explain!!!!
Amy  |  Wed Jan 23, 2008 at 11:48 AM
I added a link to a close up of the heart to step 9. You will find instructions there.

For a complete recipe of what I used (including the punch sizes), please click on the link on the bottom of the tutorial for the gallery on pull treats. My treat pouch is posted there.
beate  |  Wed Jan 23, 2008 at 11:58 AM

Page 1 of 4 pages  1 2 3 >  Last »

You need to be logged in to comment

GET OUR NEWSLETTER


Splitcoaststampers's privacy policy