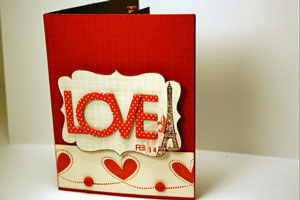
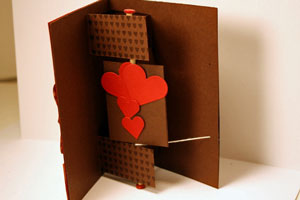
Pop-Up Twirl Card

by Maren Benedict

Create a card with a twirling pop up surprise inside.

Supplies
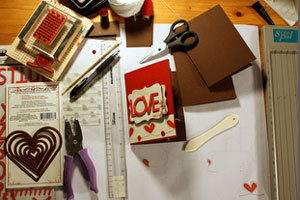
  • Two 8 1/2" x 5 1/2" card bases (heavy/thick cardstock works best)

  • Two 1 1/4" x 2 1/4" strips of cardstock

  • Two 2 1/2" x 2" strips of cardstock

  • Scoring tool (optional)

  • Scissors

  • String

  • Small Hole Punch

  • Skewer or skinny straight straw

  • Adhesive (glue dots)

Step-by-Step

  1. Step 1

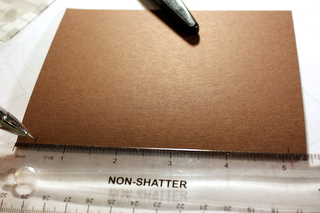
    Score one card base at 4 1/4" and fold in half.

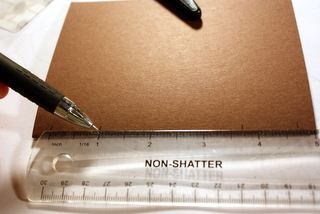
    Mark the cardstock 3/8” from both ends.

  2. Step 2

    Now make a mark 1” in from each of the 3/8” marks.

  3. Step 3

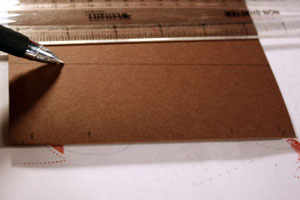
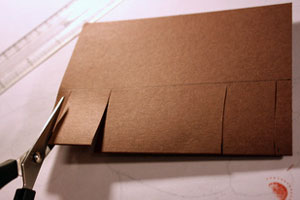
    Draw a line across the base 1 3/4" from the edge.

    This will be covered up and is only a guide to cut to.
  4. Step 4

    Cut from each mark up to the guideline.
  5. Step 5

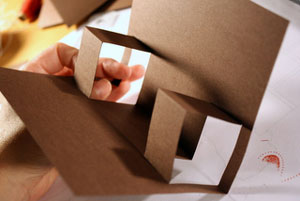
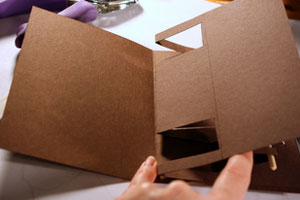
    Fold the strips/tabs in as shown.

    Shut the card to create creases.
  6. Step 6

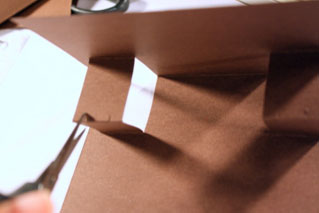
    Cut two small slits on the edges of each tab.
  7. Step 7

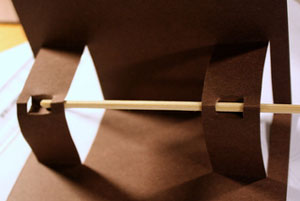
    Fold the strips in to allow the skewer to slide through.

    Trim the edges of the skewer to be slightly shorter than the card.
  8. Step 8

    Punch a small hole approximately 3/4" in from both sides of the back of the card.

    The holes should be slightly above the bottom tab.
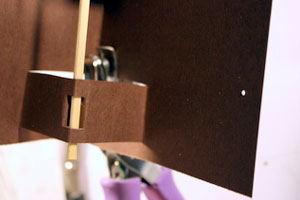
  9. Step 9

    Feed your string through one hole and adhere.
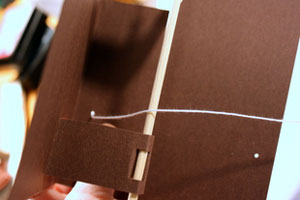
  10. Step 10

    Wrap string around skewer at least a few times and feed it through the other hole.

    Close card and adhere the second end of the string.
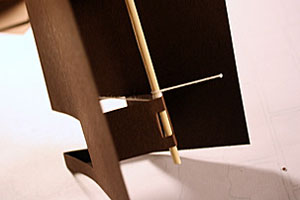
  11. Step 11

    Practice opening and closing the card to see if you need to adjust the tension of the string.

    The skewer should rotate when opening and closing the card.
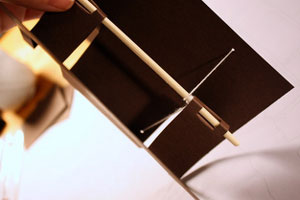
  12. Step 12 (Optional)

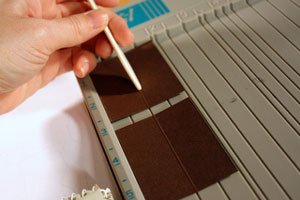
    Score both 2 1/2" x 2" cardstock strips in half (at the 1" mark).

    This will help keep the skewer in place.
  13. Step 13 (Optional)

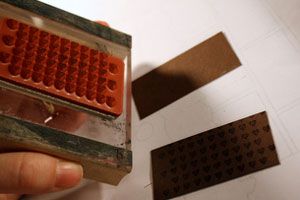
    Embellish/stamp both 1 1/4" x 2 1/4" strips and attach to the front of the tabs.
  14. Step 14

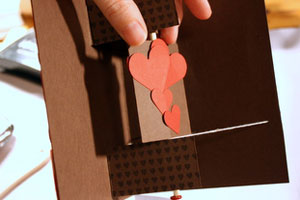
    Embellish and stamp one side of both 2 1/2" x 2" cardstock strips. These should be identical on both sides as they will be the spinning element.

    Place one embellished strip underneath the skewer, decorated side down. Add adhesive to the outside edges of the strip, then adhere the second embellished strip to the first.
  15. Step 15

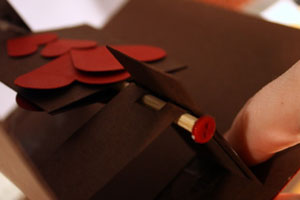
    Adhere small buttons to the top and bottom of the skewer to prevent it from sliding.
  16. Step 16

    Adhere to the inside of the second card base.
  17. Step 17

    Decorate card front.

  18. Your card is done.

Video!

Your Turn

You've seen the tutorial, now you try it! We've got a section of the gallery set aside for Pop-Up Twirl Card. Try this technique, then upload your artwork to the gallery. Show us your creations!

***Please note - Internet Explorer/Edge is not a supported browser, and will not allow you to see the videos. Please use Chrome, Firefox or Safari to view our tutorial videos.
Questions and Comments

We'd love to get your feedback or questions. Leave your comment below.

What a fun and adorable interactive card! Thanks for the wonderful tutorial, Maren!
Rose Ann  |  Wed Jan 20, 2010 at 12:16 PM
Love this tutorial. I will have to make one when I have a free day. I know my gals will love it.

Cerise
Cerise Welter  |  Wed Jan 20, 2010 at 12:24 PM
I LOVE making twirling cards and I have to say this is the most clear set of instructions I have ever seen. KUDOS to you for such a good job on this tutorial.
Heyentah  |  Wed Jan 20, 2010 at 12:34 PM
Thanks for the wonderful tutorial and video, Maren!! I look forward to trying this.
Joanne (sleepyinseattle)  |  Wed Jan 20, 2010 at 12:41 PM
Thanks this is a great tutorial. Plan to to try it !
Mary Binder  |  Wed Jan 20, 2010 at 12:52 PM
Genial ce tuto
j'adore
merci bcp des demain je le fais

J'adore les projets de ce site, j'attends le mercredi avec tjs bcp d'impatience

a bientot
agnes  |  Wed Jan 20, 2010 at 12:53 PM
Great tutorial! TFS
Keely Yowler  |  Wed Jan 20, 2010 at 1:43 PM
Great Card... i plan on making that one for sure this weekend! i agree with the other ladies, great tutorial and video, it's been a long time since someone created something that is easy to follow! kudos
Natacha Diemer  |  Wed Jan 20, 2010 at 1:45 PM
Thanks for the instructions and tutorial. They are both well done and provide clear instruction. I say that without having made one but I think I'll do fine with what you've provided. Thanks so much.
Diane  |  Wed Jan 20, 2010 at 2:02 PM
Maren! Love your tutorial :D
Jimmi  |  Wed Jan 20, 2010 at 2:31 PM
Maren! You are Bah-rilllliant! smile Thanks ever so for this awesome tute! My fave in a long time. Can't WAIT to try this!
BevMom  |  Wed Jan 20, 2010 at 2:42 PM
I Love you tutorial! On my card I colored the string with a marker the same color as the card base, so the string doesn't show up very much! Your instructions are wonderful! Very easy to follow! T.F.S.
Noreen  |  Wed Jan 20, 2010 at 3:26 PM
I found that the instructions for this project
were not that clear enough, and the suggestion of putting buttons on the ends of the skewer did not work.
In fact, I doubt that I will pass this project onto my friends.
Dori  |  Wed Jan 20, 2010 at 4:01 PM
Hi Dori! I am sorry it didn't work out for you. Would you like me to clarify anything? I am more than happy to help. How did you adhere the buttons? Glue dots and/or tombow mono should work (just be sure to let the tombow set first).
Maren  |  Wed Jan 20, 2010 at 4:11 PM
Nice tutorial. Camera work is a little shaky and I was getting a little motion sick. Is it attached to you head?
donna  |  Wed Jan 20, 2010 at 4:12 PM
Hi Donna. No that was my fabulous husband's work. HA! Sorry about that. Definitely not a professional camera man but I do appreciate his help. Hope you can muster through it! smile
Maren  |  Wed Jan 20, 2010 at 4:13 PM
Great idea, Noreen! smile
Maren  |  Wed Jan 20, 2010 at 4:19 PM
I love this type of motion card - it is great to see someting new out there!!! Thank you for sharing this with us all..............
Patti Lee  |  Wed Jan 20, 2010 at 4:38 PM
This is so cute! I am going to have to try it soon. I wonder if a coffee stir stick might work, too? Great job on the tutorial. smile
Leah  |  Wed Jan 20, 2010 at 4:52 PM
Hi Leah,

I use the sturdy round red coffee stirrers all the time. The flatish ones don't work very well though. You can use Copic Markers to color the plastic ones (straws, too) if you want. It really can make the card look so pulled together.
Heyentah  |  Wed Jan 20, 2010 at 5:26 PM

Page 1 of 4 pages  1 2 3 >  Last »

You need to be logged in to comment

GET OUR NEWSLETTER


Splitcoaststampers's privacy policy