Pop-Up Flower Pot Card
by Chris Slogar
Create a 3D Flower Pot Card that folds flat for mailing.

Supplies
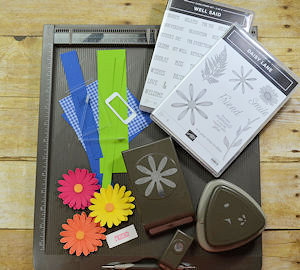
- Cardstock (Stampin’ Up!® Blueberry Bushel, Granny Apple Green, Melon Mambo, Grapefruit Grove, Pineapple Punch, and Whisper White used here)
- Window sheets
- Designer Paper (SU 2018-2020 In Color Designer Paper used here)
- Paper trimmer
- Scoring tool
- Corner rounder (SU Detailed Trio used here)
- Adhesive (Tombow Multi-purpose glue, Glue Dots, and SU Fast Fuse and Dimensionals used here)
- Other supplies as needed to complete the project (SU supplies used here: Daisy Lane Stamp Set and Daisy Punch, 1/2” circle punch, Well Written Stamp Set and Stitched Labels Dies, Melon Mambo Ink, Grapefruit Grove Ink, Pineapple Punch Ink, and Blueberry Bushel Ribbon)
Step-by-Step
-
Step 1
To make the base:
Cut 4” squares of cardstock and designer paper for base. Attach designer paper to cardstock and round corners of base. Score at 2” and burnish – if you used liquid glue, wait until it dries before folding.
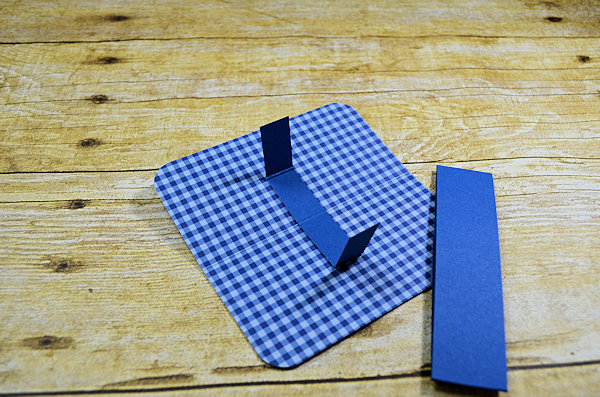
Cut cardstock pieces – 1” x 9”, scored at 2 3/8” and 6 1/2” for band; 1/2” x 4”, scored at 1”, 2”, and 3” for support. Fold band and attach ends at overlap. -
Step 2
Fold support piece and apply Tombow glue to two middle sections. Attach support at center of score line on base, aligning center fold of support piece with score line on base.
-
Step 3
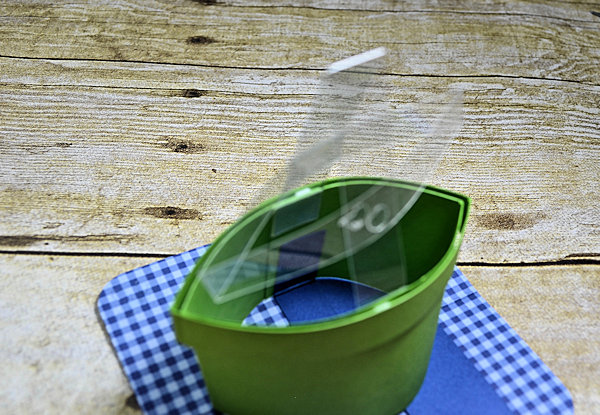
To make the pot:
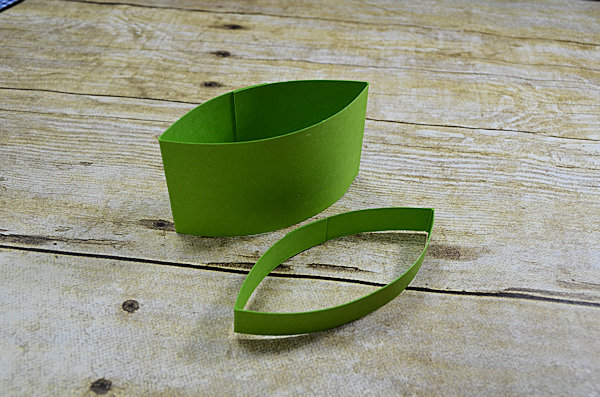
Cut cardstock pieces – 1 3/4” x 7 1/2”, scored at 2” and 5 1/2” for pot; 1/2” x 8”, scored at 2 1/8” and 5 7/8” for rim. Burnish score lines and use bone folder to break down fibers and round pieces. Press each piece flat to attach ends at overlap.
-
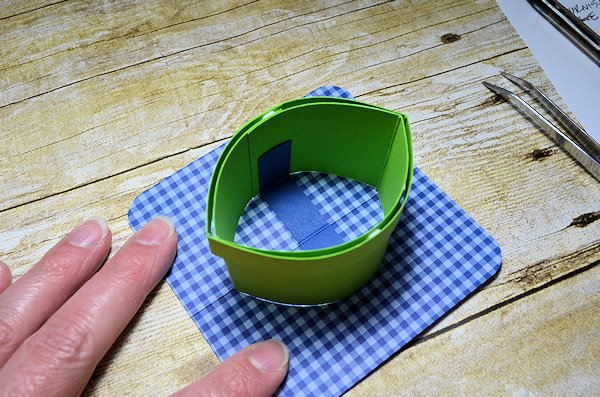
Nest the pot piece in the rim piece. Attach pot to rim using mini dimensionals at center back and center front of pot. -
Step 4
Apply Tombow glue to end sections of support piece. Place rounded pot around support. Attach pot to support at front and back of pot, aligning folds at side of pot with score line on base.
-
Pinch base, support and pot closed and allow glue to dry completely.
-
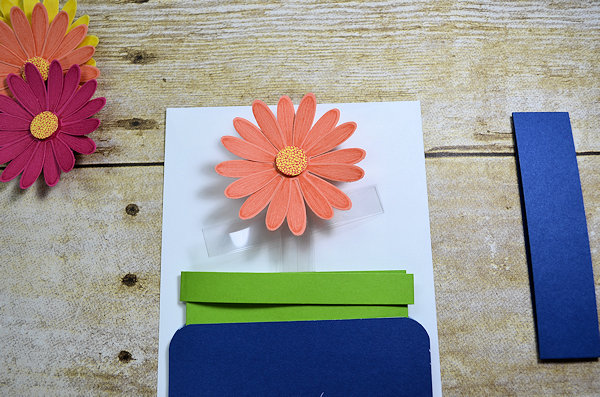
Step 5
Cut support pieces for flowers from Window Sheets – 1/2” x 5 1/2”, scored at 2 3/4” for vertical piece; 1/2” x 6 1/2”, scored at 1 3/4” and 4 3/4” for horizontal piece. Fold horizontal piece and attach ends with glue dots at overlap.
Add 1/2” width of sticky strip to each end of folded vertical piece and attach vertical piece to inside of pot at front and back. Attach horizontal piece (at a slight angle) to inside of vertical piece using glue dots to attach at front and back, creating a 3D frame to hold up the flowers. -
Step 6
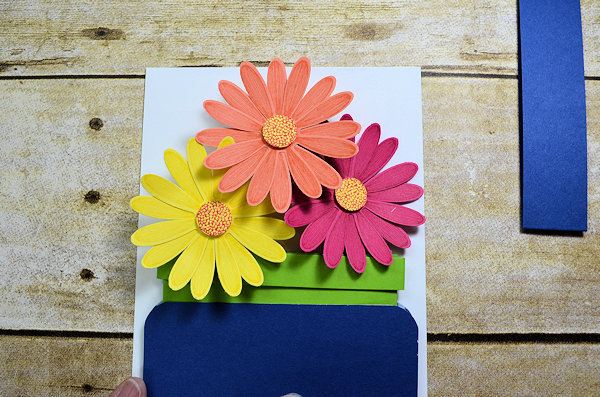
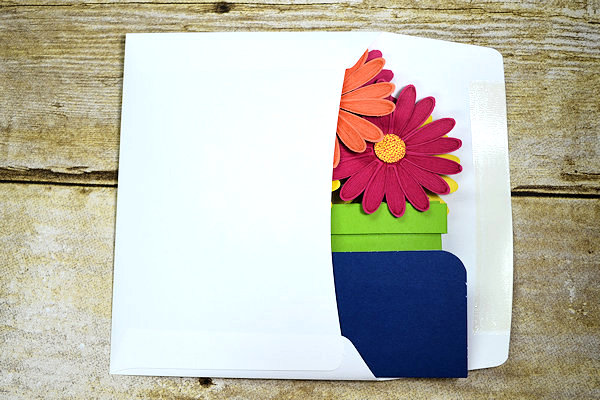
Fold card flat and place over an envelope. Attach flowers to Window Sheet support pieces with glue dots. Do not allow flowers to exceed limits of the envelope. Repeat on back of folded card.
-
NOTE:
Sample shows a total of 6 flowers – each flower was created by stamping and punching two daisies (the larger of the Stampin’ Up! daisy punches). The centers are 1/2” circles punched from stamped flowers and mounted on dimensionals. -
Step 7
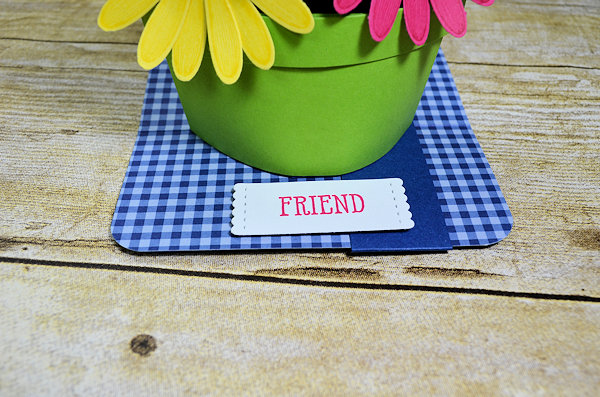
Place band around card base and attach greeting using a dimensional at only one side so that band can slide freely on and off base.
-
Step 8
Complete the project.
-
The card will fold flat to fit into an A2 envelope.


Video!
Your Turn
You've seen the tutorial, now you try it! We've got a section of the gallery set aside for Pop-Up Flower Pot Card. Try this technique, then upload your artwork to the gallery. Show us your creations!
***Please note - Internet Explorer/Edge is not a supported browser, and will not allow you to see the videos. Please use Chrome, Firefox or Safari to view our tutorial videos.

Questions and Comments
We'd love to get your feedback or questions. Leave your comment below.
Please provide a good resource for purchasing the Window sheets. Thanks
Page 1 of 1 pages