Pop-Up Book Card
by Norma Lee
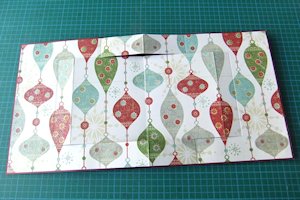
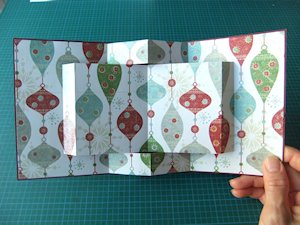
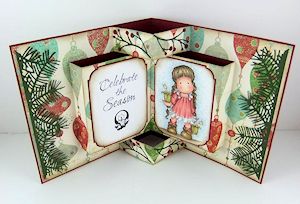
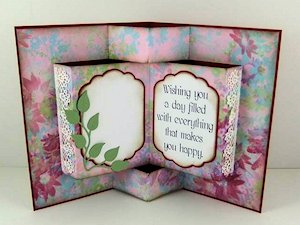
Open this card to reveal a book-shaped pop up feature.
Supplies
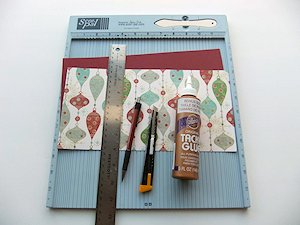
- 6" x 12" plain cardstock
- 5 7/8" x 12" patterned cardstock (patterned paper is too flimsy)
- Scor-Pal or other scoring tool
- Pencil, ruler and craft knife (or paper trimmer)
- Adhesive (craft glue used here)
- Other supplies as needed to complete the card
Step-by-Step
-
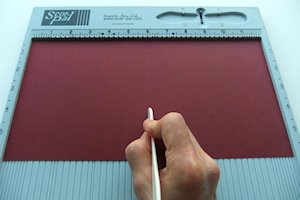
Step 1
Place the 6" x 12" plain cardstock on the scoreboard. Score midway at 6" and fold along the score line. Set cardstock aside.
-
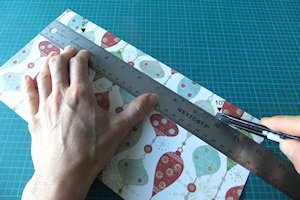
Step 2
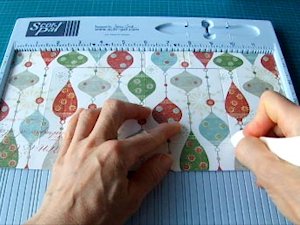
On the 5 7/8" x 12" patterned cardstock, measure down 1" from the top 12" edge of the paper and cut from 2" to 10" as shown. Do the same at the bottom of the paper.
-
Step 3
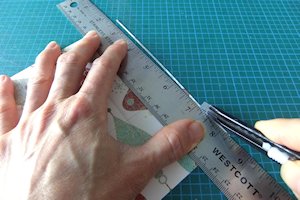
Place patterned cardstock upside-down on the scoreboard. On the top and bottom 1" strips, score at 4" and 8". On the middle section, score at 2", 6" and 10". These are for valley folds.
NOTE:
When scoring and folding, the score line should be on the outside of the fold.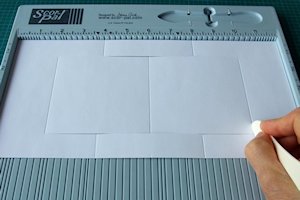
-
Step 4
Turn the patterned cardstock right side up. On the top and bottom 1" strips, score at 6". On the middle section, score at 2 3/4" and 9 1/4". These are for mountain folds.
-
Step 5
Cut off a 1/16" strip of paper from the left and right edges of the patterned cardstock.
-
Step 6
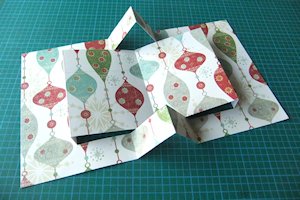
Valley-fold and mountain-fold along score lines as shown.
-
Step 7
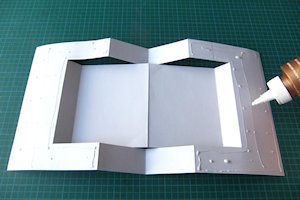
Apply glue or other adhesive to the back of the outside left and outside right panels of the patterned cardstock as shown.
-
Step 8
Adhere patterned cardstock to the plain cardstock as shown, creating a 1/16" border all the way around.
-
Open and close the card to make sure the folds are lined up correctly.
-
Step 9
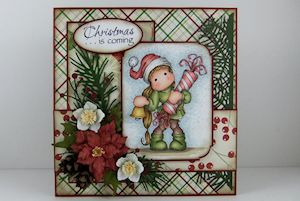
Decorate the card as desired.
-
This completed card is 6" square. See instructions below for A2 size.
Video!
Variations
-
For an A2 card (4 1/4" x 5 1/2"):
Cut plain cardstock to 8 1/2" x 5 1/2" and score midway at 4 1/4".
Cut patterned cardstock to 8 1/2" x 5 3/8". Cut a line 1" from top and bottom, from 1" to 7 1/2".
Score on top and bottom strips: for valley folds at 2 3/4" and 5 3/4"; for mountain folds at 4 1/4".
Score on middle section: for valley folds at 1", 4 1/4" and 7 1/2"; for mountain folds at 1 3/4" and 6 3/4".
-
Your Turn
You've seen the tutorial, now you try it! We've got a section of the gallery set aside for Pop-Up Book Card. Try this technique, then upload your artwork to the gallery. Show us your creations!
***Please note - Internet Explorer/Edge is not a supported browser, and will not allow you to see the videos. Please use Chrome, Firefox or Safari to view our tutorial videos.

Questions and Comments
We'd love to get your feedback or questions. Leave your comment below.
Page 1 of 2 pages 1 2 >