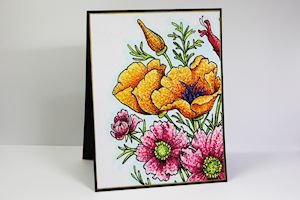
Pointillism

by Allison Cope

Color and shade an image using tiny dots.

Supplies

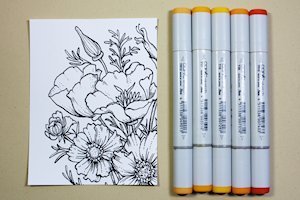
  • Sturdy, smooth cardstock

  • Printed digital stamp, or rubber stamp image stamped with dye ink (Power Poppy digital stamp used here)

  • Markers (Copic alcohol markers used here; water-based markers may also be used)

Step-by-Step

  1. Step 1

    Print a digital stamp image, or rubber stamp an image onto some smooth, sturdy cardstock.

    HINT:
    Use a dye ink for stamping any image you are going to color with alcohol markers. Memento brand is recommended.
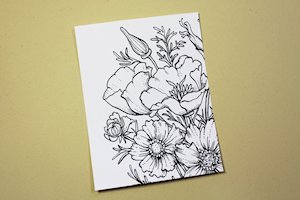
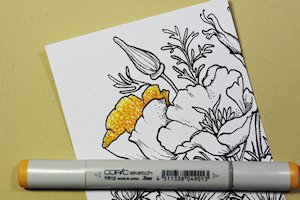
  2. Step 2

    Gather a minimum of three markers to color the image with. Five Copic colors were used in this example (lightest to darkest: Y19, Y17, YR12, Y38, YR18) . Try using a light, medium and a dark tone of the same color.

    Beginning with the lightest color, hold the marker straight up and down and apply small dots to the image. For more concentrated color, apply the dots closer together. For a lighter or highlighted area, use dots applied wider apart. Let each layer of dots completely dry between applications so you do not blend them together.
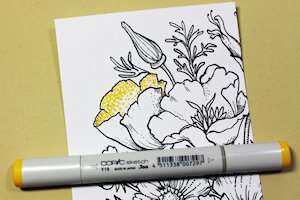
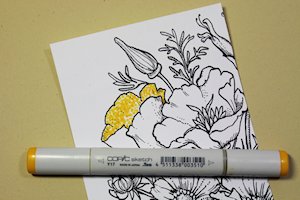
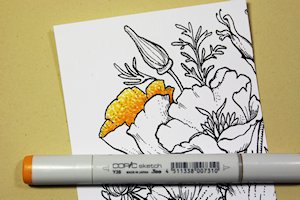
  3. Step 3

    Grab the next darkest color of marker and begin to overlap your dot application. You can use different sizes of dots to get the desired coverage of your image, but try to keep them fairly small.
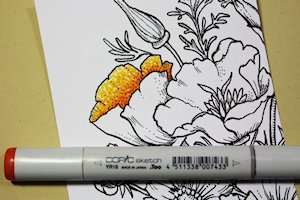
  4. Step 4

    Apply the third color. Begin to deepen the color of the areas that appear shaded.

  5. Step 5

    Apply the fourth tone of marker. Concentrate these darker shades of color in the areas of shade and shadow. The more dots you apply to one area, the richer and darker the tone will appear.

  6. Step 6

    Apply the final and darkest color of marker. Try using a cluster of many tiny dots to allow your lighter shades of color to show through if desired.

  7. Step 7

    Continue coloring using the concepts shown above.
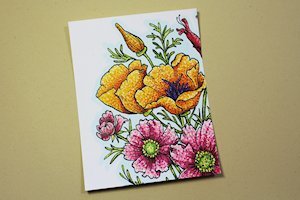
  8. Step 8

    Decorate the card as desired.

Video!

Your Turn

You've seen the tutorial, now you try it! We've got a section of the gallery set aside for Pointillism. Try this technique, then upload your artwork to the gallery. Show us your creations!

***Please note - Internet Explorer/Edge is not a supported browser, and will not allow you to see the videos. Please use Chrome, Firefox or Safari to view our tutorial videos.

Questions and Comments

We'd love to get your feedback or questions. Leave your comment below.

Love the way this turned out. Can't wait to try it myself!
hopemitchell  |  Wed Aug 6, 2014 at 6:02 AM
My daughter spent many hours creating a pointillism project for a high school art class (she even won an award at a local art festival). I can't wait to try this and send the card to her.
This is so creative. Thanks for sharing!
Di  |  Wed Aug 6, 2014 at 7:11 AM
What a pretty, simple technique I hadn't thought of! I'm definitely going to be trying this one. smile
Ambelleina  |  Wed Aug 6, 2014 at 7:44 AM
Awesome! Reminds me of that painter or painters that used dots. Thank you!
Kathy Harrison  |  Wed Aug 6, 2014 at 7:49 AM
Fabulous tech! Beautiful! TFS!
Fran Gumprecht  |  Wed Aug 6, 2014 at 8:19 AM
This card is amazing, Ally! GREAT job on doing this tutorial! You rock, girl!
Virginia Lu  |  Wed Aug 6, 2014 at 9:45 AM
This is gorgeous! I think I have those Copics, so I will have to find an image and give it a shot!
Rita Wright  |  Wed Aug 6, 2014 at 11:02 AM
Great tutorial. Wonderful video. Thanks ladies.
kab  |  Wed Aug 6, 2014 at 12:23 PM
Super tutorial and beautiful card, Allison. I love watching the video, Dina, and gave it a try. It is so fun.
Benzi  |  Wed Aug 6, 2014 at 12:45 PM
Awesome! Can't wait to try this. Thank you!
Rosie Johnson  |  Wed Aug 6, 2014 at 2:04 PM
Great technique and such a fun way of coloring images!!...thanks for sharing!
Jamie Patsilevas  |  Wed Aug 6, 2014 at 4:57 PM
gorgeous!!
Sara Shepherd  |  Wed Aug 6, 2014 at 8:24 PM
I have never seen this type of art... I have to try it. I love the digital stamp, where can I purchase it?
Guille Ehrlich  |  Wed Aug 6, 2014 at 8:44 PM
Great tutorial, Allison! I just love this technique!
Lee Ann Barrett  |  Wed Aug 6, 2014 at 9:20 PM
I've never thought to do this before. What an awesome technique. Thanks!!
Bonnie Ratzloff  |  Thu Aug 7, 2014 at 6:56 AM
LOVE IT! About to go try it out. Thanks!
Carla Goodlace  |  Sat Aug 9, 2014 at 4:57 PM
I should have read this before I gave it a try. Will do another image at some stage and use this tutorial - thanks
Janine B  |  Sun Aug 10, 2014 at 2:07 AM
This is such a great idea and looks like fun. I can't wait to see if I can do this technique. Thank you for sharing this idea.
Karen Kilgo  |  Mon Aug 11, 2014 at 4:59 PM
What a fantastic tutorial. thank you for sharing.
Lake Lady
Lake Lady  |  Mon Aug 18, 2014 at 6:04 PM
Guille - the image is available at www.powerpoppy.com as a digital stamp.
Dina K  |  Wed Aug 20, 2014 at 7:03 AM

Page 1 of 2 pages  1 2 >

You need to be logged in to comment

GET OUR NEWSLETTER


Splitcoaststampers's privacy policy