Pixel Embellishments
by Trudy Sjolander
Turn double-sided foam adhesive into pretty embellishments to use on your cards.
Supplies
- Double-sided foam adhesive squares, Helmar small square white ZapDots used here
- Perfect Pearls Pigment Powders
- Soft Dusting Brush
Step-by-Step
-
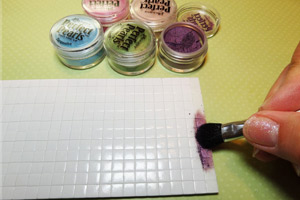
Step 1
Remove top protective film from a row of adhesive squares and lightly dust on first color of pigment powder.
-
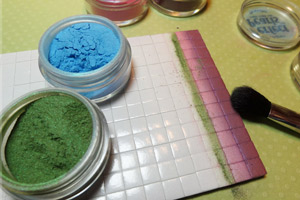
Step 2
Remove additional rows of protective film and add other colors of pigment. Note that are two colors of pigment on some squares.
-
Step 3
Rub powder into adhesive squares until they are no longer tacky.

-
Step 4
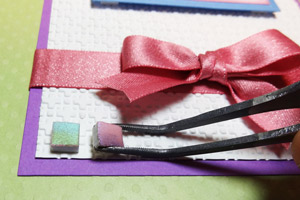
Attach a bow and place "pixels" around card to create a design. Tweezers are helpful here.
-
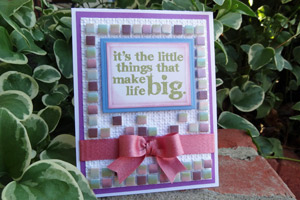
Step 5
Finish your card.
Video!
Variations
-
Try other mediums
You can use any shape or color of self adhesive foam shapes and other mediums for coloring them. Here is a card created with black circle foam adhesives and ultra fine glitter.

-
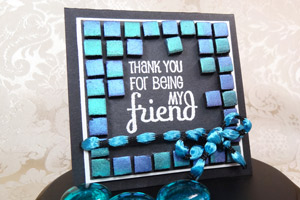
This card was done with small black foam adhesives and Perfect Pearls Pigment Powders.
Your Turn
You've seen the tutorial, now you try it! We've got a section of the gallery set aside for Pixel Embellishments. Try this technique, then upload your artwork to the gallery. Show us your creations!
***Please note - Internet Explorer/Edge is not a supported browser, and will not allow you to see the videos. Please use Chrome, Firefox or Safari to view our tutorial videos.

Questions and Comments
We'd love to get your feedback or questions. Leave your comment below.
Hope you all enjoy it!
Hugs,
True :D
Fran, I am sure any kind of pigment powders would work just fine.
Page 1 of 3 pages 1 2 3 >