Pierced Luminaria
by Clare Buswell
Create a luminaria with pierced and cut images.
Supplies

- Neutral colored cardstock
- Stamps, Waltzingmouse Stamps Seasons of Love - Tags, Santa’s Coming to Town, Pic-nic Patterns used here
- Ink
- Piercing tool
- Craft knife
- Scoring tool
- Ribbon or seam binding
- Double sided tape
- Foam mat
- Ruler, pencil, rubber, scissors
- Battery operated tea-light
Step-by-Step
-
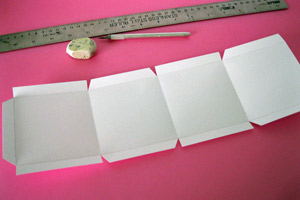
Step 1
Take a 14 1/2" x 4 1/2" piece of neutral colored cardstock. Mark a 1/2" border top, bottom and on one of the short sides. Each side is 3 1/2" square.
Template: Luminaria Template
-
Step 2
Cut these borders into tabs with the corners cut off as shown. Leave two panels with straight tabs top and bottom as shown (the first and third). Score lines.
-
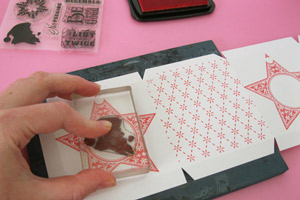
Step 3
Turn over and stamp two panels of the luminaria with background pattern.
Hint:
Mask the other panels when stamping.
-
Step 4
Stamp the remaining panels with an image stamp(s).
-
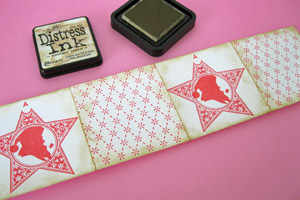
Turn in tabs and use Distress Ink to ink edges. (optional)
-
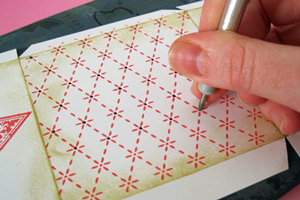
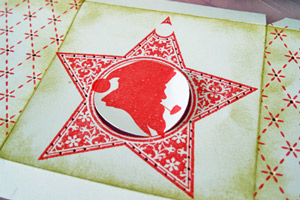
Step 5
Place cardstock onto foam pad and pierce holes in pattern (just pick a section of the pattern, too many holes could weaken the structure). Repeat for second panel.
-
Step 6
Pierce holes around the image, repeat for second panel.
-
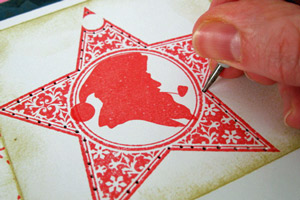
Step 7
Using a craft knife cut sections around the circle, make sure you leave parts touching the sides. Repeat for second panel
-
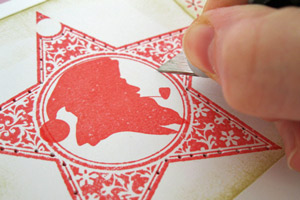
Step 8
Lift cut edges slightly.
-
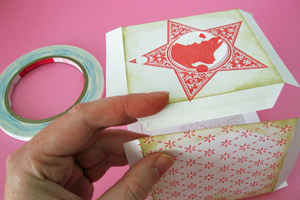
Step 9
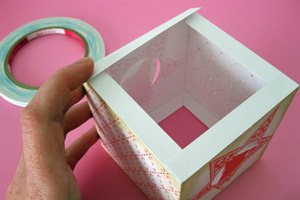
Assemble luminary and seal tab using double sided tape as shown.
-
Step 10
Adhere corners at the top and bottom of luminaria with the straight tabs showing on top.
-
Step 11
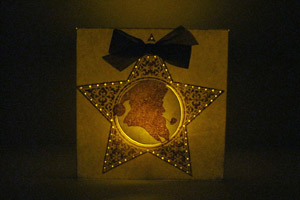
Add bows to top of image to finish.

-
Video!
Variations
-
Don't have 14 1/2" long paper, no problem
Start with a 11 1/2" x 3 3/4" strip of cardstock. Score at 1/2" and 3 1/4" on the 3 3/4" side. Score the long side at 2 3/4", 5 1/2", 8 1/4" and 11". Then follow instructions above.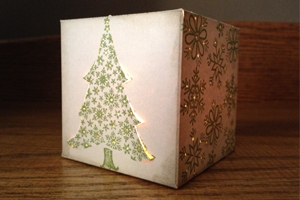
Your Turn
You've seen the tutorial, now you try it! We've got a section of the gallery set aside for Pierced Luminaria. Try this technique, then upload your artwork to the gallery. Show us your creations!
***Please note - Internet Explorer/Edge is not a supported browser, and will not allow you to see the videos. Please use Chrome, Firefox or Safari to view our tutorial videos.

Questions and Comments
We'd love to get your feedback or questions. Leave your comment below.
Hugs and smiles
Page 1 of 1 pages