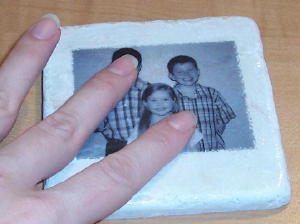
Photo Tiles

by Maria Williams

Created custom keepsake coasters.

Supplies
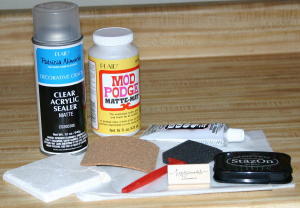
  • 4" x 4" Tumbled Tile (Wipe down with a damp cloth to remove any dust and let dry completely)
  • Tissue Paper
  • Mod Podge®
  • Tape
  • Foam brush
  • 4” x 4” Cork
  • Permanent glue
  • Stamp (optional)
  • StazOn®
  • Acrylic Sealer

Step-by-Step

  1. Step 1

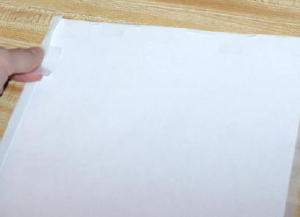
    Cut a piece of tissue paper and tape it to a regular sheet of paper. (This way it will feed through the printer.)
  2. Step 2

    Print picture on tissue paper and trim to fit tile.
  3. Step 3

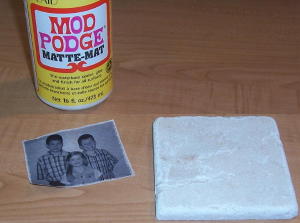
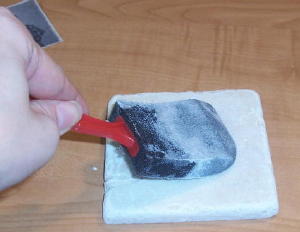
    Apply a thin coat of Mod Podge™ to tile.
  4. Step 4

    Place picture on the tile.

  5. Step 5

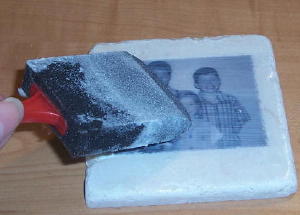
    Apply another thin coat of Mod Podge™ over picture and then let dry.
  6. Step 6

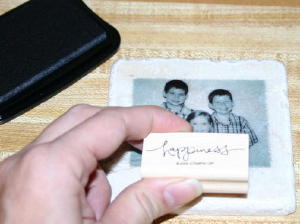
    Ink stamp with Stazon™, and stamp on tile. Let dry, then cover entire tile with another layer of Mod Podge.
  7. Step 7

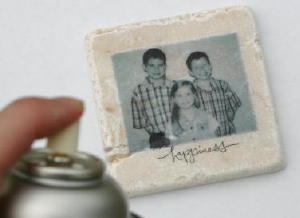
    After letting the Mod Podge™ dry completely, spray with acrylic spray, following directions on can.
  8. Step 8

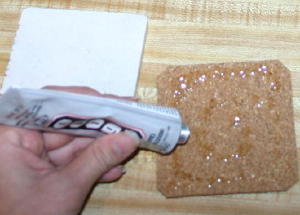
    After tile is completely dry, turn it over and apply permanent glue to one side of the cork square.
  9. Step 9

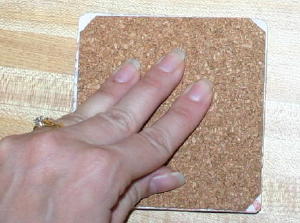
    Attach cork glue side down to the back of the tile and press down firmly.
  10. Step 10

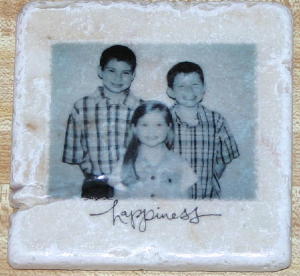
    Let the glue dry and enjoy your coaster!
Your Turn

You've seen the tutorial, now you try it! We've got a section of the gallery set aside for Photo Tiles. Try this technique, then upload your artwork to the gallery. Show us your creations!

***Please note - Internet Explorer/Edge is not a supported browser, and will not allow you to see the videos. Please use Chrome, Firefox or Safari to view our tutorial videos.

Questions and Comments

We'd love to get your feedback or questions. Leave your comment below.

I would love to make these. My question is "Where to purchase the tumbled tiles for this project". Thanks
Kristine Sanford  |  Wed Feb 13, 2008 at 8:37 AM
You didn't state it but I would presume you'd need to use a laser printer since I expect inkjet copies would bleed?
Teresa Stephens  |  Wed Feb 13, 2008 at 9:25 AM
The tiles can be bought at hardware stores that sell flooring. I buy mine at Home Depot.
Claudette  |  Thu Feb 14, 2008 at 11:58 AM
Wow... this looks very interesting. Thanks for the tutorial.
Photography enthusiast  |  Wed Feb 20, 2008 at 6:06 PM
I would like to attempt to make an "altered" cork board using fabric to cover the board. Do you have any suggestions on what type of adhesive (or other) to use to adhere the fabric to the cork?
Theresa  |  Thu May 15, 2008 at 4:51 PM
I have found these tiles at my local flooring store for $3/yard.
Alison Shiloh Wear  |  Wed Jun 11, 2008 at 12:52 PM
After you complete all the steps and the modge pod dries, are the tiles asborent if a glass of tea or water is placed on it? Also, I am assuming to use a laser printer or can you use like a photo printer like a Canon I9900 to print pictures on the tissue paper?
Deborah (StampinQbee)  |  Wed Jun 25, 2008 at 1:24 PM
can you do this with an inkjet printer?
Michelle Hansen  |  Thu Jul 31, 2008 at 6:11 PM
wow! This is very cool! I think i may try this one. By the way, can i do this to a Inkjet Refills printer?
ches  |  Wed Aug 27, 2008 at 12:13 AM
Love this idea. Has anyone used glossy tiles for this or pictures on photo paper?
pam  |  Sun Aug 31, 2008 at 11:25 AM
Where do we go to see the answers to these questions? I too am intersted in this but have an ink jet printer also what is the craft ink and bake technique? when we do the stazon then add marker colors do we heat set it for every new color or do we go ahead and do the whole thing then heat set and how many coatings of modge podge?? man I am full of questions today. Thanks Tracy
Tracy  |  Tue Sep 16, 2008 at 9:46 AM
do you have to use tissue paper? I was curious if you could use a regular photo or a xerox paper copy like Archiver's offers
Melissa  |  Tue Nov 11, 2008 at 7:58 PM
Mine looked great till I put something cold on it and it got a bit wet with condensation. the photo was lifting. So I tried putting something hot on it ..the picture started to come away with the cup. The Modge podge just doesn't seem to work for me ... Thanks .. I loved the look of them but I want to be able to use them as well.. Tracy
Mine looked great till I used it  |  Wed Nov 12, 2008 at 3:00 AM
I printed my pictures with a ink jet and in color. When I went to put them on the tile the ink ran. DO they need to be B&W? and do they also need to be done with Laser printer? Help this is a Christmas gift.
Donna  |  Tue Dec 2, 2008 at 1:26 PM
Kristine - I bought my tiles at Home Depot. I'm sure you can find them at Lowes or other home improvement store. I bought a box of about 10 for around $6.

Deborah - after the mod podge dries completely, be sure you seal it with an acrylic spray. I usually will spray 2 - 3 coats of acrylic spray (letting each coat dry completely before I spray the next one on).
As far as what printer I use to print on the tissue paper, I have done these on both laser printer and injet printer. I have not tried printing tissue paper through a photo printer like the little Kodak or Cannon ones.

When printing with an inkjet printer, be sure you give extra time for the ink to dry completely before you put it on the tile and apply the mod podge to it. (if the picture is not completely dry, then it will smudge when you mod podge it).
Maria Williams  |  Mon Dec 8, 2008 at 12:44 PM
can we do this with a regular photo? I have so many doubles ... wonder if it would work? has anyone tried that
Tracy  |  Mon Dec 8, 2008 at 12:46 PM
Michelle H, and ches - i have used both - an inkjet printer and laser printer and both came out fine. only thing is when you use the inkjet, be sure ink is completely dry before you continue with the mod podge.

Pam - I have not tried glossy tiles for this for 2 reasons: 1.) when applying the mod podge, you will see the brush streaks and I don't think that would look too good (who knows, maybe it will work out fine), and 2.) the glossy tiles are already sealed. I don't know how well it will take or resist the final project.
Maria Williams  |  Mon Dec 8, 2008 at 12:50 PM
Tracy - if you go looking through the resource pages here on scs, there is a tutorial for stamping on tiles. http://www.splitcoaststampers.com/resources/tutorials/tile_coasters/
You should be able to get the answers to your general questions about stamping on tiles with the tutorial as well as the Q and A that follows it.
As far as having to heat set these tiles between each coat of mod podge or acrylic sealer - the answer is no. Just make sure each of your layers are completely dry before going on to the next step. make sense?

Melissa - as far as using photo paper or copy paper instead of tissue paper, I don't know how that will turn out. I used the tissue paper because it is so thin and almost see through. It is also not as bulky as photo paper. I think the thickness can have an affect on the final outcome of your project - it may be uneven between where the the picture is and the tile. Also, because of that thickness, you may need to do several layers of the mod podge to be sure the picture doesn't pull away. make sense?

Tracy - Did you seal the coasters before you used them? If you don't seal them, then if the mod podge gets wet, it will react. Make sure you apply a few coats of acrylic sealer.
Maria Williams  |  Mon Dec 8, 2008 at 1:51 PM
Donna - When I made mine, I chose to do black and white because that was my preference. I have made these in color and also with an inkjet printer. Be sure you give plenty of time for the ink to dry before you put it on the tile otherwise the ink will smear.
Maria Williams  |  Mon Dec 8, 2008 at 1:54 PM
If you guys have any other questions, please be sure to pm me and I will answer you questions as soon as I can. smile
Maria Williams  |  Mon Dec 8, 2008 at 1:55 PM

Page 1 of 4 pages  1 2 3 >  Last »

You need to be logged in to comment

GET OUR NEWSLETTER


Splitcoaststampers's privacy policy