Photo Cube
by Rose Ann Reynolds
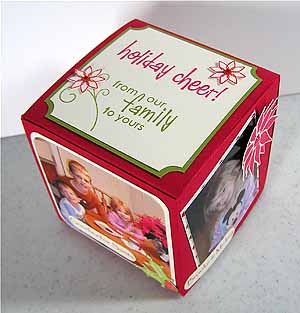
These keepsakes can easily be folded flat for mailing to your loved ones. The finished cube is 2 3/4" x 2 3/4" when assembled.
Supplies
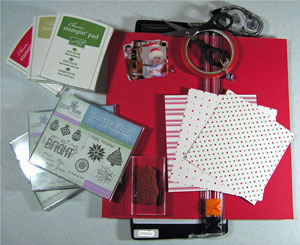
- 12" x 12" sheet card stock
- Patterned paper
- Paper cutter with scoring blade
- Scissors
- Sticky Strip™ and general adhesive (SNAIL or similar product)
- Photos
- Any stamps, ink, and embellishments
Step-by-Step
-
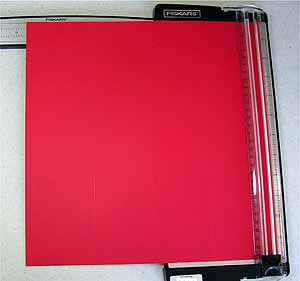
Step 1
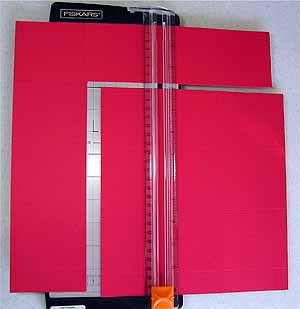
Score sheet of 12" x 12" cardstock at 1/2", 3 1/4", 6", 8 3/4", and 11 1/2".
-
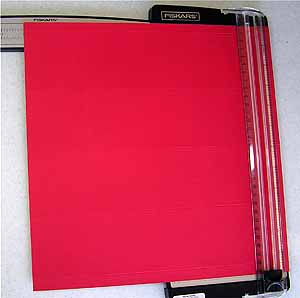
Step 2
Turn card stock so scored lines are horizontal, and score at 2 3/4", 5 1/2", 8 1/4", and 11".
-
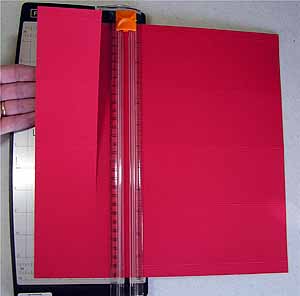
Step 3
Insert cutting blade, and cut along the 2 3/4" score line, stopping the cut 3 1/4" from the bottom.
-
Step 4
Turn card stock 90° and cut along the 3 1/4" score line starting 2 3/4" down from the top.
-
Step 5
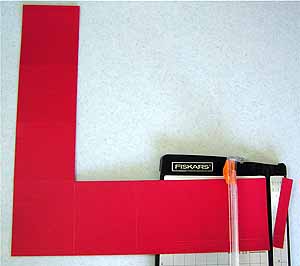
Trim 1/2" off the flap as shown.
-
Step 6
Trim off areas that are marked in the photo.
-
Step 7
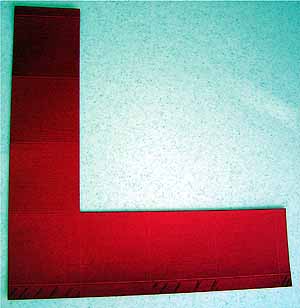
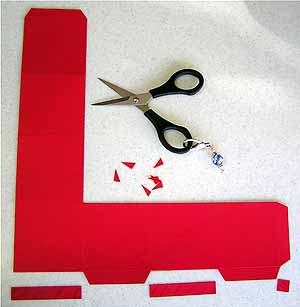
Trim the corners of the little tabs as shown.
-
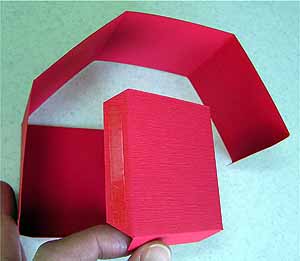
Step 8
Bring the right side of the strip over to form a cube, and adhere with Sticky Strip™ shown in the photo.
-
Step 9
Wrap the other "strip" around to form a cube, and apply Sticky Strip™ to the flap. Do not remove the red liner strip or the cube will not flatten for shipping.
Tuck the flap in and decorate as desired.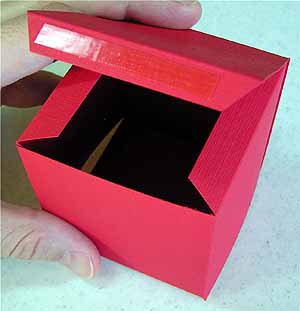
-
Step 10
Pull the top flap out of the cube and bring flap back around. Decorate cube with stamps, photos, paper and embellishments.
Flatten as shown for mailing, then attach a little note explaining how to assemble and secure for displaying.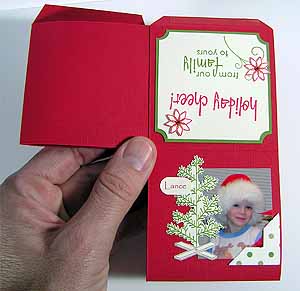
-
Step 11
Finished photo cube.
Your Turn
You've seen the tutorial, now you try it! We've got a section of the gallery set aside for Photo Cube. Try this technique, then upload your artwork to the gallery. Show us your creations!
***Please note - Internet Explorer/Edge is not a supported browser, and will not allow you to see the videos. Please use Chrome, Firefox or Safari to view our tutorial videos.

Questions and Comments
We'd love to get your feedback or questions. Leave your comment below.
All of the projects have been fabulous...but this CAN'T be the last day! More, more, more!! Thanks to SCS and all of the wonderful designers for some great holiday ideas!!
Vicki
Thanks for all of the positive response, everyone! I hope you have fun with this!
way to go girlie ..
Thanks,
Sue
Ash....
(http://hastkala-oceanichope.blogspot.com/)
Page 1 of 1 pages