Petite Purse
by Becky Roberts
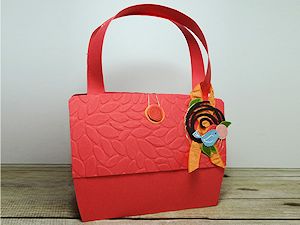
Make a tiny purse for a favor or small gift.
Supplies
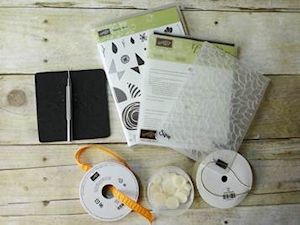
- Petite Purse Template (click to download)
- Cardstock (Stampin’ Up!® Watermelon Wonder, Old Olive, Blushing Bride, Early Espresso used here)
- Scissors
- Scoring tool or stylus
- Corner rounder
- Adhesive (Tombow Mono Multipurpose Liquid Glue and Mini Glue Dots used here)
- Other supplies as needed to complete the project (Stampin’ Up! supplies used here: Watermelon Wonder, Old Olive, Blushing Bride, and Marina Mist inks; Swirly Bird stamp set; Petal Burst Embossing Folder, Swirly Scribbles Thinlits Dies, Peekaboo Peach Ruched Ribbon, Elastic Gold Cord, Classic Designer Buttons, Gold Thread)
Step-by-Step
-
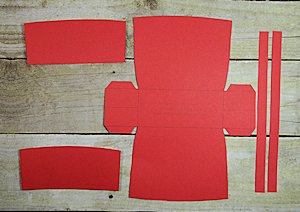
Step 1
Print the Petite Purse Template onto desired cardstock, or print the pattern to use as a template and trace it onto the cardstock.
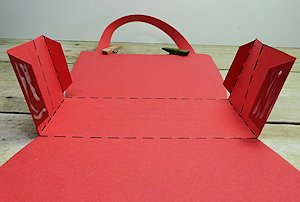
Cut out the pieces that are the front and back overlay. Use the cardstock below them to cut two 1/2” x 8-1/2” strips for the handles.
-
Step 2
Cut on the solid lines, being sure to cut off the all the black line from the outside edges so it does not show once assembled. Score on the dashed lines using a ruler and stylus or bone folder.

-
Step 3
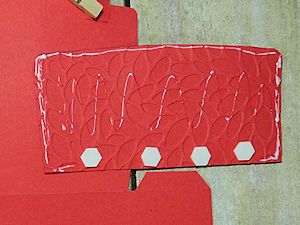
Emboss the front and back overlay (Petal Burst Embossing Folder used here).
Lay the pieces on the front and back, matching them up with the top of the purse. Use a corner rounder on the top two corners. Do not adhere yet.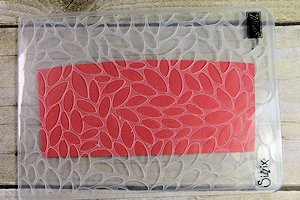
-
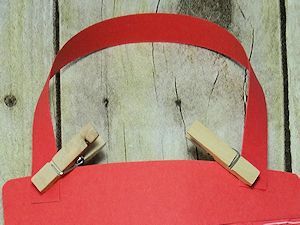
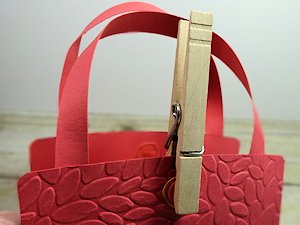
Step 4
The handles go on now. Whip them in your fingers to give them a curve. Apply glue about 1/2” up on each end and adhere them to the purse. Use a clothespin to secure them until completely dry.
-
Step 5
Apply foam tape to the backside bottom of the overlay pieces, and glue to the sides and top.
-
NOTE:
The foam is optional but gives the side pieces a little more dimension and lift.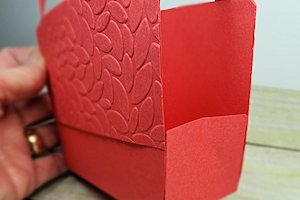
-
Step 6
Fold on all the score lines with a bone folder.
-
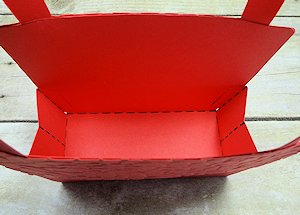
Put glue on the tabs and fold each side in, lining them up with the outside edge of the purse.
-
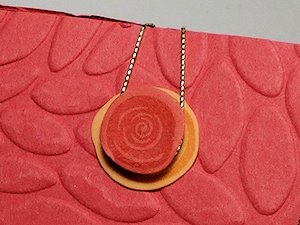
Step 7
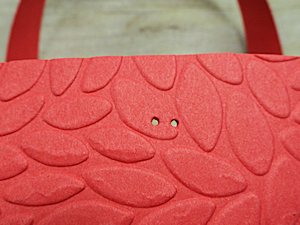
To create the closure for the purse, you need two buttons, a medium one with 2 holes and a tiny one with 4 holes. Hold the 2 hole button up to the center/top backside of the purse and use your paper piercing tool to create 2 holes through the button holes. Remove the button and make the holes a little bigger if needed.
-
Step 8
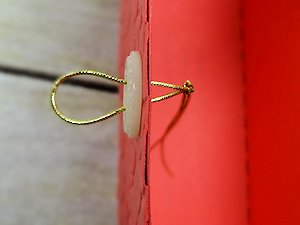
Thread 6” of gold elastic cord through the button and through the holes in the purse ending up on the inside. Back some of the cord out to create the loop and tie the rest in a knot tight against the inside of the purse.
-
Step 9
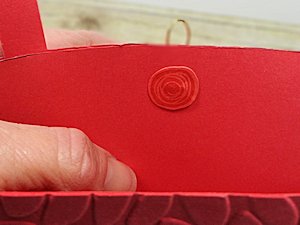
Trim and cover the knot with a die cut shape, attaching it with glue. Adhere the button with glue or glue dots, being careful to not glue the cord. Pinch those two with a clothespin and let them dry.
-
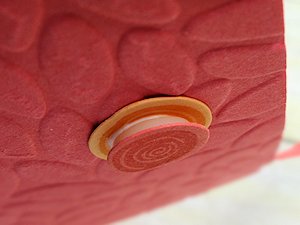
Step 10
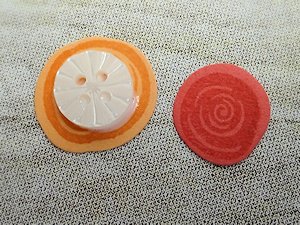
The closure on the front of the purse is a large and small stamped die cut shape.
-
Step 11
Layer the larger circle against the purse, adhering the tiny 4-hole button and the small die cut piece on top.
-
Clothespin the pieces together on the purse front until dry.
-
Step 12
Once everything is completely dry, loop the cord from the back to the front, closing the top of the purse and creating a cute shape.
-
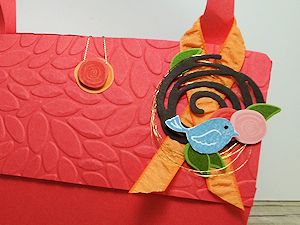
Step 13
Embellish the purse as desired.
-
Step 14
Complete the project. The base of the purse is 2” x 4 3/8”, and the sides are 3 7/8" high.
Video!
Your Turn
You've seen the tutorial, now you try it! We've got a section of the gallery set aside for Petite Purse. Try this technique, then upload your artwork to the gallery. Show us your creations!
***Please note - Internet Explorer/Edge is not a supported browser, and will not allow you to see the videos. Please use Chrome, Firefox or Safari to view our tutorial videos.

Questions and Comments
We'd love to get your feedback or questions. Leave your comment below.
Maggie
Page 1 of 1 pages