Pencil Shaded Watercolor
by Debby Hughes
Add more dimension to a watercolored image by deepening shadows with colored pencil.
Supplies
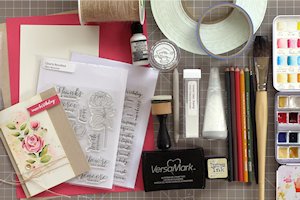
- Outline stamp (Clearly Besotted Merci Beaucoup used here)
- Embossing ink (Versamark used here)
- White embossing powder
- Heat tool
- Watercolor paper (Arches hot pressed watercolor card used here
- Painter's tape
- Watercolor medium (various tube watercolors used here, including Daniel Smith Quinacridone Coral and Quinacridone Gold, Schmincke Olive Green Yellowish and Naples Yellow Reddish)
- Paint brushes (#1 round and #24 flat brushes used here)
- Colored pencils (Prismacolor Raspberry, Black Raspberry, Kelp green, 90% Cool Grey, and Goldenrod used here)
- Blending solvent, such as odorless mineral spirits, baby oil, etc.
- Paper stumps or other blending tool
- Other supplies as needed to complete the project (used here: Clearly Besotted Message Me clear stamp set, Foam Tape (3M), Twine (May Arts), embellishments (Little Things From Lucy’s Cards, Champagne Sequin Mix, pink rhinestones – unknown source), Mini MISTI, Adhesive (Ranger Multi Medium Matte), Ink Blender (Ranger mini ink blender), Bone Folder & Stylus, Cardstock (Neenah Desert Storm, Bazzill Lollipop, Antique Linen Distress Ink))
Step-by-Step
-
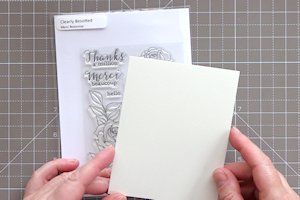
Step 1
Prepare watercolor paper by cutting it to the desired size.
-
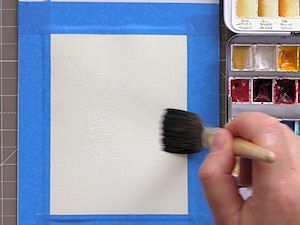
Step 2
Stamp an outline image in embossing ink.
TIP:
Before stamping, treat the card with an antistatic powder tool to prevent stray embossing powder.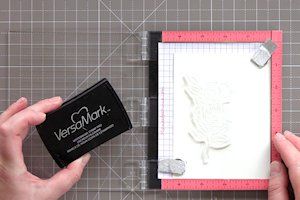
-
Heat emboss with white embossing powder.

-
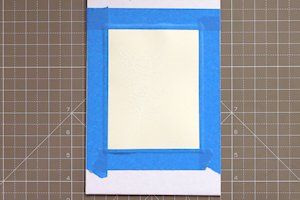
Step 3
Tape the watercolor card to a board or to your work surface using painter's tape.
-
Begin with a clear wash of water to dampen the paper in and around the outline of the image. This gives a good base for watercoloring. Use a wide brush for broad, horizontal strokes.
-
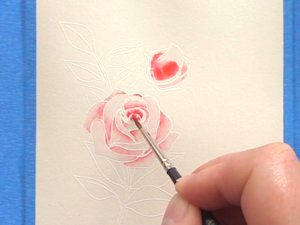
Step 4
Add color to the darkest areas of the image with a smaller round brush, allowing the water on the paper to move the color into lighter areas. Add more water as needed to assist color flow.
-
Step 5
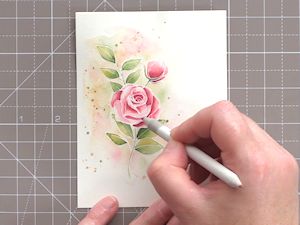
Deepen shading with darker colors after the base colors are complete. This will add dimension and make the flower look more realistic.

-
Step 6
Ground the image by adding a background of color around it. Blend out the color with lots of water. Add in colors used in the image for more depth.
Let the panel dry completely, and remove the tape.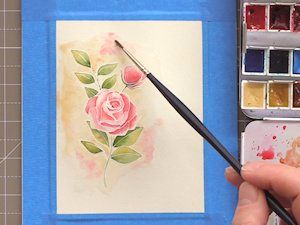
-
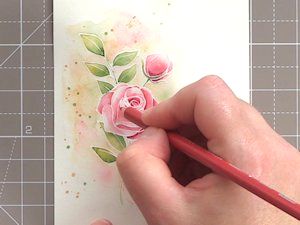
Step 7
Use colored pencil to add more details and shadows. This preserves the layers of watercolor while adding depth to the image.
-
Step 8
Blend out the color using a paper stump dipped in odourless mineral spirits or another solvent. (For instructions on pencil blending with solvents, see our tutorial HERE.)
-
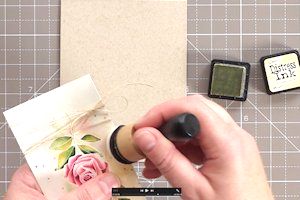
Step 9
Add the painted panel to a card or other project.
-
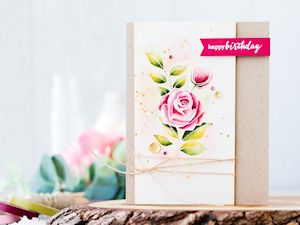
Step 10
Complete the project.
Video!
Your Turn
You've seen the tutorial, now you try it! We've got a section of the gallery set aside for Pencil Shaded Watercolor. Try this technique, then upload your artwork to the gallery. Show us your creations!
***Please note - Internet Explorer/Edge is not a supported browser, and will not allow you to see the videos. Please use Chrome, Firefox or Safari to view our tutorial videos.

Questions and Comments
We'd love to get your feedback or questions. Leave your comment below.
I often use color pencils with Copics, but never thought about using them with my watercolors. Now I am just itching to try this!
Page 1 of 2 pages 1 2 >