Pearl Ex™- Pearly Window
by Beate Johns
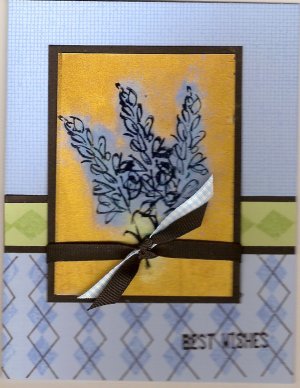
Stamp acetate, run it through a Xyron™ then add Pearl Ex™ for a pretty focal point
Supplies
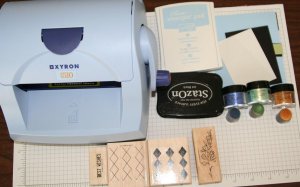
- Pearl Ex™
- Xyron™ Machine with adhesive cartridge (or spray adhesive)
- Pearl Ex™ (here True blue, Aztec Gold and Duo Yellow/Green)
- Sponge dauber, Q-tips™ or stipple brushes to apply Pearl Ex™
- Acetate
- Piece of neutral cardstock the size of your acetate
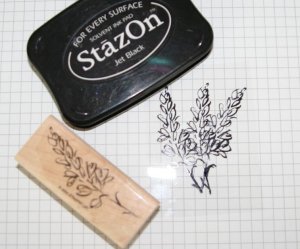
- Black Stazon™
Step-by-Step
-
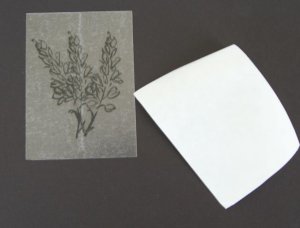
Step 1
Stamp image(s) on acetate with Stazon™.
-
Step 2
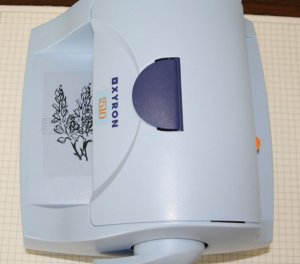
Let image dry. Run it through the Xyron™ machine with the stamped image facing up.
-

-
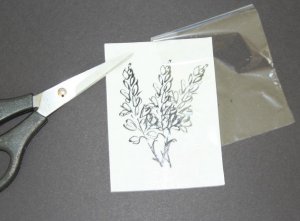
Step 3
Trim to acetate size, then peel off the plastic sheet from the top of the image.
-
Step 4
Flip sheet of acetate over and peel off the other plastic sheet carefully. Try to touch the adhesive side as little as possible.
-
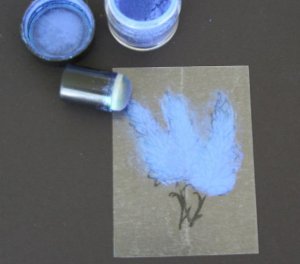
Step 5
Start applying Pearl Ex™ to the image. You can either apply it all over in a random fashion or try to color the image with different Pearl Ex colors.
-
-
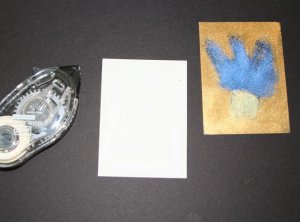
Step 6
Take the neutral cardstock and add tape or run it through the Xyron™ machine.
-
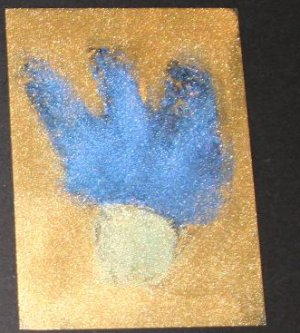
Step 7
Adhere the Pearl Ex™ covered acetate to the neutral cardstock. The Pearl Ex7trade; will be facing the neutral cardstock.

-
Step 8
Finish your project.
Variations
Glitter or gold
Instead of Pearl Ex™, try adding glitter or gold leafing to the sticky side of the acetate.
Your Turn
You've seen the tutorial, now you try it! We've got a section of the gallery set aside for Pearl Ex™- Pearly Window. Try this technique, then upload your artwork to the gallery. Show us your creations!
***Please note - Internet Explorer/Edge is not a supported browser, and will not allow you to see the videos. Please use Chrome, Firefox or Safari to view our tutorial videos.
Questions and Comments
We'd love to get your feedback or questions. Leave your comment below.