Pastel Stencil Press
by Dina Kowal
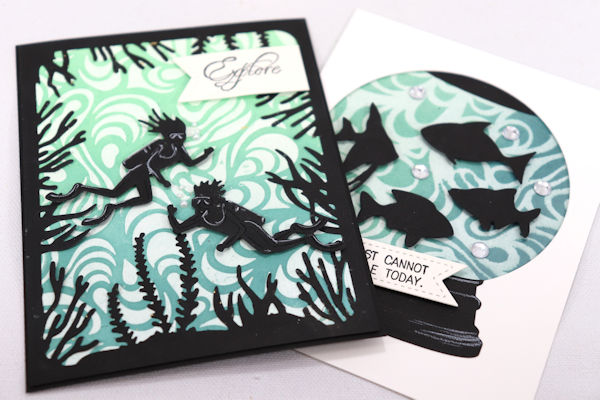
Create two backgrounds using a stencil and pastels.
Supplies
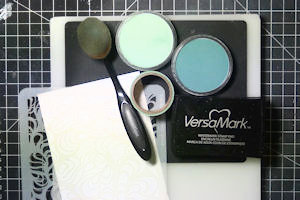
- Smooth cardstock or watercolor paper - 2 panels
- Stencil (A Colorful Life Designs 019157 Psychedelic Swirls used here)
- Versamark ink
- Die cutting machine
- Silicone or rubber embossing pad
- PanPastels or other chalk/pastel media
- Soft makeup brush or other applicator
- Washi tape
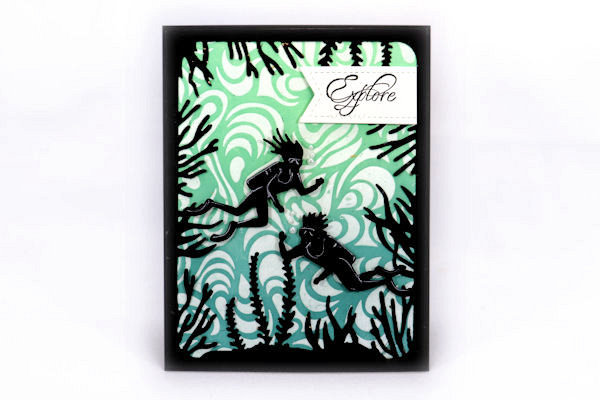
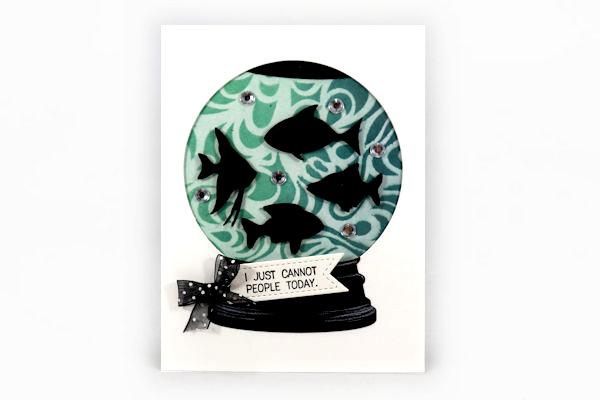
- Other supplies as needed to complete the project (Impression Obsession DIE694 Sea Life Frame, DIE684 Scuba Divers, DIE797 Crazy Stitched Set, DIE798 Stitched Tag, DIE122 Snow Globe, A13010 Explore cling stamp, CL827 Introverting clear set, black swiss dot ribbon)
Step-by-Step
-
Step 1
Secure a cardstock panel to the back of a stencil with washi tape.
-
Step 2
Press a Versamark or other embossing pad through the stencil, coating the stencil with ink as well as inking the design onto the cardstock.
Set the inked cardstock aside. -
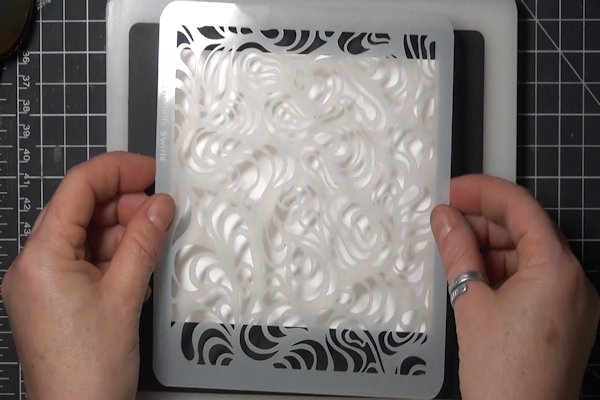
Step 3
Prepare a sandwich for your die cutting machine, laying down a rubber/silicon embossing mat, a new piece of plain cardstock, and the stencil with the inked side down. Lay a cutting plate over the top and adjust with shims as needed for your die cutting machine.
-
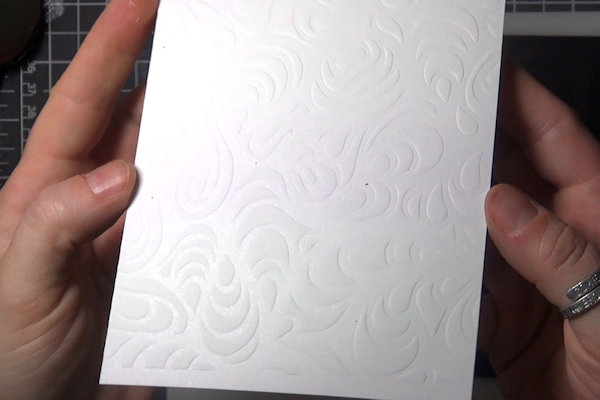
The stencil will create an imprint into the cardstock as well as transferring the embossing ink.
-
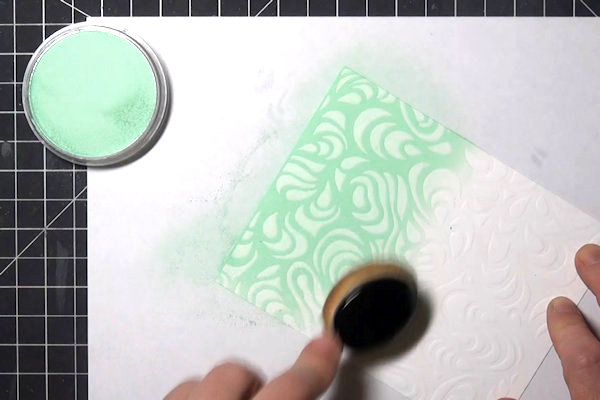
Step 4
Use a soft brush or other applicator to apply PanPastel or another dry chalk/pastel medium to the panel. The medium will stick to the embossing ink.
-
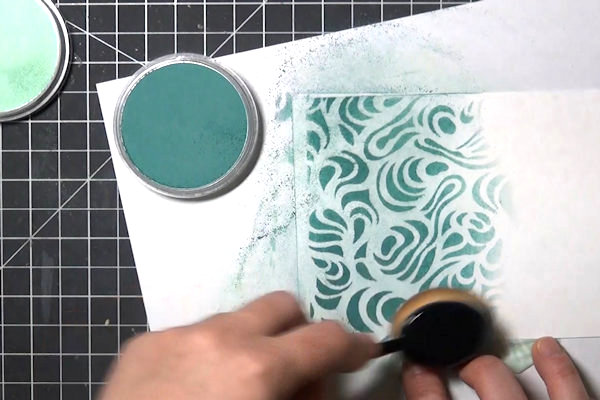
Step 5
Use a soft brush or other applicator to apply PanPastel or another dry chalk/pastel medium to the inked panel from Step 2.
-
Step 6
Use the two backgrounds to complete cards or other projects.
-


Video!
Your Turn
You've seen the tutorial, now you try it! We've got a section of the gallery set aside for Pastel Stencil Press. Try this technique, then upload your artwork to the gallery. Show us your creations!
***Please note - Internet Explorer/Edge is not a supported browser, and will not allow you to see the videos. Please use Chrome, Firefox or Safari to view our tutorial videos.

Questions and Comments
We'd love to get your feedback or questions. Leave your comment below.
Page 1 of 1 pages