Pastel Embossing
by Amy Rysavy
Combine two easy techniques for a pretty look.
Supplies
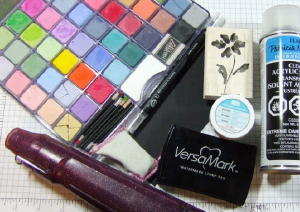
- Black or dark colored cardstock
- Solid image stamp(s)
- Embossing Buddy™
- VersaMark™
- White embossing powder
- Heat tool
- Blender pen
- Pastels
- Scratch paper
- Matte finish clear acrylic sealer
Step-by-Step
-
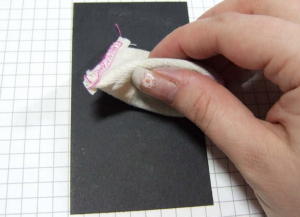
Step 1
Rub an Embossing Buddy™ all over the cardstock to remove any static or fingerprints.
-
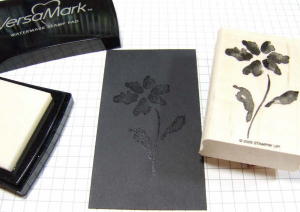
Step 2
Ink stamp in VersaMark™ and stamp onto the cardstock.
-
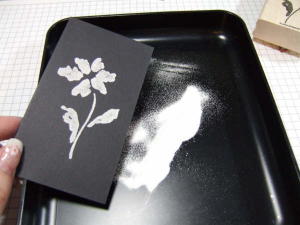
Step 3
Pour white embossing powder over the stamped image and tap off excess.
-
Step 4
Heat the image with a heat tool until fully melted.
Take care to keep the tool moving to avoid burning the cardstock.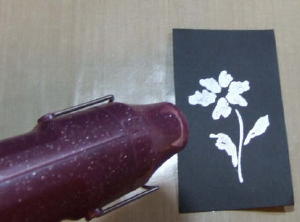
-
Step 5
Once the image has cooled, use a blender pen to pick up the desired pastel colors. Apply directly to the embossed image.
It’s best to start with the lightest color and work to the darkest. It’s easy to add more color and depth this way.
Note: Try to avoid applying pastels to the cardstock that's not embossed. If you do, use an eraser to remove any “mistakes”.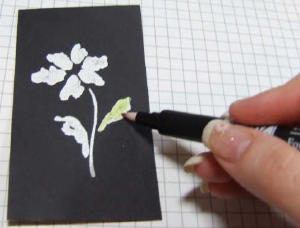
-
Step 6
Continue adding colors (scribble on scratch paper between colors to remove the previous color from the blender pen) until you reach your desired look.
Before proceeding, make sure there are no flecks of pastel or smudges on the cardstock.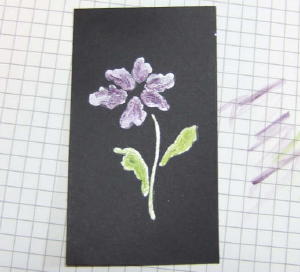
-
Step 7
Working in a well-ventilated area or outside, place the cardstock on scratch paper (brown packing paper, a cardboard box or large paper bag would also work), and lightly spray with matte finish clear acrylic sealer.
Two light coats will give better results than one thick coat. Let the cardstock dry a few minutes before handling.
-
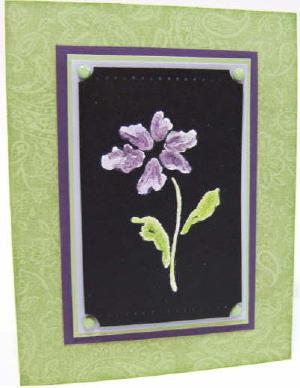
Step 8
Finish your card.
Your Turn
You've seen the tutorial, now you try it! We've got a section of the gallery set aside for Pastel Embossing. Try this technique, then upload your artwork to the gallery. Show us your creations!
***Please note - Internet Explorer/Edge is not a supported browser, and will not allow you to see the videos. Please use Chrome, Firefox or Safari to view our tutorial videos.

Questions and Comments
We'd love to get your feedback or questions. Leave your comment below.
It sounds like you used clear embossing powder. You will need WHITE embossing powder for this technique.
Hugs and smiles
Yes, we are talking about chalk. Stampin' Up! calls them Stampin' Pastels.
Hugs and smiles
Page 1 of 1 pages