Party Favor
by Andrea Walford
Try swapping the holiday paper for heart-, flower-, or birthday candle-printed paper, and you've got a party favor for any occasion!
Supplies
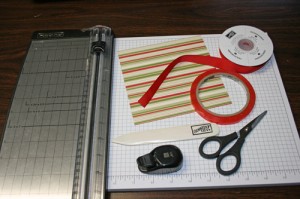
- Paper trimmer with scoring blade
- 6" x 6" sheet Patterned paper
- Two 8" pieces of ribbon
- Bone Folder
- 1/4" Square Punch
- Sticky Strip
- Fine Tip Scissors
Step-by-Step
-
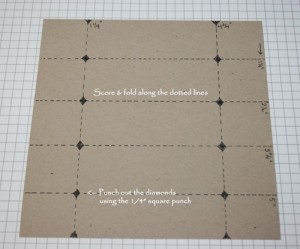
Step 1
This picture will show where to score and fold, and where to punch.
-
Step 2
Align paper with top of the paper cutter and score at 1 1/4", 2 1/2". 3 3/4" and 5". Rotate paper 90 degrees, then score at 1 1/4" and 4 3/4".
-
Step 3
Using a bone folder to fold along all the score lines.
-
Step 4
Starting at the edge of the paper, align the corner of the 1/4" square punch so the crease is centered in the punch opening.
Adjust the edges of your paper so that only EXACTLY HALF of the square will be punched out to create a triangle shaped notch.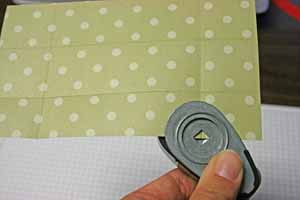
-
Step 5
Fold paper at the first score line, then realign punch as described in step 4, and punch.
When the paper is unfolded, there will be a diamond-shaped hole.
-
Step 6
Fold your paper at the next score line and repeat step 5.
Note: To prevent punch malfunction, don't punch through more than 2 layers of paper.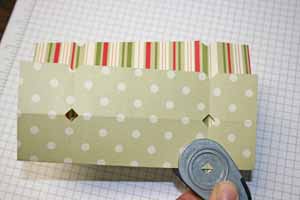
-
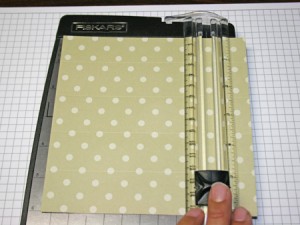
Step 7
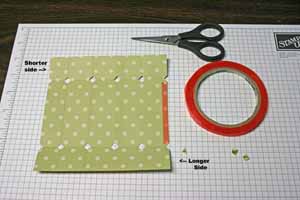
Once all "triangles" and "diamonds" are cut, apply Sticky Strip on the wrong side of the paper, along the outside edge of the wider end.
-
Step 8
Remove the red liner. Overlap and adhere the ends together so that a rectangular box shape is created.
-
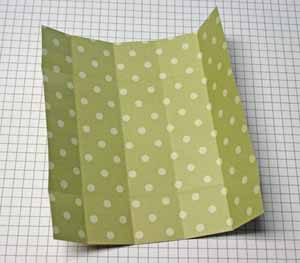
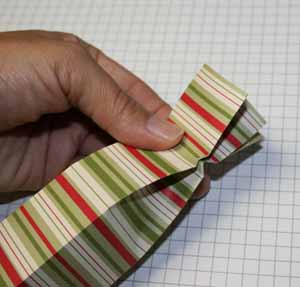
Step 9
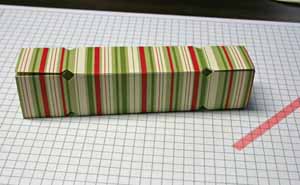
Pinch each end as shown and tie the ribbon around it in a knot. Trim the ends of the ribbon.
-
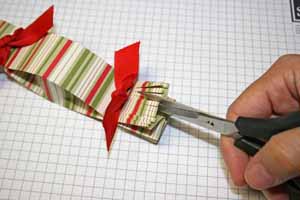
Step 10
Using a fine-tipped pair of scissors, cut the ends on each side into a fringe.
-
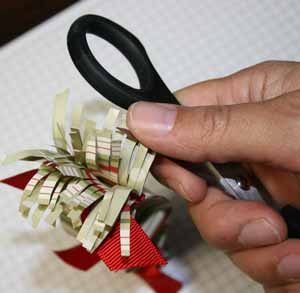
Step 11
In the same way that you curl gift-wrapping ribbon, use your scissor blade to gently curl the strips of paper.
Video!
Variations
-
Try different sizes.
Make it round
Start with a 6" x 12" piece of patterned paper. Lay it long side down on a cutting mat. Cut 2" horizontal slits about 2" away from the short end, 1/2" apart from top to bottom of the paper with a craft knife.
Tape a 4 1/2" x 6" piece of patterned paper over the center of the cut paper. Roll up, and tape together. Push cut sections together and tie shut.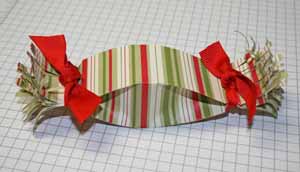
Your Turn
You've seen the tutorial, now you try it! We've got a section of the gallery set aside for Party Favor. Try this technique, then upload your artwork to the gallery. Show us your creations!
***Please note - Internet Explorer/Edge is not a supported browser, and will not allow you to see the videos. Please use Chrome, Firefox or Safari to view our tutorial videos.

Questions and Comments
We'd love to get your feedback or questions. Leave your comment below.
I Love This Site!!
Thanks for the wonderful tutorial ~ I'll be making lots of these ... they are perfect for all kinds of little goodies and treats!!
Hint: A star punch will make a good little notch in the sides it you don't have a square punch.
Bonnie
Page 1 of 2 pages 1 2 >