Parchment Craft
by Ellen Hutson
Re-create a delicate fifteenth-century paper craft with these beginner tips and techniques.
Supplies
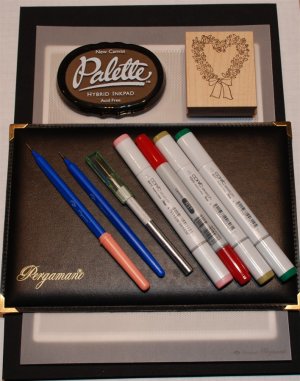
- Embossing and Perforating Pad (This spongy pad gives support for perforating and embossing. The depth is thick enough so that the needle tip does not go all the way through the pad, thus protecting your work surface.)
- Embossing Pad (This pad allows you to dry emboss, giving you the right amount of support so as to not punch through the parchment and yet allows the parchment to be embossed. Substitute with a dark color cardstock atop a stack of newsprint or use a mouse pad to give this a try.)
- Pergamano® Perforating Grid, Diagonal (or Paper Piercing Guide)
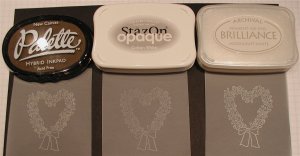
- White Ink (Use Palette, StazOn, or Brilliance for best results)
- Parchment Paper (May substitute vellum cardstock)
- Detailed stamps with some open space
- Note Card
- Decorative Paper
- Pergamano Embossing Tools Extra Small Ball, Fine Stylus or Fine-tipped Embossing Stylus
- Pergamano Perforating Pen, 1-Needle (The diameter on this pen is quite a bit smaller then a regular piercing tool, but to give this a try, use a piercing tool.)
- Piercing Tool
- Copic Markers (Other options are Prismacolor Pencils and Gamsol, chalks, Dye Ink and Blender Pen)
- 1/8” Red Liner Tape
- Sugar Dust (very fine micro beads)
Step-by-Step
-
Step 1
Stamp image using white ink on parchment paper. Palette New Canvas was used here. Experiment to find out what ink works best.
-
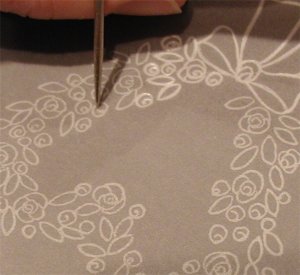
Step 2
Turn the stamped image over and work on the back side. If you do not have an embossing pad, work on dark colored cardstock with newsprint underneath. The dark color contrast will make it so much easier to “see” the design outline.
Using a fine-tipped embossing stylus, trace the outline of the image.
-
For extremely fine detail, use the tip of a piercing tool, but be extremely careful not to perforate the parchment paper
-
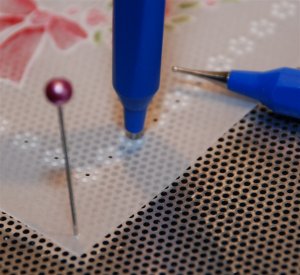
Step 3
Place the diagonal perforating grid atop the embossing and perforating pad. Attach parchment paper on top of the grid. In the corners of the paper use stick pins to hold the project in place.
Use a 1-needle perforating pen to create the pattern. This particular pattern was created by using every other hole in the grid, then skipping a row, moving over one and repeating. Skip a row, move over one and repeat.
Tip: If you don't have a perforating grid, try the paper piercing template.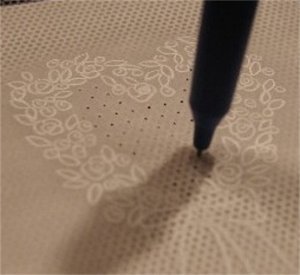
-
Step 4
Remove from grid. Continuing to work on the "back side" of the image, color details to enhance the beauty of the project.
Tip: The alcohol content of COPIC markers makes working on parchment and vellum quick, clean and easy! Begin with a lighter color, then add the darker color. Come back in again with the lighter color to blend.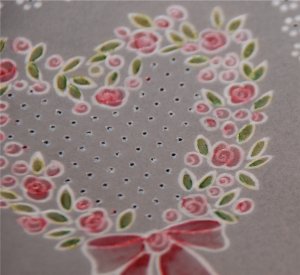
-
Close-up view of finished front.
-
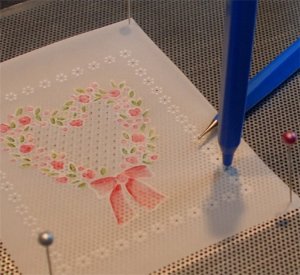
Step 5
Once again attach project to grid as shown. Continue to work on the “back side” of the image.
-
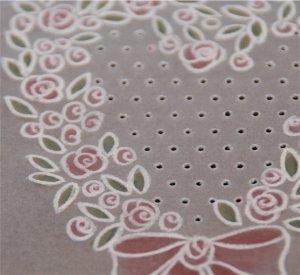
Step 6
The flower detail is created easily when using the grid. Gently press the tip of the ball-point embossing tool into each hole creating the “flower” shape as shown. Pierce the center of each “flower” with the 1-needle perforating pen.
-
Step 7
Cut a window in card front to accommodate the parchment project. Adhere project behind window.
Cut a second window slightly smaller then the first from coordinating patterned paper and adhere behind parchment project.
Tip: To create a beaded frame, cut and adhere 1/8” red liner tape around card front window. Apply sugar dust to tape surface and tap off excess.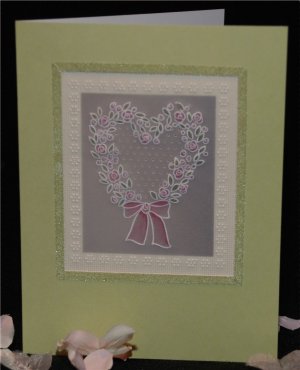
Variations
This is just the tip of the iceberg with what can be done using these techniques. There are edge details and numerous other embossing and perforating techniques, but I wanted to start out keeping it basic and allowing you to try and utilize some of the tools you may already own. I can tell you that the proper tools do make a difference, but we all need to start someplace and I hope that you give this a try. The sheer elegance and beauty of this ancient craft brought into a modern age is breathtaking. Thank you for allowing me to share this art form with you.
Your Turn
You've seen the tutorial, now you try it! We've got a section of the gallery set aside for Parchment Craft. Try this technique, then upload your artwork to the gallery. Show us your creations!
***Please note - Internet Explorer/Edge is not a supported browser, and will not allow you to see the videos. Please use Chrome, Firefox or Safari to view our tutorial videos.

Questions and Comments
We'd love to get your feedback or questions. Leave your comment below.
Cant wait to get started.
Just what I need on a rainy windy Monday morning
And where do you get the grids?
Angela
Please put me on your news letter list etc.
Thank
Page 1 of 1 pages