Paper Doll
by Lydia Fiedler
Create a doll out of folded paper for a bookmark or embellishment.
Supplies

- Origami paper - 5 1/8" x 1 1/2"
- Origami paper - 6 1/4" x 5/8"
- Origami paper - 1 3/8" x 5/8"
- Cardstock for face (Blushing Bride used here)
- Black crepe paper, for hair
- Strong adhesive (Sticky Strip™ used here)
- Scoring tool, (Scor-Buddy™ used here)
- Scissors
- 1/2" circle punch
- Bobby pin
- Embroidery thread or thin cord
- Wire cutters
- Bone folder
Step-by-Step
-
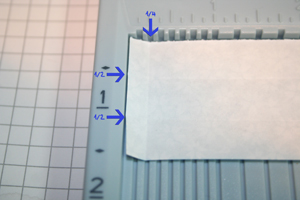
Step 1
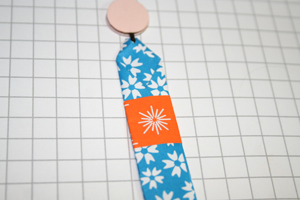
Score the 5 1/8" x 1 1/2" piece of origami paper at 1/2" on each of the long sides, and at 1/4" on one of the short sides with a Scor-Buddy or other scoring tool.
-
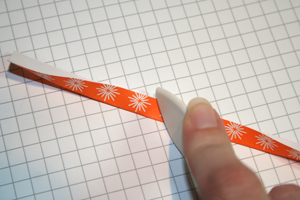
Step 2
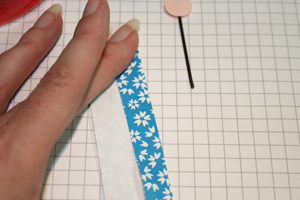
Fold the 6 1/4" piece of origami paper in half longways, creasing with a bone folder.
-
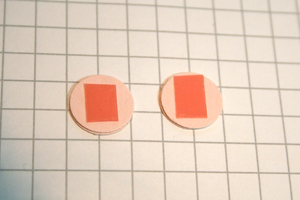
Step 3
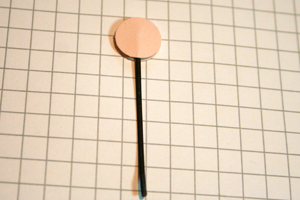
Punch 4 circles out of cardstock with a 1/2" circle punch. Adhere two circles together with your normal adhesive, and do the same with the remaining two. Put a small piece of Sticky Strip on each of these thick circles.
-
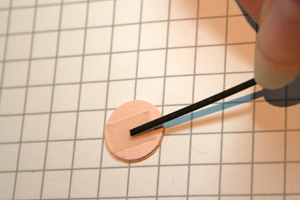
Step 4
Cut the bobby pin in half with wire cutters, keeping the flat side, and snip off the rounded end of this piece, so that your remaining piece is perfectly flat. Remove the backing of the Sticky Strip and adhere the metal stick to one of the stacked circles.
-
Step 5
Adhere your remaining circle stack on top, sandwiching the bobby pin in between.
-
Step 6
Crease along the score lines of your large piece of origami paper.
-
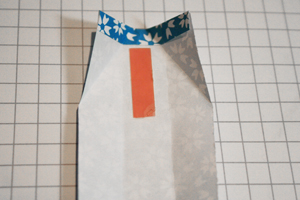
Step 7
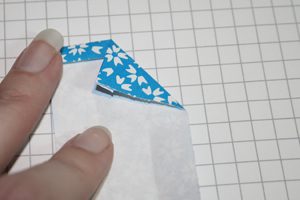
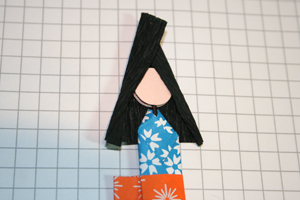
Fold the paper down at the top 1/4" score line, and then fold the top right corner down at an angle, leaving space in the center for the doll's neck to go in.
-
Step 8
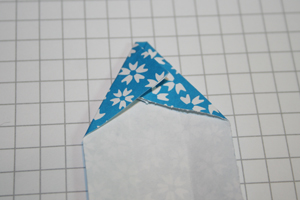
Fold the left corner over the right. Don't worry if they are not completely symmetrical.
-
Step 9
Place a small piece of Sticky Strip down the center of the robe.
-
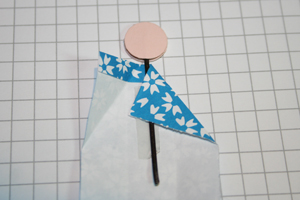
Step 10
Securing the doll's head and neck to the robe on the Sticky Strip, fold down the right corner until it sticks to the adhesive.
-
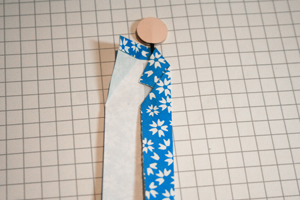
Step 11
Fold the right side of the robe along the score line on the right side.
-
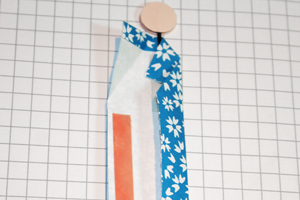
Step 12
Place a piece of Sticky Strip on the left side of the robe below the scored corner fold, then fold the corner down, and fold the left side of the robe closed over the right.
-
Step 13
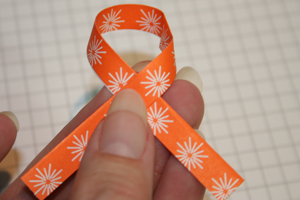
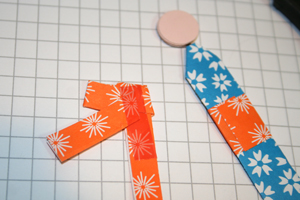
Tie a knot in the folded strip of origami paper, in the center of the strip. It's easiest if you start by holding the paper in a ribbon shape. Work with the knot as you tie it to make sure it stays as close to the center of the strip as possible.
-
Step 14
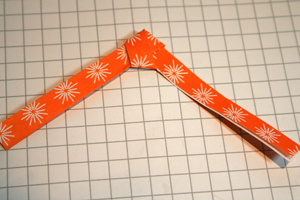
When the knot is complete, it should form an angle, as shown.
-
Step 15
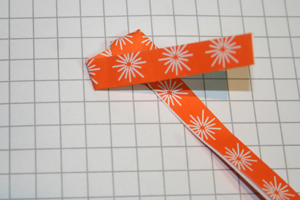
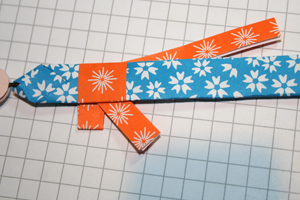
Take the left side of the sash and fold it back towards the right side as shown. It should be angled down slightly from the knot.
-
Step 16
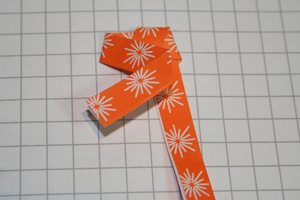
Fold the end back out to the left side, at about a 45 degree angle from the first fold.
-
Step 17
Wrap the 1 3/8" x 5/8" piece of origami paper around the doll, using your regular adhesive.
-
Step 18
With the folded side shown in Step 16 face up, apply Sticky Strip to the folded sash.
-
Adhere the sash to the back of the doll so that from the front, it looks like this.
-
Step 19
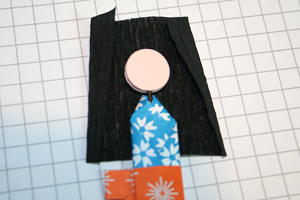
Put a small amount of your normal adhesive on the back of the doll's head. Place a 2" piece of black crepe paper behind the doll's head, and fold in the ends of each side at an angle.
-
Step 20
Continue rolling the ends in until the crepe paper is snug around her head, and the bottom of her hair is in a shape that you like.
-
Step 21
Place a small amount of your regular adhesive on the top of her face, and adhere a narrower strip of crepe paper to the doll's face for bangs.
Note - do not apply an inline adhesive directly to the crepe paper - it will tear.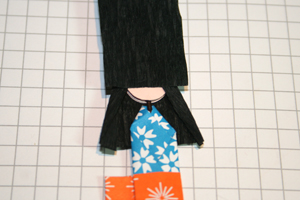
-
Step 22
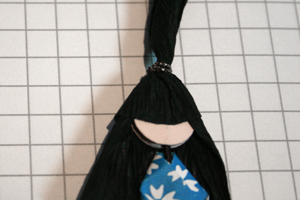
Holding the crepe paper around her face, twist the top part tightly into a top knot, keeping the twist close to the top of her head.

-
Step 23
Tie a piece of thread or thin cord around the top knot just above her head, and trim the ends.
-
Step 24
Trim off the excess, so that her top knot ends just above the cord.

-
Step 25
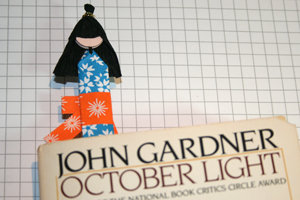
The paper doll is complete, and is flat enough to make a cute bookmark.
-
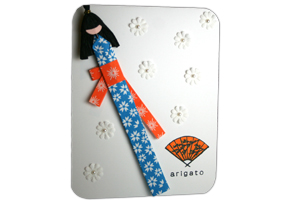
This is how the doll would look as an embellishment on a card.
Video!
Your Turn
You've seen the tutorial, now you try it! We've got a section of the gallery set aside for Paper Doll. Try this technique, then upload your artwork to the gallery. Show us your creations!
***Please note - Internet Explorer/Edge is not a supported browser, and will not allow you to see the videos. Please use Chrome, Firefox or Safari to view our tutorial videos.

Questions and Comments
We'd love to get your feedback or questions. Leave your comment below.
Cute doll & great instructions.
Thank you so much!!!
My only comments are concerning her "sash" which is actually called an Obi. The Kimono is always folded left over right. The reverse of Western culture. Right over left is only done for funerals.
Wanted you to know I posted a link to this tutorial/video today on my blog, PaperFriendly.
Nancy Ward
PaperFriendly
http://www.nancywardcrafts.com
Page 1 of 1 pages