Paper Cone
by Beate Johns
Create a paper cone to hold treats or small gifts, with just cardstock and patterned paper.
Supplies
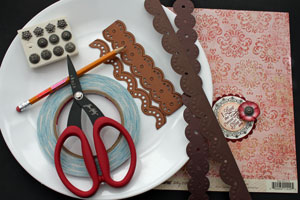
- One sheet of patterned paper
- Plate, pencil and scissors, or circular cutting tool
- Scor-Tape™, or other strong adhesive
- Glue Dots
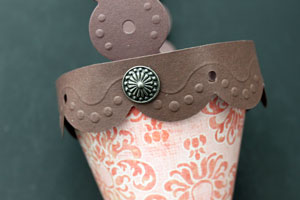
- Two 11" long strips of cardstock, with either a punched or a die cut edge (Big Scalloped Borderabilities™ Petite used here)
- Paper trimmer
- Embellishments
Step-by-Step
-
Step 1
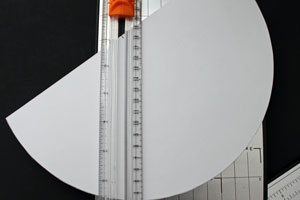
Place your patterned paper face down, and trace a half circle onto it with the help of a plate or other circular template.
Variation:
Use a circle cutter combine step one and two.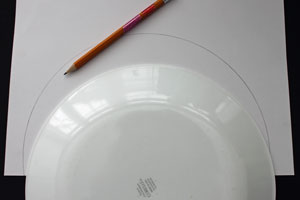
-
Step 2
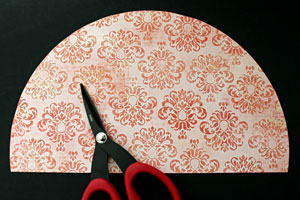
Cut out your half circle.
-
Step 3
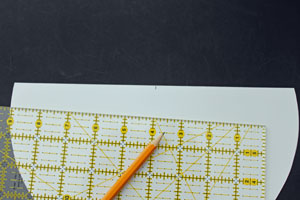
Mark the center of the straight edge on the back of the patterned paper .
-
Step 4
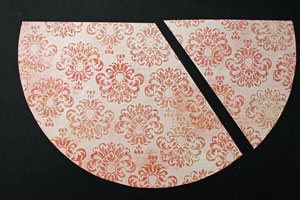
Place your paper in your paper trimmer. Center the mark you made over your cutting groove. Line up the paper so you will cut off about 1/4th of your semi circle.
-
-
Step 5
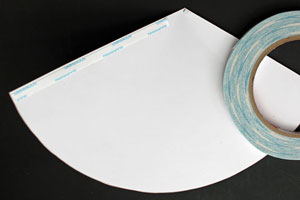
Apply Scor-Tape to one of the straight edges on the back of your patterned paper.
-
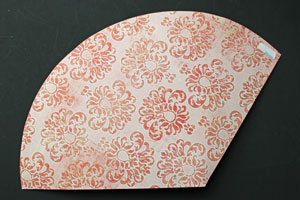
Flip paper over and add a small piece of Scor-Tape to the top of the patterned side of your paper cone.
-
Step 6
Remove the backing of your adhesive tape, and roll your paper into a cone, beginning with the patterned side with the adhesive.
Hint:
Before rolling your cone, soften your paper by rubbing it over the edge of your desk a few times. This will break the fibers in the paper and will make it easier to roll.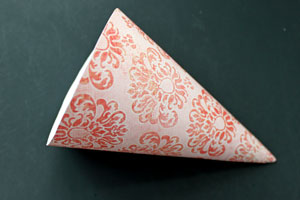
-
Step 7
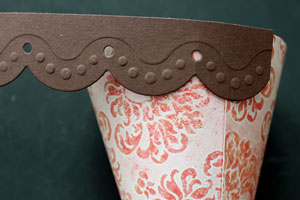
On one of your 11" cardstock strips add a strong adhesive tape to each end, and also add glue dots across the top of the strip, at even intervals.

-
Step 8
Line up one end of your paper strip near the seam of your paper cone and begin wrapping it around the top edge.
-
Continue to wrap the border around the top of your cone.
Hint:
Because of the shape of the cone, the bottom part of the border will not lay flat against the cone.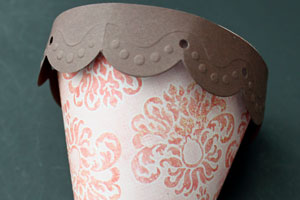
-
Step 9
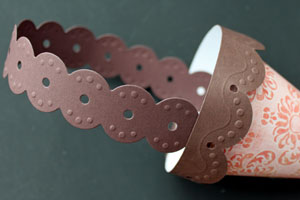
Take your other 11" long strip and add Scor-Tape; to each end.

-
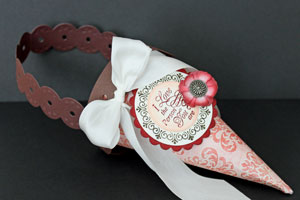
Adhere each end to the inside of your cone to create handles.
-
Step 10
Add brads through the handles to reinforce them.
-
Step 11
Embellish your cone - JustRite™ stamps and satin ribbon and flowers were used in the sample.
Video!
Variations
-
Close it up
Tape a strip of tissue paper on the top of the inside of your cone. Add goodies and tie the tissue paper strip shut.
Party Hat
Create a bigger cone and turn it upside down. Add an elastic band to the hat instead of a paper handle.
Doll body
Turn your cone upside down and add a head made with a styrofoam ball or a die cut.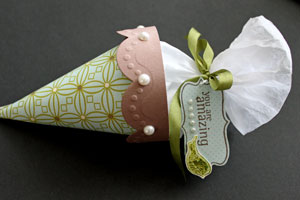
Your Turn
You've seen the tutorial, now you try it! We've got a section of the gallery set aside for Paper Cone. Try this technique, then upload your artwork to the gallery. Show us your creations!
***Please note - Internet Explorer/Edge is not a supported browser, and will not allow you to see the videos. Please use Chrome, Firefox or Safari to view our tutorial videos.
 *
*
Questions and Comments
We'd love to get your feedback or questions. Leave your comment below.
I just want to say thank you for inspiring me with the most beautiful and amazing projects here.
Thanks.
Toddle!
Zara
Bereta
Page 1 of 1 pages