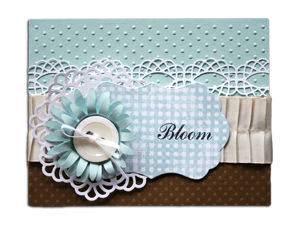
Paper Buttons

by Lynn Pratt

Turn regular cardstock into paper buttons.

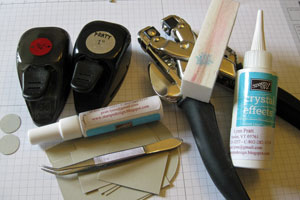
Supplies
  • Cardstock
  • Sanding block
  • Glue pen
  • Crystal Effects™, or other clear drying glaze
  • Crop-A-Dile™
  • 3/4" Circle punch
  • 1" Circle punch
  • Heart punch or other shape punch

Step-by-Step

  1. Step 1

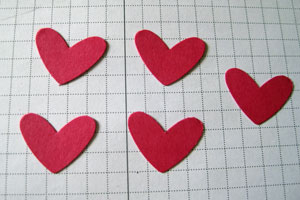
    Punch five of the same shapes out of cardstock.
  2. Step 2

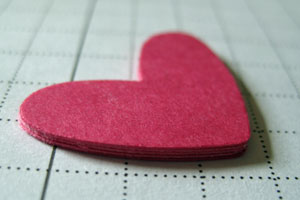
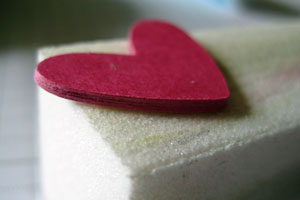
    Using a glue pen, stack them one on top of the other, making sure to line up the edges as close as possible.
  3. Step 3

    With a sanding block, smooth out the edges.
  4. Step 4

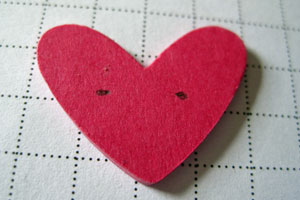
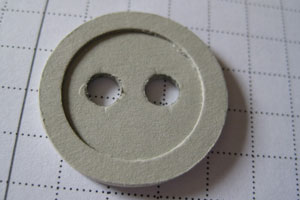
    Using a pencil, mark where you want the holes, then punch them using a Crop-a-dile™ or a hole piercing tool the size you want the holes to be.
  5. Step 5

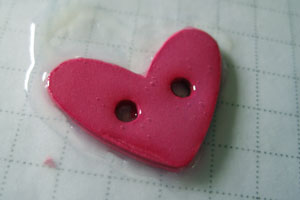
    Cover the top and sides with Crystal Effects™ and put it on wax paper to dry. It should take about 30 minutes.
  6. Step 6

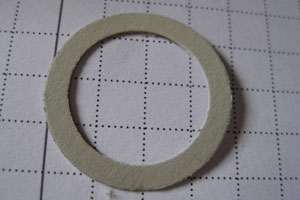
    If you are making circle buttons, make the stack of cardstock out of 1" circles. Then punch out a 3/4" circle and then the 1" circle around this.
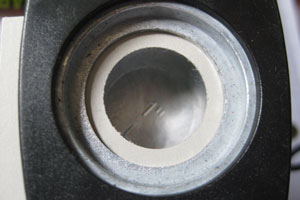
  7. This will give you an outer ring. You will need two of these.
  8. Step 7

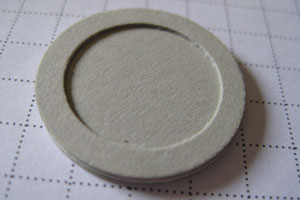
    Stick these on top of the stack to create your button shape.
  9. Step 8

    You have perfect buttons to match any color you are using!

    Tip:
    Experiment with different punches and hole sizes. Add patterned paper to the top of the card stock stack to get different varieties!

  10. Step 8

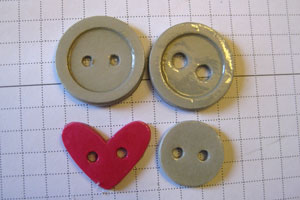
    Punch holes with a Crop-a-dile™ and then use the Crystal Effects™ as shown with the heart button.
  11. Step 9

    Use buttons on your project.

Video!

Your Turn

You've seen the tutorial, now you try it! We've got a section of the gallery set aside for Paper Buttons. Try this technique, then upload your artwork to the gallery. Show us your creations!

***Please note - Internet Explorer/Edge is not a supported browser, and will not allow you to see the videos. Please use Chrome, Firefox or Safari to view our tutorial videos.

Questions and Comments

We'd love to get your feedback or questions. Leave your comment below.

Thanks for an awesome tutorial! I can't count how many times I've hunted for just the right button for a card, only to come up empty-handed. Never thought of making my own. Can't wait to try this technique. TFS!
Doodledop  |  Wed May 11, 2011 at 4:36 AM
Very cool! Looks just like a real button.
juliee28  |  Wed May 11, 2011 at 5:00 AM
This is an awesome idea! thanks so much!
Kathy  |  Wed May 11, 2011 at 5:21 AM
Well I'll be. Looks like the real thing. Thanks for sharing.
LINDA STERLING  |  Wed May 11, 2011 at 5:35 AM
A couple things I'm going to try:
the smallest nestabilities shapes and emboss the edge on the top layer. Also for time, I want to try to use clear embossing powder for shine. I do not have a crop-o-dile, so I will use my tiny punch and line up the holes.
Laura  |  Wed May 11, 2011 at 5:42 AM
That's fabulous! Thanks for sharing it.
Sandra k  |  Wed May 11, 2011 at 5:51 AM
LOVE this idea! can't wait to try it! How nice it will be to have buttons that match my projects! Thanks for sharing! Blessings, Sharon
Sharon Russell  |  Wed May 11, 2011 at 5:53 AM
Sizzix has a sizzlit with several sizes of buttons and a embosslit with several sizes of buttons. I cut out four or five of them and glue them together, pretty much as you did in the tutorial. The Sizzlit already has the holes punched, so you just line them up! Running them through the Xyron machine makes the process faster, too.
Linda Pittman  |  Wed May 11, 2011 at 5:54 AM
How cool is that???
Unbelievably simple yet so effective!
Love it!
I can't wait to make a bunch of different shapes of buttons!
Gerri Kowalski  |  Wed May 11, 2011 at 6:02 AM
Wow this is fab, so real looking, thanks for a great tutorial, hugs Liz xx
liz marsden  |  Wed May 11, 2011 at 6:12 AM
I cannot wait to try this! What a great idea!
Ann Roseberry  |  Wed May 11, 2011 at 6:57 AM
WOW! Thanks for sharing! I've never put buttons on my cards, just never much liked any I saw - colors didn't match right, etc. This is a super-cool idea! I can't wait to try it!
Jen in PA  |  Wed May 11, 2011 at 7:02 AM
WOW, such a great technique! I have never seen this one! They look so real.
Julie Heyer  |  Wed May 11, 2011 at 7:02 AM
This is just the coolest idea ever. I've made some cardstock buttons in the past, but never thought of using the crystal effects on them.
Thank you so much for sharing this neat idea!
Kris  |  Wed May 11, 2011 at 7:15 AM
AWESOME! Can't wait to try this. I am so excited to now have available a technique that allows me to have any punch shape/color button that I desire to use on my projects.
Thanks for sharing!!!
stampdujour  |  Wed May 11, 2011 at 7:29 AM
LOVE THIS!!!
Jade Moore  |  Wed May 11, 2011 at 7:46 AM
Great. This technique will make it so much easier to coordinate the buttons to the color cardstock and allows any shape to be used!!! I totally love it.
Lillian Johnston  |  Wed May 11, 2011 at 7:53 AM
Amazing! How in the world did you think of this?
LTrain  |  Wed May 11, 2011 at 7:56 AM
These are great! Would be so awesome to use coordinating patterned paper as the top layer to your buttons, then they will always be a perfect match!!! Thanks for sharing! Even an avid scrapper like me can learn something new!
Iekika79  |  Wed May 11, 2011 at 8:15 AM
I use Bazzill's round 1" chipboard circles as a base and ink the sides to match my top layer...much easier than cutting out all those layers. It it a fun way to coordinate and make a project look pulled together!
Ronda A.  |  Wed May 11, 2011 at 8:40 AM

Page 1 of 5 pages  1 2 3 >  Last »

You need to be logged in to comment

GET OUR NEWSLETTER


Splitcoaststampers's privacy policy