Ornament Garland
by Dina Kowal
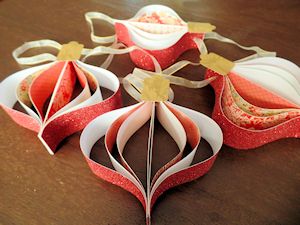
Use paper strips to make an ornament or dreidel garland.
Supplies
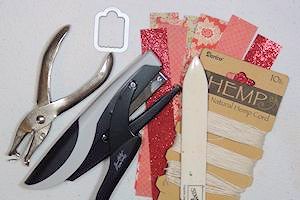
- Cardstock - patterned, solid, or double sided
- Paper trimmer
- Stapler (Tim Holtz Tiny Attacher used here)
- Metallic paper
- 1/8” hole punch
- Twine or ribbon
- Scoring tool
- Hot glue gun or glue dots
- Scalloped tag die or border die/scissors to make similar shape (discontinued Sizzix/Doodlebug tag die used here (set #659100)
Step-by-Step
-
Step 1
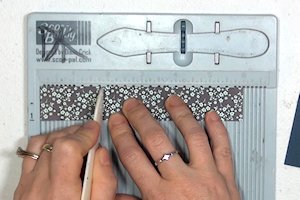
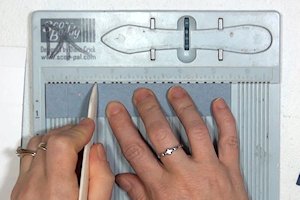
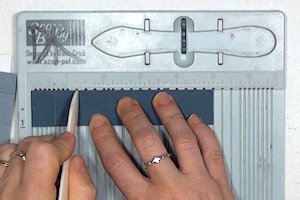
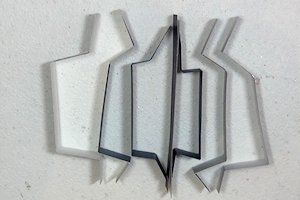
To make an ornament shape, cut cardstock into strips as follows:
2 strips 1” x 6”
2 strips 1” x 5”
2 strips 1” x 4 1/2”
2 strips 1” x 4”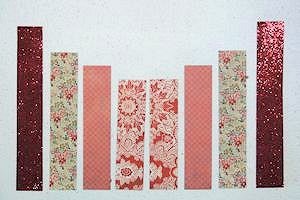
-
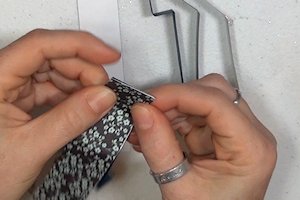
Step 2
Divide the strips into two stacks, longest to shortest, with the longest strips on the bottom. The paper pattern that will show to the outside of the ornament should be facing down.
-
Step 3
Turn the first stack of strips over onto the other stack with the shortest strips to the inside.

-
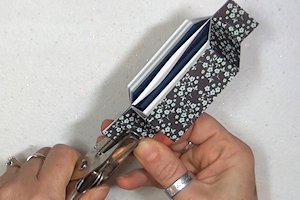
Line up the bottom edges, and staple all the strips together at the bottom.
-
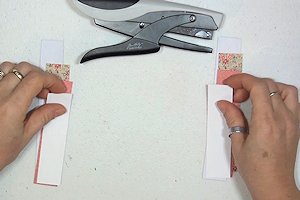
Step 4
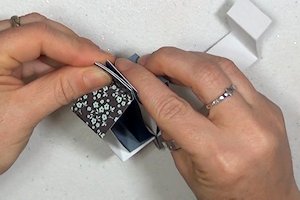
One at a time, carefully align all the tops of the strips together.
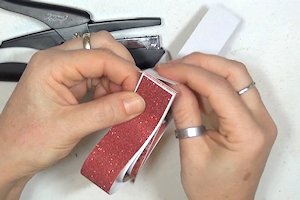
-
Staple the ornament at the top to hold the shape.

-
Step 5
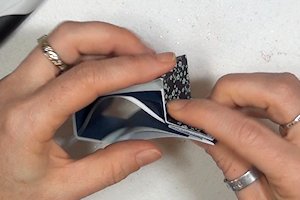
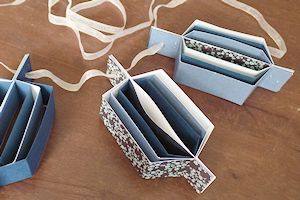
Adjust the layers as needed – they may need a little ‘fluffing’.

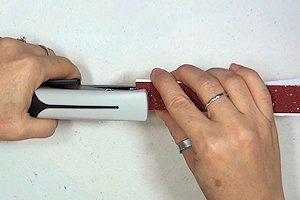
-
Punch a hole at the top of the ornament.
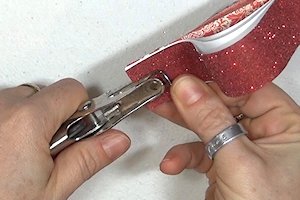
-
Step 6
Adhere a small scallop tag to the front of the ornament, or create a similar shape with dies or decorative scissors.
NOTE:
Be sure you’re adding the tag to the punched end of the ornament.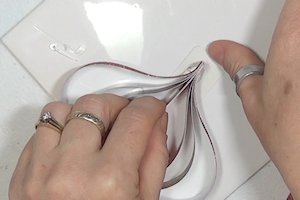
-
Step 7
Repeat the above steps to create enough ornaments for a garland, and string them together with ribbon or twine.
-
Step 8
To make a dreidel shape, cut cardstock into strips as follows:
2 strips 1” x 6”
2 strips 1” x 5 1/2”
2 strips 1” x 5”
2 strips 1” x 4 1/2”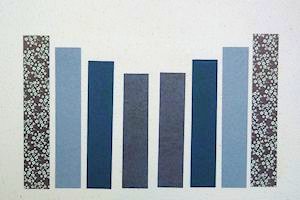
-
Step 9
Score the 6” strips at 5/8”, 1 3/4”, 4”, and 5”.
-
Step 10
Score the 5 1/2" strips at 5/8”, 1 1/2”, 3 3/4", and 4 1/2".
-
Step 11
Score the 5” strips at 5/8”, 1 1/4", 3 1/2”, and 4”.
-
Step 12
Fold the scored pieces as shown. Order them from longest to shortest toward the center. Be sure the pattern of your paper is facing the same way (to the inside or outside) on both sides. The center pieces are not folded.
-
Step 13
Line up one end of the pieces together (be sure to have all the 1” sections at the top and the 5/8” sections at the bottom).
-
Staple all the strips together at the end. Add a second staple if needed to keep the straight section together.

-
Step 14
Carefully align the opposite ends of the strips together.
-
Staple all the strips together at the end. Add a second staple if needed to keep the straight section together.

-
Step 15
Crease well at the first score line to give it a 90 degree angle on both sides.
-
Punch a hole at the top of the dreidel.
-
Step 16
Repeat the above steps to create enough dreidels for a garland, and string them together with ribbon or twine.
Video!
Variations
-
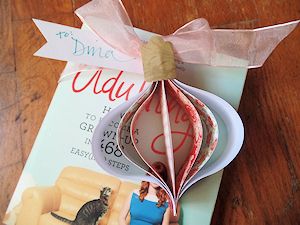
Tie a bow through the punched hole and use a single ornament or dreidel as a gift tag.
Your Turn
You've seen the tutorial, now you try it! We've got a section of the gallery set aside for Ornament Garland. Try this technique, then upload your artwork to the gallery. Show us your creations!
***Please note - Internet Explorer/Edge is not a supported browser, and will not allow you to see the videos. Please use Chrome, Firefox or Safari to view our tutorial videos.

Questions and Comments
We'd love to get your feedback or questions. Leave your comment below.
Page 1 of 1 pages