One Layer Paper Tole
by Dina Kowal
Add dimension to stamped images without adding layers.
Supplies
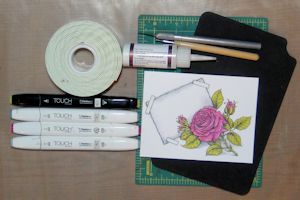
- Heavy cardstock or watercolor paper
- Outline stamp (floral images work well with this technique – Power Poppy La Vie en Rose digital stamp used here)
- Coloring medium of your choice
- Sharp craft knife
- Cutting mat
- Foam pad
- Ball stylus or other rounded tool
- Foam tape
- Glue
- Other supplies as needed to complete the project
Step-by-Step
-
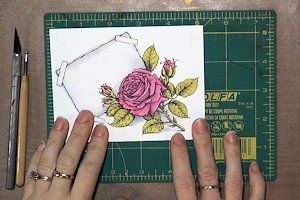
Step 1
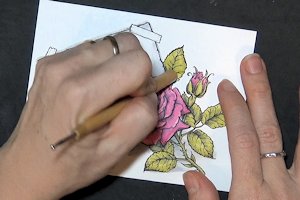
Stamp an outline image on cardstock or watercolor paper. Color with any medium.
-
Step 2
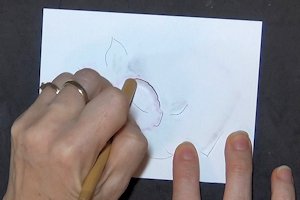
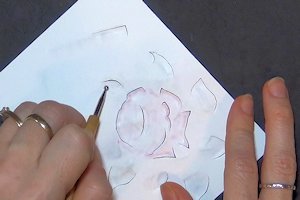
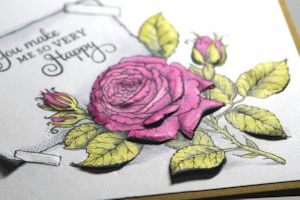
Looking at the stamp image, determine which portions of the image might project or be raised if the object were 3-dimensional. These may be objects or sections that appear to be to the foreground, or are overlapping another object.
The areas cut on this project are indicated here.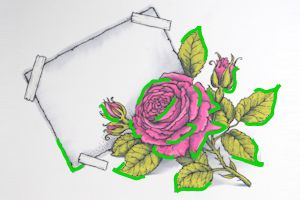
-
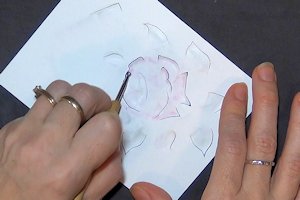
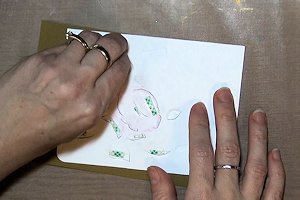
Step 3
Lay the panel on a cutting mat and use a craft knife to cut around the outside of a few of these areas. Do not cut around the entire outline. For leaves, either cut from the midpoint of the sides down to the point, or cut along one side to emphasize the curve. Choose a few petals to accent the shape and dimension of the flower.

-
Space cuts about 1/4" apart, and take care not to cut portions out completely.

-
Step 4
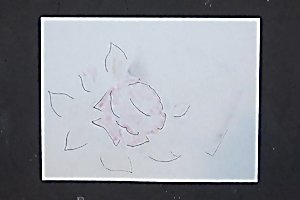
Turn the image panel over, and lay it on a foam mat or mouse pad.
-
Use a ball stylus or other rounded tool (even a rounded pen cap will work) to press into the inside of each curve that you’ve created with your craft knife. Rub back and forth inside the curve, and the paper will begin to break down and curve upwards.
-
Step 5
When you’ve finished embossing, turn the image back over, and press gently into the flower centers to bring the embossed areas back up. The stylus can also be run along the lines of the image to increase dimension.
-
Step 6
If desired, turn panel over and use a smaller stylus to further define edges.
-
Step 7 (Optional)
To emboss areas of the image that are too small to cut out, run a stylus around the edge of the area lightly to create an outline on the back side.
-
Turn the panel over. Press the area inside the outline into the foam mat – it will be raised on the front.
-
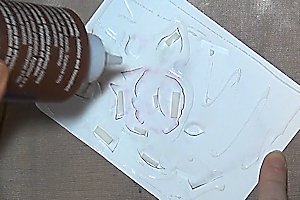
Step 8
Put a small piece of foam tape in each curve created by cutting and embossing.
-
Step 9
When gluing the panel to place onto a card base, be sure there is glue in all flat areas, to the inside of each piece of foam, and to the outside of each cut line.
-
Step 10
Adhere the panel to the card base, and press down the glued areas.
-
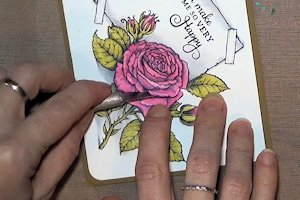
Step 11
Lift and reshape the edges of the raised areas as needed, using a craft knife.
-
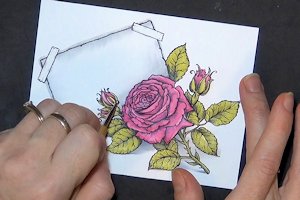
The image has dimension, but is still flat enough to mail in a standard envelope.
-
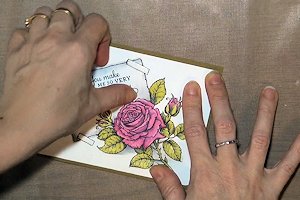
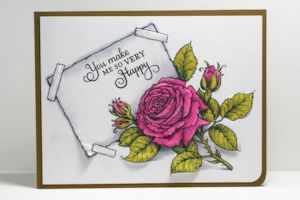
Step 12
Embellish and complete the card.
Video!
Your Turn
You've seen the tutorial, now you try it! We've got a section of the gallery set aside for One Layer Paper Tole. Try this technique, then upload your artwork to the gallery. Show us your creations!
***Please note - Internet Explorer/Edge is not a supported browser, and will not allow you to see the videos. Please use Chrome, Firefox or Safari to view our tutorial videos.

Questions and Comments
We'd love to get your feedback or questions. Leave your comment below.
Thanks again for sharing.
Page 1 of 2 pages 1 2 >