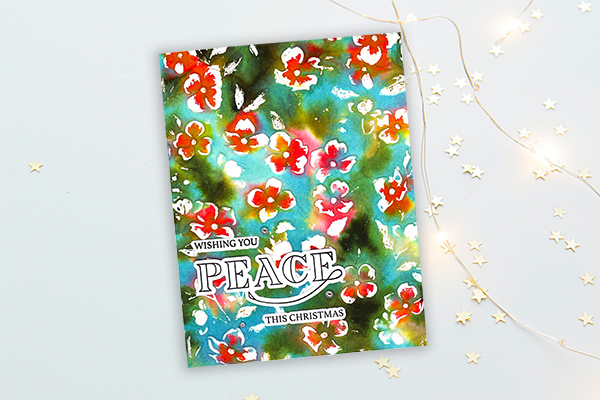
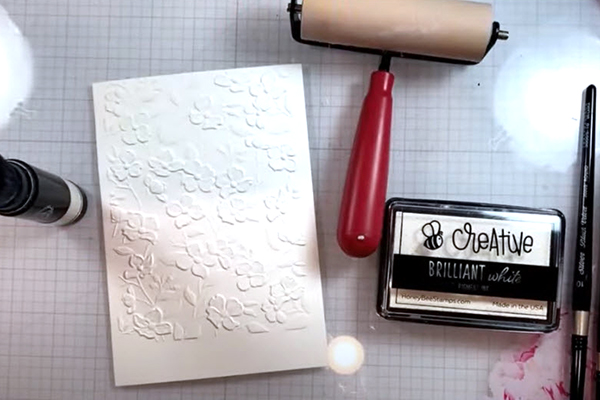
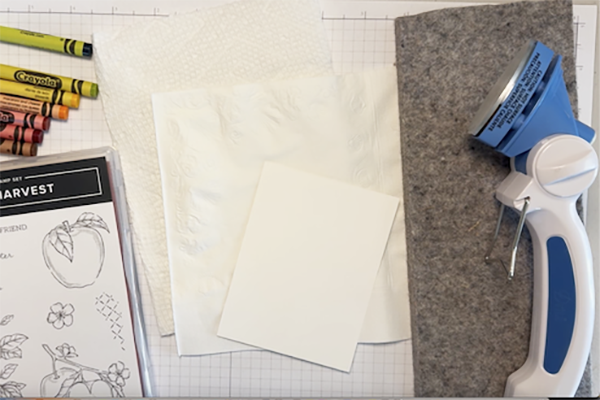
Brayered Emboss Resist
by Lydia Fiedler
Combine a few techniques to produce a beautiful mixed media background.
Supplies
-
For a detailed supply list, please see the video description on YouTube
- Watercolor paper
- Powder tool
- White pigment ink
- Brayer
- Embossing powder
- Heat tool
- Watercolor
Step-by-Step
Video!
Your Turn
You've seen the tutorial, now you try it! We've got a section of the gallery set aside for Brayered Emboss Resist. Try this technique, then upload your artwork to the gallery. Show us your creations!
***Please note - Internet Explorer/Edge is not a supported browser, and will not allow you to see the videos. Please use Chrome, Firefox or Safari to view our tutorial videos.
Coloring With Paper
by Lydia Fiedler
Community manager Lydia Fiedler will show you how to use paper to color layering dies.

Supplies
-
For a detailed supply list, please see the description on YouTube by clicking "more":
- Layering dies
- Small blending tools
- Ink
- Paper
- Adhesive
Step-by-Step
Video!
Your Turn
You've seen the tutorial, now you try it! We've got a section of the gallery set aside for Coloring With Paper. Try this technique, then upload your artwork to the gallery. Show us your creations!
***Please note - Internet Explorer/Edge is not a supported browser, and will not allow you to see the videos. Please use Chrome, Firefox or Safari to view our tutorial videos.
Melted Crayon Blending
by Betty Traciak
Learn to color your stamp images with melted wax.
Supplies
- Stamps
- Ink
- Cardstock
- Crayons
- Iron
- Heat resistant surface
- Iron
Step-by-Step
Video!
Your Turn
You've seen the tutorial, now you try it! We've got a section of the gallery set aside for Melted Crayon Blending. Try this technique, then upload your artwork to the gallery. Show us your creations!
***Please note - Internet Explorer/Edge is not a supported browser, and will not allow you to see the videos. Please use Chrome, Firefox or Safari to view our tutorial videos.
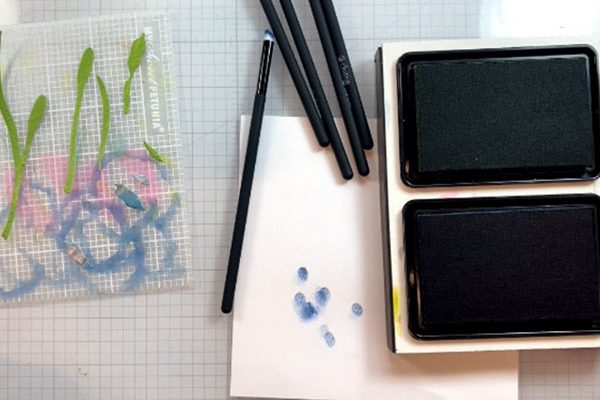
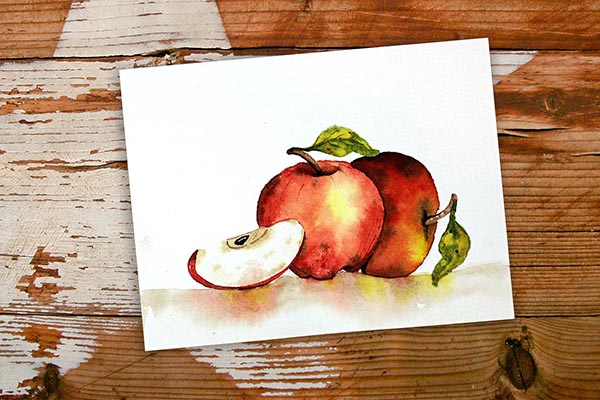
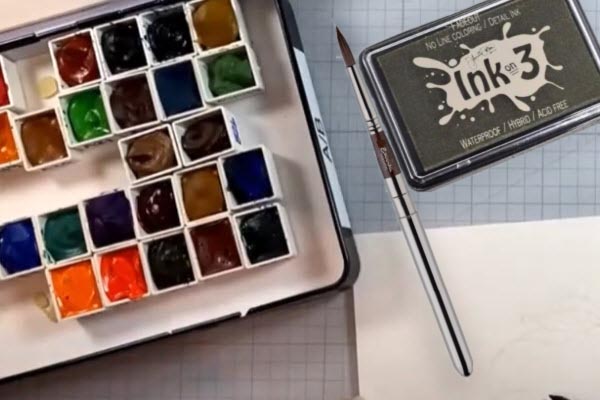
Intro to No-Line Watercolor
by Lydia Fiedler
Take the fear out of no-line watercolor with this introductory tutorial.
Supplies
Step-by-Step
Video!
Your Turn
You've seen the tutorial, now you try it! We've got a section of the gallery set aside for Intro to No-Line Watercolor. Try this technique, then upload your artwork to the gallery. Show us your creations!
***Please note - Internet Explorer/Edge is not a supported browser, and will not allow you to see the videos. Please use Chrome, Firefox or Safari to view our tutorial videos.
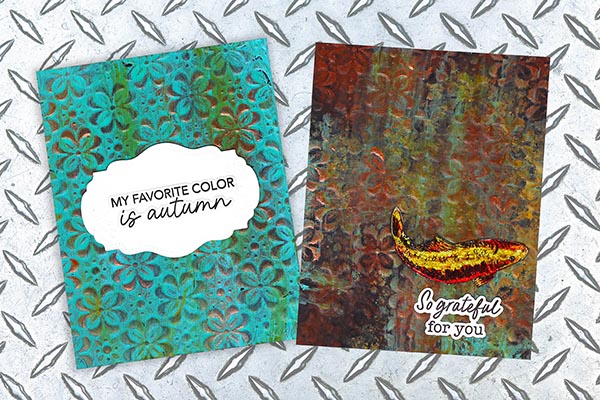
Painted Patinas
by Lydia Fiedler
Use the same colors of paint to create two very different faux patinas.
Supplies
-
For a detailed supply list, please see the video description on YouTube
- Embossing folders
- Acrylic paints
- Sea sponge or similar
- Black cardstock
Step-by-Step
Video!
Your Turn
You've seen the tutorial, now you try it! We've got a section of the gallery set aside for Painted Patinas. Try this technique, then upload your artwork to the gallery. Show us your creations!
***Please note - Internet Explorer/Edge is not a supported browser, and will not allow you to see the videos. Please use Chrome, Firefox or Safari to view our tutorial videos.
Easy Origami Owl
by Lydia Fiedler
Make an easy origami owl with DIY origami paper. This project is based on an original pattern at origami.me.
vNLF.jpg)
Supplies
-
For a detailed supply list and a link to the pattern author's pattern, please see the video description on YouTube
- Copy paper
- Bone Folder
- Background Stamp
- Jewelry findings or charms
Step-by-Step
Video!
Your Turn
You've seen the tutorial, now you try it! We've got a section of the gallery set aside for Easy Origami Owl. Try this technique, then upload your artwork to the gallery. Show us your creations!
***Please note - Internet Explorer/Edge is not a supported browser, and will not allow you to see the videos. Please use Chrome, Firefox or Safari to view our tutorial videos.
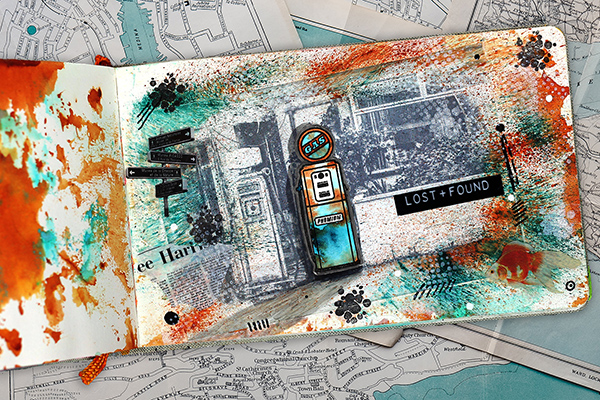
Art Journaling with Printed Images
by Lydia Fiedler
Seamlessly blend royalty-free images and stamps for beautiful journal pages.
Supplies
.JPG)
-
For a detailed supply list, please see the video description on YouTube.
- Gesso
- Printed Image
- Glue Stick
- Stamps
- Watercolor
- Paint markers
- Ephemera
- Stamps
- Ink
- Toothbrush or splatter brush
Step-by-Step
Video!
Your Turn
You've seen the tutorial, now you try it! We've got a section of the gallery set aside for Art Journaling with Printed Images. Try this technique, then upload your artwork to the gallery. Show us your creations!
***Please note - Internet Explorer/Edge is not a supported browser, and will not allow you to see the videos. Please use Chrome, Firefox or Safari to view our tutorial videos.
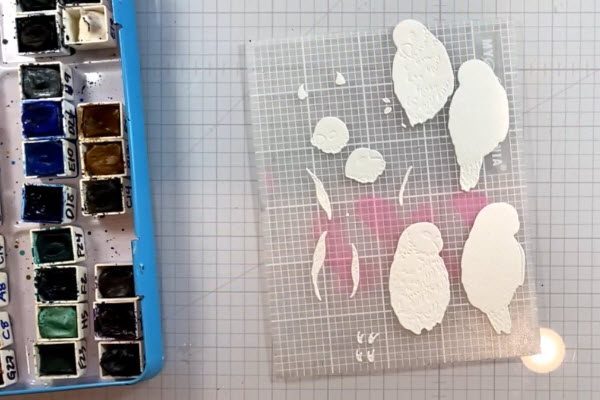
Watercolor Underpainting
by Lydia Fiedler
Community Manager Lydia Fiedler will show you how a single underpainting color can help you create effortless blends.
Supplies
-
For a detailed supply list, please see the video description on YouTube.
- Watercolor
- Die Cuts cut from Watercolor Paper
- Water
Step-by-Step
Video!
Your Turn
You've seen the tutorial, now you try it! We've got a section of the gallery set aside for Watercolor Underpainting. Try this technique, then upload your artwork to the gallery. Show us your creations!
***Please note - Internet Explorer/Edge is not a supported browser, and will not allow you to see the videos. Please use Chrome, Firefox or Safari to view our tutorial videos.
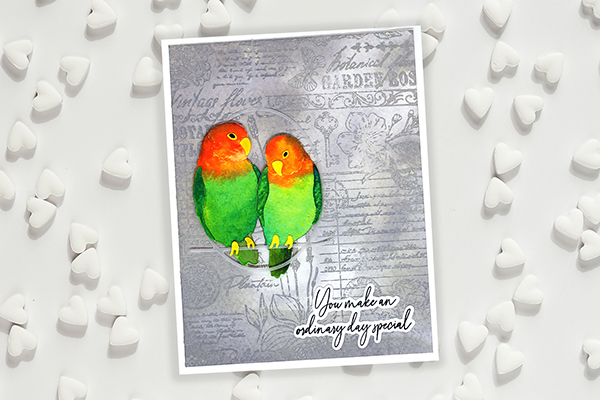
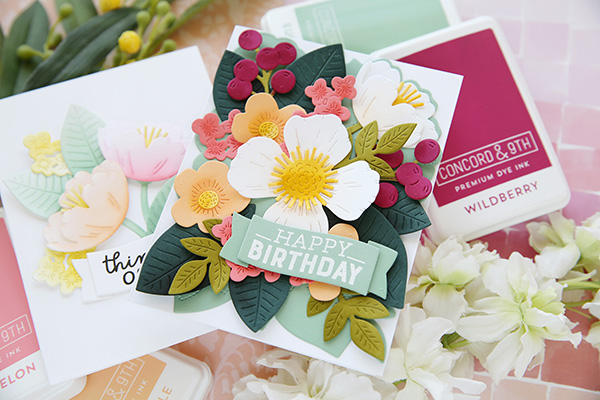
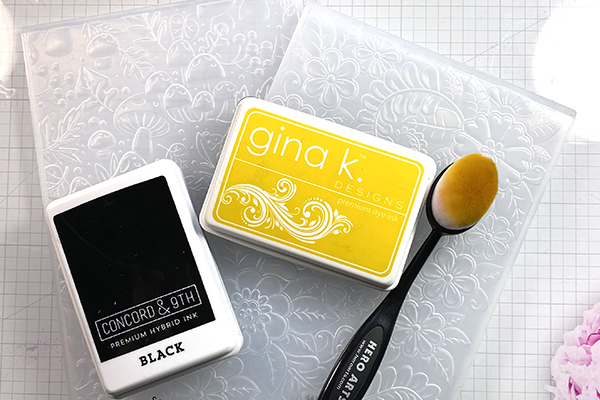
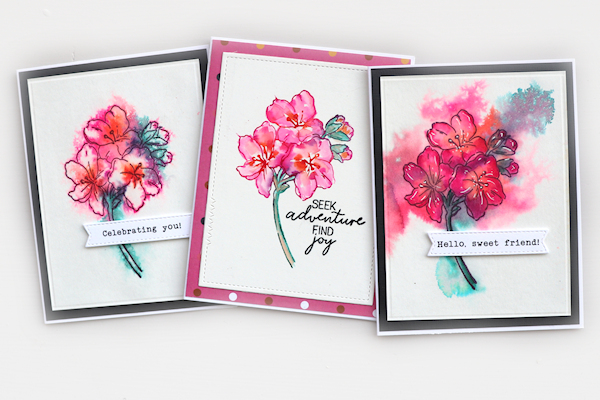
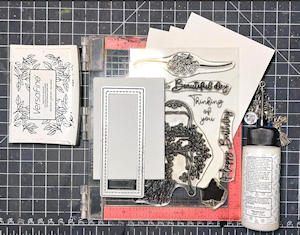
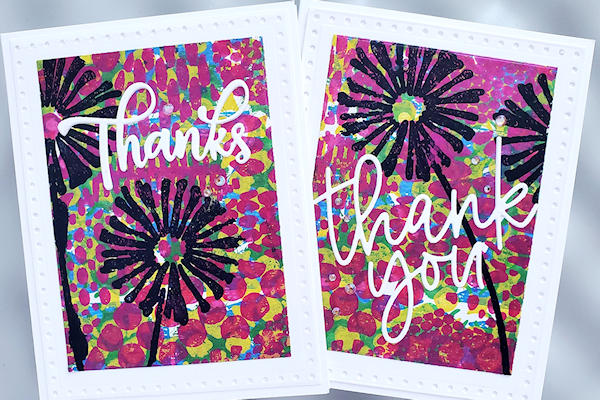
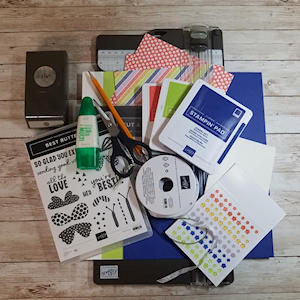
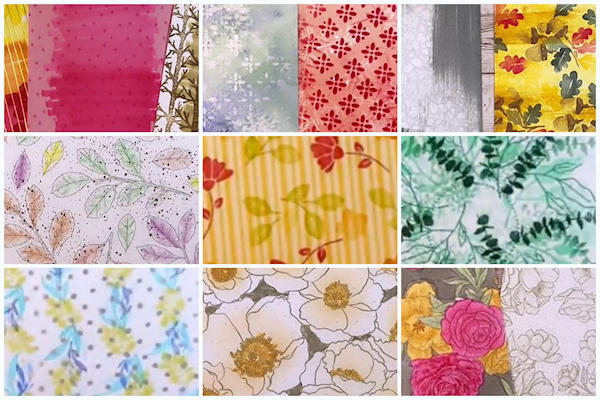
Color Shifted Card Designs
Watch as Laura Bassen gets strikingly different results on two cards using the same colors.
Supplies
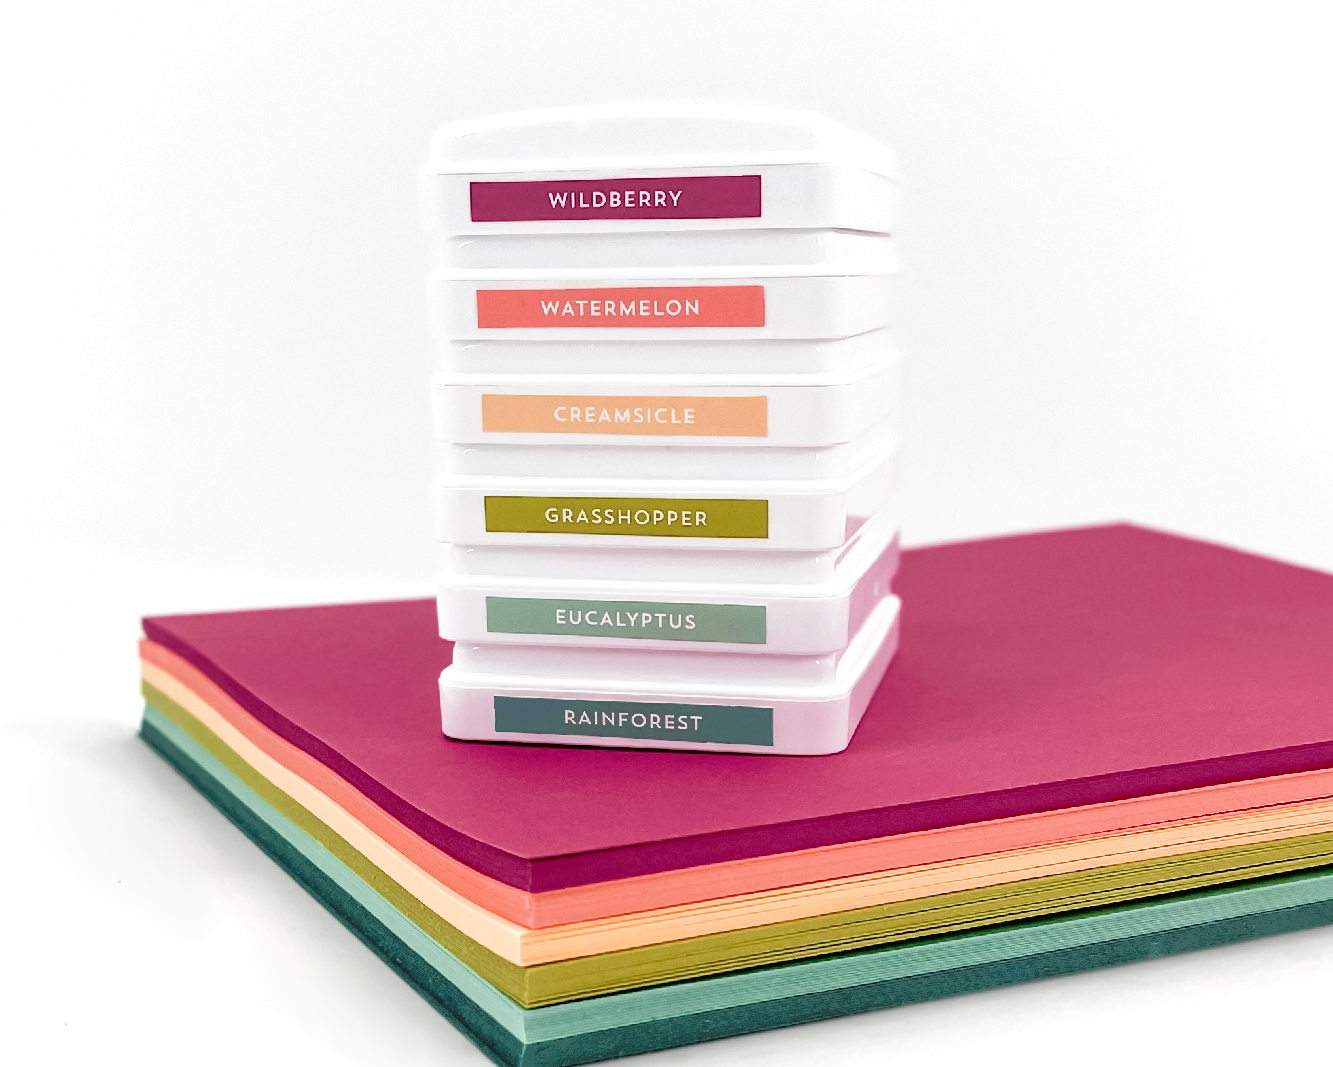
- Ink - Concord & 9th 2024 Color Collection used here
- Coordinating Cardstock - Concord & 9th 2024 Color Collection used here
- Dies - Concord & 9th Primrose Garden Bundle used here
- Blending Brushes
- Adhesive
Step-by-Step
Video!
Your Turn
You've seen the tutorial, now you try it! We've got a section of the gallery set aside for Color Shifted Card Designs. Try this technique, then upload your artwork to the gallery. Show us your creations!
***Please note - Internet Explorer/Edge is not a supported browser, and will not allow you to see the videos. Please use Chrome, Firefox or Safari to view our tutorial videos.
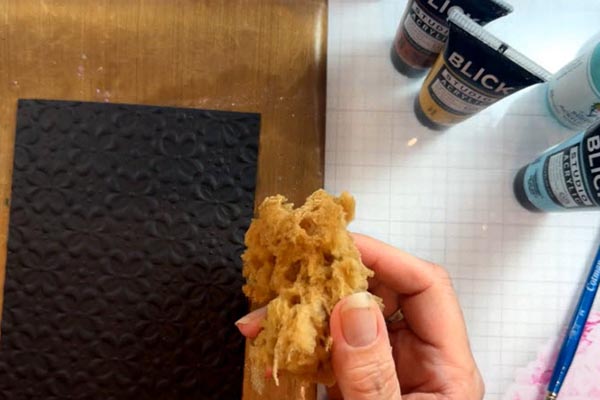
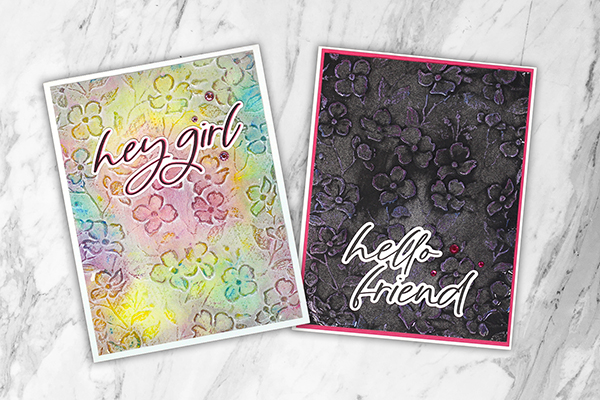
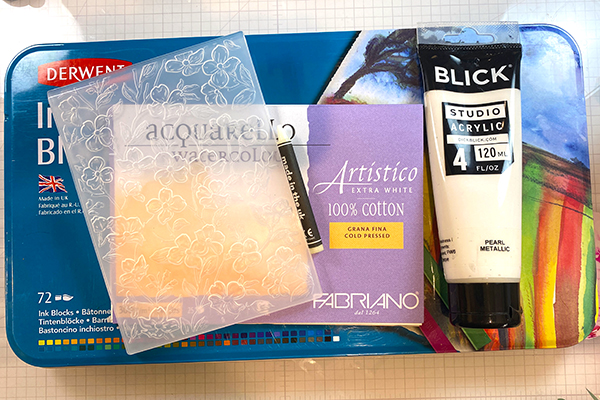
Fresco Resist
by Lydia Fiedler
Learn a fun twist on our original faux fresco technique.
Supplies
-
For a detailed supply list, please see the video description on YouTube
- Derwent Inktense Pencils or crayons
- 3D Embossing Folder
- Clear Wax Crayon
- Acrylic Paint
- Paper Towels or Baby Whites
Step-by-Step
Video!
Your Turn
You've seen the tutorial, now you try it! We've got a section of the gallery set aside for Fresco Resist. Try this technique, then upload your artwork to the gallery. Show us your creations!
***Please note - Internet Explorer/Edge is not a supported browser, and will not allow you to see the videos. Please use Chrome, Firefox or Safari to view our tutorial videos.
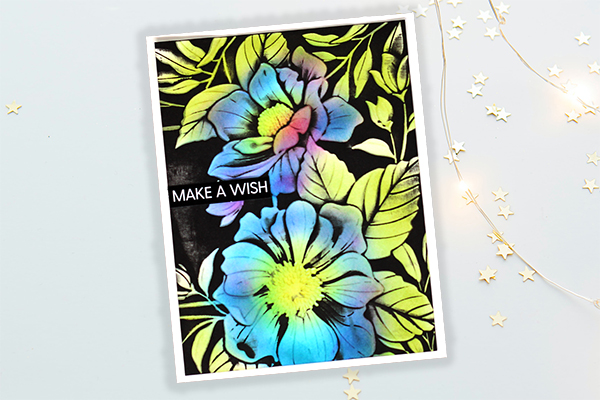
Blackout Embossing
by Lydia Fiedler
Create bold and dramatic effect with 3D embossing folders and ink.
Supplies
-
For a detailed supply list, please see the video description on YouTube
- 3D Embossing Folders
- Ink (Foam ink pad preferred)
- Blending Brushes
Step-by-Step
Video!
Your Turn
You've seen the tutorial, now you try it! We've got a section of the gallery set aside for Blackout Embossing. Try this technique, then upload your artwork to the gallery. Show us your creations!
***Please note - Internet Explorer/Edge is not a supported browser, and will not allow you to see the videos. Please use Chrome, Firefox or Safari to view our tutorial videos.
Washi Tape Inlay
by Lydia Fiedler
Learn a fun way to use your pretty washi tapes
Supplies
wtf.jpg)
-
For specific product information, please see the video description on YouTube.
- Washi Tape (opaque and transparent)
- Stamps
- MISTI
- Craft Knife
- Coloring tools
Step-by-Step
Video!
Your Turn
You've seen the tutorial, now you try it! We've got a section of the gallery set aside for Washi Tape Inlay. Try this technique, then upload your artwork to the gallery. Show us your creations!
***Please note - Internet Explorer/Edge is not a supported browser, and will not allow you to see the videos. Please use Chrome, Firefox or Safari to view our tutorial videos.
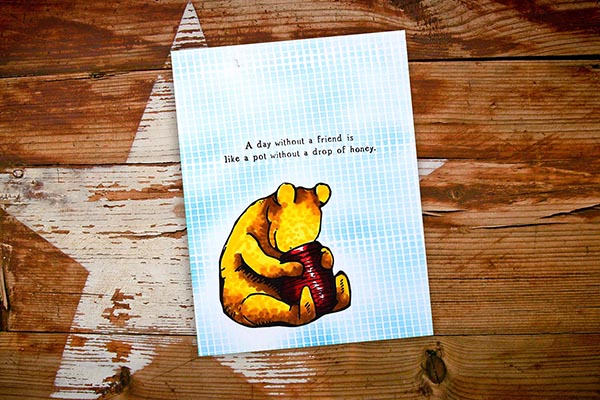
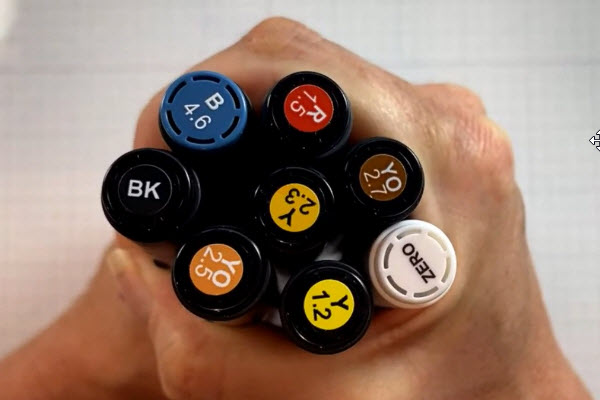
Coloring Teddy Bear Fur Texture
by Lydia Fiedler
Learn to mimic the texture of teddy bear fur with alcohol markers.
Supplies
-
For a detailed supply list, please see the video description on YouTube
- Alcohol markers
- Stamps
- Cardstock
Step-by-Step
Video!
Your Turn
You've seen the tutorial, now you try it! We've got a section of the gallery set aside for Coloring Teddy Bear Fur Texture. Try this technique, then upload your artwork to the gallery. Show us your creations!
***Please note - Internet Explorer/Edge is not a supported browser, and will not allow you to see the videos. Please use Chrome, Firefox or Safari to view our tutorial videos.
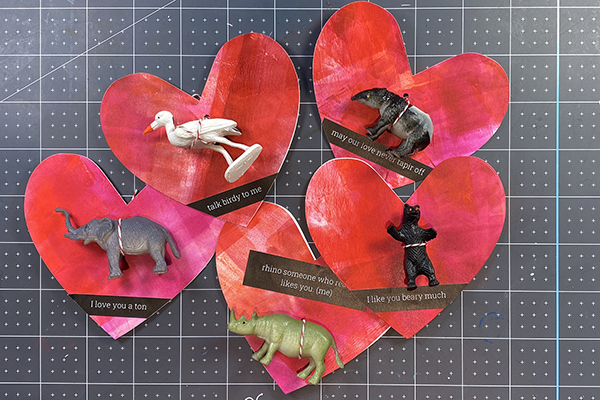
Animal Valentines
by Lydia Fiedler
Make punny, animal valentines with zero calories for work or school.
Supplies
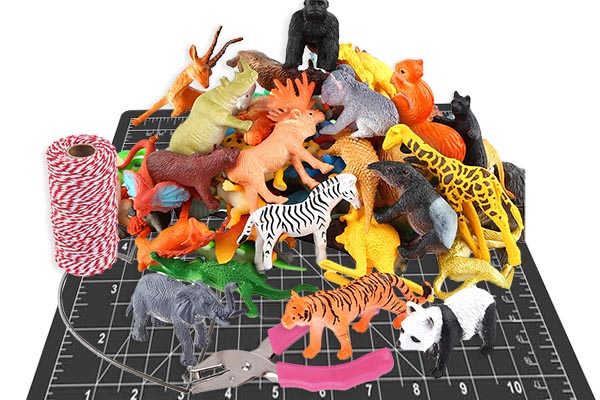
-
For detailed supplies, please see the video description on YouTube
- Animal Figurines
- Heart Dies
- Twine
- Hole punch
- Double-sided adhesive sheets
- Colored paper or similar
Step-by-Step
Video!
Your Turn
You've seen the tutorial, now you try it! We've got a section of the gallery set aside for Animal Valentines. Try this technique, then upload your artwork to the gallery. Show us your creations!
***Please note - Internet Explorer/Edge is not a supported browser, and will not allow you to see the videos. Please use Chrome, Firefox or Safari to view our tutorial videos.
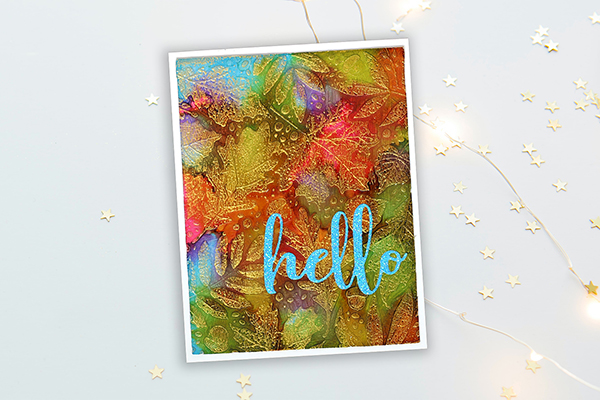
Drunken Embossed Foil
by Lydia Fiedler
Get a luminous opacity with embossing and alcohol ink.
Supplies
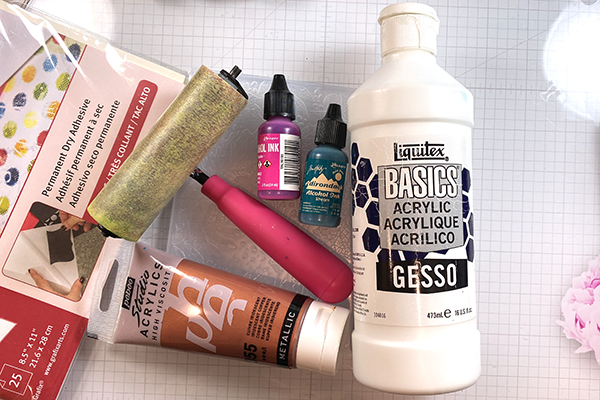
-
Please see video description on YouTube for detailed supplies
- 3D embossing folder
- Gesso
- Alcohol inks
- Double sided adhesive sheets
- Brayer
- Gold acrylic paint
Step-by-Step
Video!
Your Turn
You've seen the tutorial, now you try it! We've got a section of the gallery set aside for Drunken Embossed Foil. Try this technique, then upload your artwork to the gallery. Show us your creations!
***Please note - Internet Explorer/Edge is not a supported browser, and will not allow you to see the videos. Please use Chrome, Firefox or Safari to view our tutorial videos.
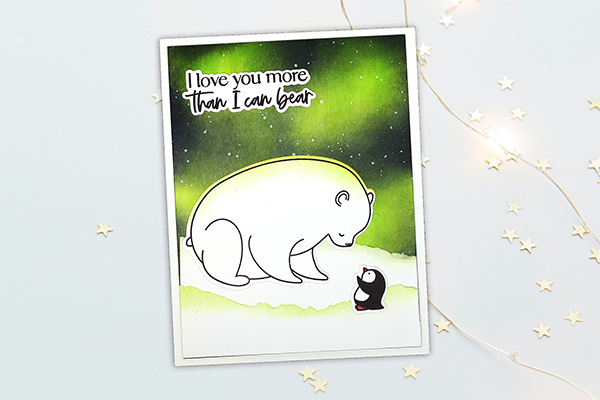
Ink Blended Northern Lights
by Lydia Fiedler
Create quick and easy Northern lights effects with blending brushes and ink.
Supplies
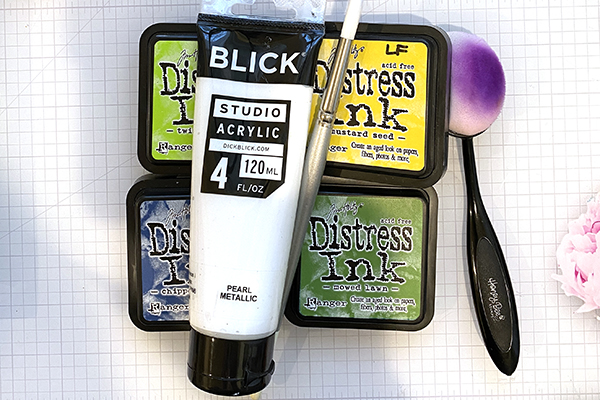
- Ink (Yellow and green and blue Distress inks used here)
- Blending Brushes
- Paintbrush
- White paint or ink
Step-by-Step
Video!
Your Turn
You've seen the tutorial, now you try it! We've got a section of the gallery set aside for Ink Blended Northern Lights. Try this technique, then upload your artwork to the gallery. Show us your creations!
***Please note - Internet Explorer/Edge is not a supported browser, and will not allow you to see the videos. Please use Chrome, Firefox or Safari to view our tutorial videos.
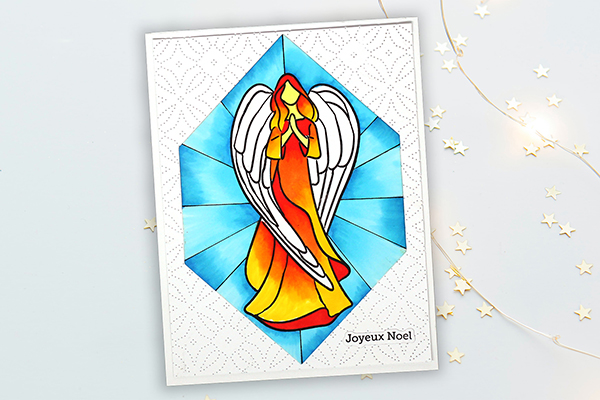
Faux Stained Glass Coloring
by Lydia Fiedler
Use alcohol markers to create a faux stained glass look.
Supplies
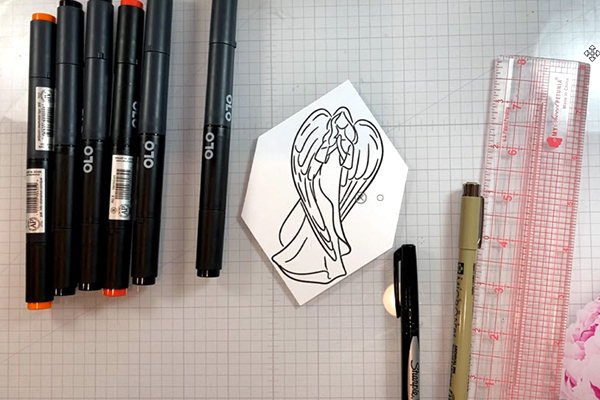
-
Please see YouTube description for a detailed supply list
- Alcohol Markers (OLO Markers used here)
- Cut-Align ruler
- Fineliner pen
Step-by-Step
Video!
Your Turn
You've seen the tutorial, now you try it! We've got a section of the gallery set aside for Faux Stained Glass Coloring. Try this technique, then upload your artwork to the gallery. Show us your creations!
***Please note - Internet Explorer/Edge is not a supported browser, and will not allow you to see the videos. Please use Chrome, Firefox or Safari to view our tutorial videos.
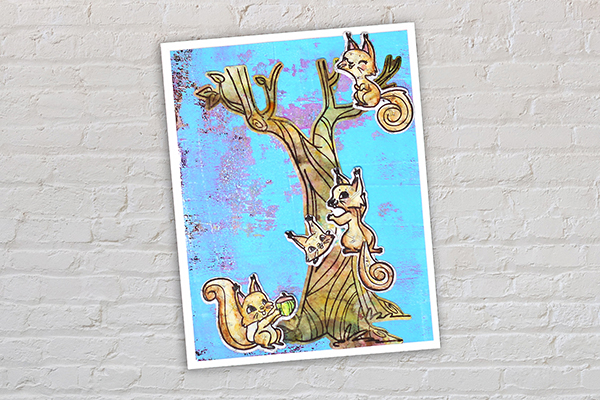
Collage with Stamps & Dies
by Lydia Fiedler
Community Manager Lydia Fiedler will teach you how to use a basic collage technique to add texture, pattern and interest to stamped and die cut images.
Supplies
.JPG)
-
For a detailed supply list - please see the video description by clicking "More" in the description area on YouTube.
- Music or book pages
- Matte medium
- Matte gesso
- Watercolor pencils
- Stamps and dies
Step-by-Step
Video!
Your Turn
You've seen the tutorial, now you try it! We've got a section of the gallery set aside for Collage with Stamps & Dies. Try this technique, then upload your artwork to the gallery. Show us your creations!
***Please note - Internet Explorer/Edge is not a supported browser, and will not allow you to see the videos. Please use Chrome, Firefox or Safari to view our tutorial videos.
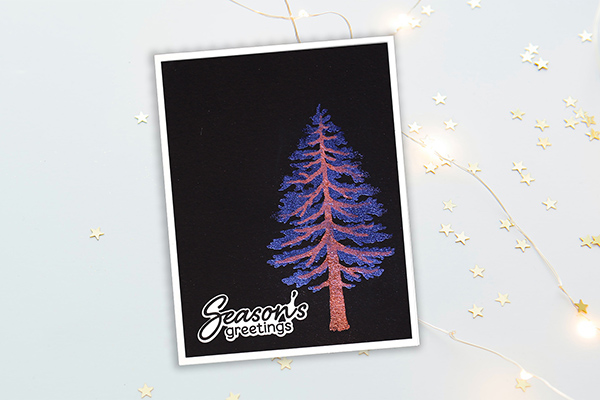
Layering Shimmery Embossing Powders
by Lydia Fiedler
Layer iridescent embossing powders together for luminous effects.
Supplies
x.JPG)
-
All specific supplies are linked in the video description
- Shimmery embossing powders
- Embossing powder tool
- Black or other dark cardstock
- Layering stamps
- Embossing ink
- Heat tool
Step-by-Step
Video!
Your Turn
You've seen the tutorial, now you try it! We've got a section of the gallery set aside for Layering Shimmery Embossing Powders. Try this technique, then upload your artwork to the gallery. Show us your creations!
***Please note - Internet Explorer/Edge is not a supported browser, and will not allow you to see the videos. Please use Chrome, Firefox or Safari to view our tutorial videos.
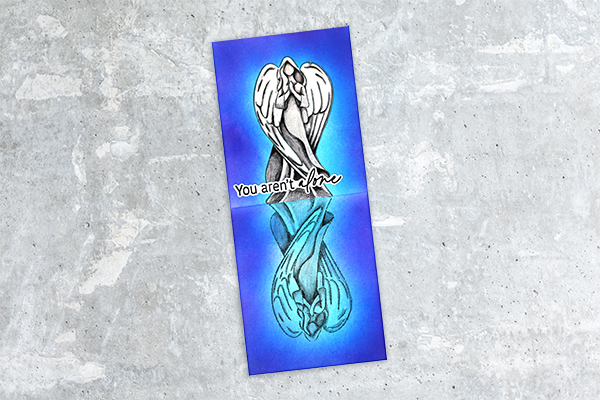
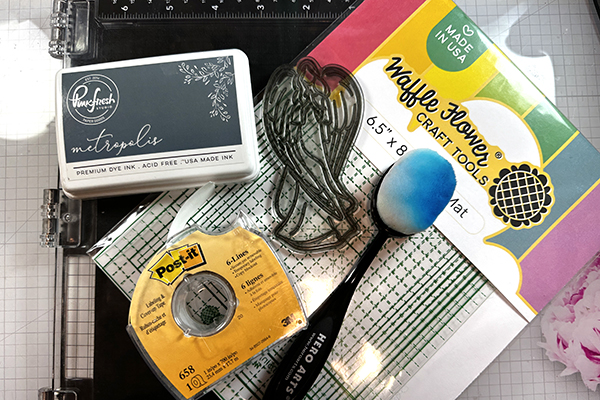
Greyscale Reflections in the MISTI
by Lydia Fiedler
Supplies
-
For detailed supplies, see video description
- MISTI
- Grip Mat or large mirror image stamp
- Post-It® Tape
- Masking Paper
- Blending brushes
- Ink
- Stamp image
Step-by-Step
Video!
Your Turn
You've seen the tutorial, now you try it! We've got a section of the gallery set aside for Greyscale Reflections in the MISTI. Try this technique, then upload your artwork to the gallery. Show us your creations!
***Please note - Internet Explorer/Edge is not a supported browser, and will not allow you to see the videos. Please use Chrome, Firefox or Safari to view our tutorial videos.
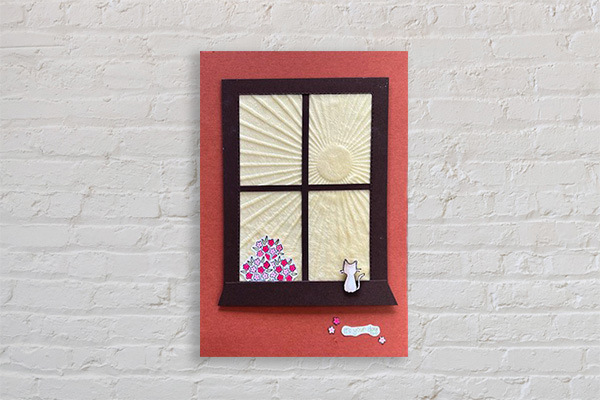
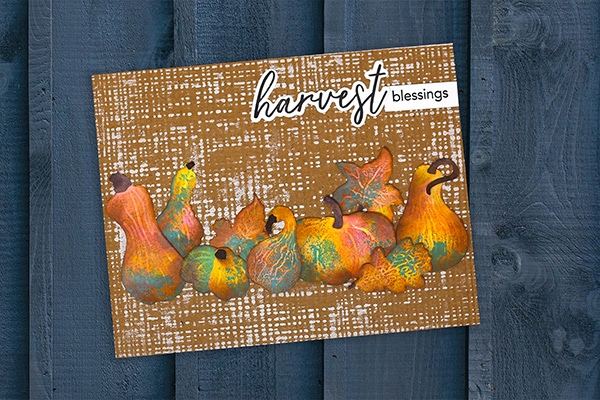
Embossing Fabric with Stamps
by Betty Traciak
Create beautiful embossed plush fabric with a rubber stamp and heat.
Supplies
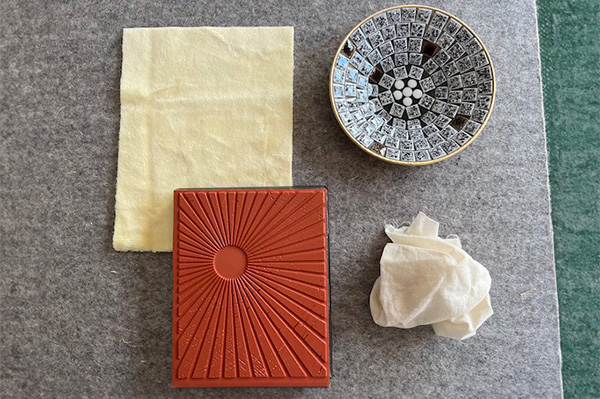
- Rubber stamp with a bold design (Stampin' Up! Rays of Light used here)
- 100% polyester plush fabric (Shannon Fabrics Minky Cuddle used here)
- Pressing Cloth - any lightweight cotton fabric
- Iron
- Water
Step-by-Step
Video!
Your Turn
You've seen the tutorial, now you try it! We've got a section of the gallery set aside for Embossing Fabric with Stamps. Try this technique, then upload your artwork to the gallery. Show us your creations!
***Please note - Internet Explorer/Edge is not a supported browser, and will not allow you to see the videos. Please use Chrome, Firefox or Safari to view our tutorial videos.
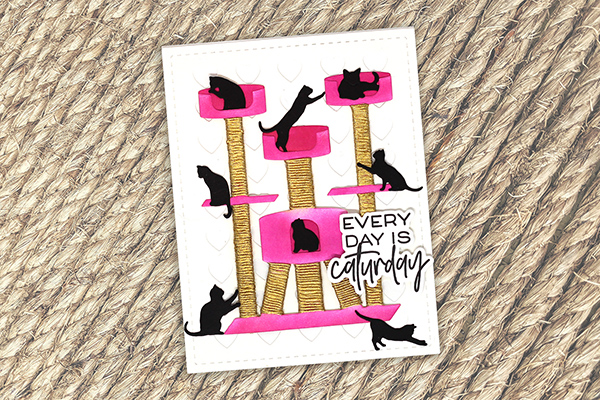
No-Stitch Embroidery Floss Accents
by Lydia Fiedler
Use embroidery floss without stitching for dimensional card accents.
Supplies
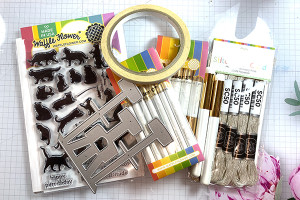
- Dies (Waffle Flower Cat Tree House Die, Cattitude Combo and Hearts Panel Die used here)
- Blending brushes (Waffle Flower shaders used here)
- Embroidery floss (Waffle Flower gold floss used here)
- Sticky Mat (Waffle Flower Grip Mat used here)
- Strong double sided adhesive
Step-by-Step
Video!
Your Turn
You've seen the tutorial, now you try it! We've got a section of the gallery set aside for No-Stitch Embroidery Floss Accents. Try this technique, then upload your artwork to the gallery. Show us your creations!
***Please note - Internet Explorer/Edge is not a supported browser, and will not allow you to see the videos. Please use Chrome, Firefox or Safari to view our tutorial videos.
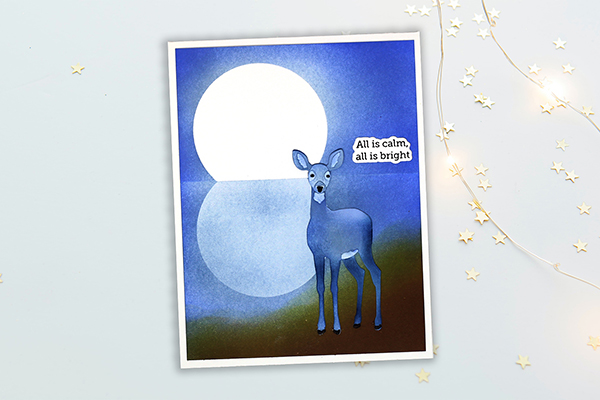
Simple Lunar Reflection
by Lydia Fiedler
Create a simple reflection on water with minimal supplies.
Supplies
.JPG)
- Circle dies
- Masking paper
- Paper trimmer
- Ink
- Blending brushes
Step-by-Step
Video!
Your Turn
You've seen the tutorial, now you try it! We've got a section of the gallery set aside for Simple Lunar Reflection. Try this technique, then upload your artwork to the gallery. Show us your creations!
***Please note - Internet Explorer/Edge is not a supported browser, and will not allow you to see the videos. Please use Chrome, Firefox or Safari to view our tutorial videos.
Backfill Gel Printing
by Lydia Fiedler
Learn a one pull multicolor gel printing technique

Supplies
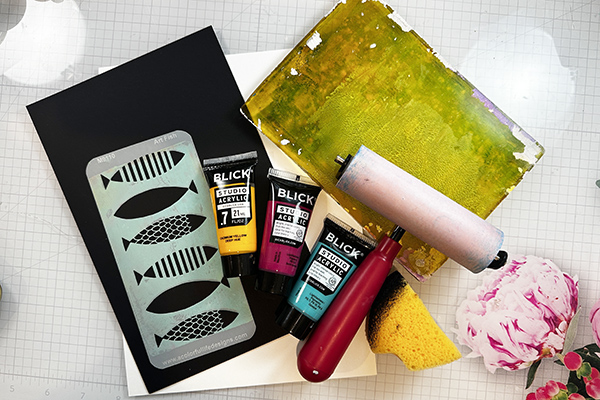
- Gel monoprinting plate (5x7 used here)
- Stencil with a large or solid design (A Colorful Life Designs Zombie Stencils used here)
- Copy Paper
- Acrylic Paint
- Brayer
- Sponge
Step-by-Step
Video!
Your Turn
You've seen the tutorial, now you try it! We've got a section of the gallery set aside for Backfill Gel Printing. Try this technique, then upload your artwork to the gallery. Show us your creations!
***Please note - Internet Explorer/Edge is not a supported browser, and will not allow you to see the videos. Please use Chrome, Firefox or Safari to view our tutorial videos.
Aging Textured Die Cuts
by Lydia Fiedler
Age colorful, textured die cuts for a vintage look.
Supplies
.JPG)
- Textured die cuts
- Water reactive inks (Distress Oxides used here)
- Sponge or blending brush
- Brown dye ink (Vintage Photo distress ink used here)
- Mister bottle
- Glass mat or similar
- Teflon craft mat or similar
Step-by-Step
Video!
Your Turn
You've seen the tutorial, now you try it! We've got a section of the gallery set aside for Aging Textured Die Cuts. Try this technique, then upload your artwork to the gallery. Show us your creations!
***Please note - Internet Explorer/Edge is not a supported browser, and will not allow you to see the videos. Please use Chrome, Firefox or Safari to view our tutorial videos.
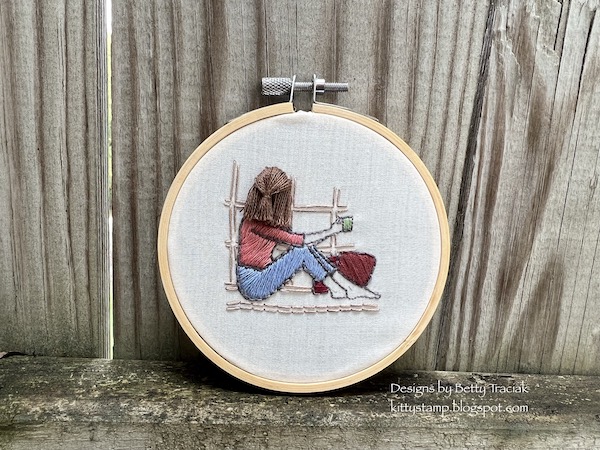
Embroidering Stamped Images
by Betty Traciak
Add detailed embroidery to line art stamp images.
Supplies
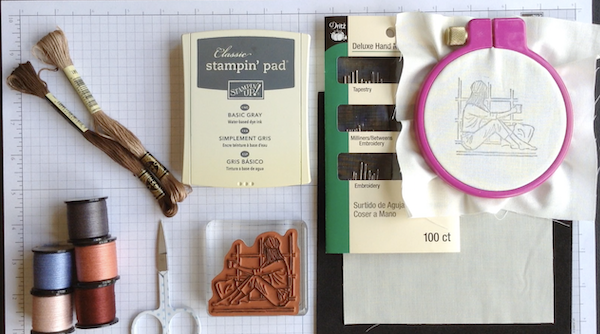
- Line art stamp
- Neutral Ink
- Embroidery floss
- Scissors
- Embroidery needles
- Light colored fabric
- Small brush
- Embroidery hoop
- Foam stamping pad optional
Step-by-Step
Video!
Your Turn
You've seen the tutorial, now you try it! We've got a section of the gallery set aside for Embroidering Stamped Images. Try this technique, then upload your artwork to the gallery. Show us your creations!
***Please note - Internet Explorer/Edge is not a supported browser, and will not allow you to see the videos. Please use Chrome, Firefox or Safari to view our tutorial videos.
Precision Foiling With Glue
by Lydia Fiedler
Use the Precision Glue Press for unique dimensional foiled accents on your cards.
300.jpg)
Step-by-Step
Video!
Your Turn
You've seen the tutorial, now you try it! We've got a section of the gallery set aside for Precision Foiling With Glue. Try this technique, then upload your artwork to the gallery. Show us your creations!
***Please note - Internet Explorer/Edge is not a supported browser, and will not allow you to see the videos. Please use Chrome, Firefox or Safari to view our tutorial videos.
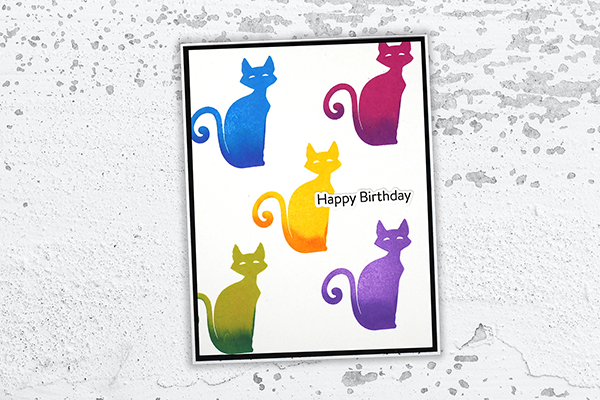
On-Stamp Ink Blending
by Lydia Fiedler
Get smooth, blended, multi-colored images using the MISTI and silhouette style stamps.
Step-by-Step
Video!
Your Turn
You've seen the tutorial, now you try it! We've got a section of the gallery set aside for On-Stamp Ink Blending. Try this technique, then upload your artwork to the gallery. Show us your creations!
***Please note - Internet Explorer/Edge is not a supported browser, and will not allow you to see the videos. Please use Chrome, Firefox or Safari to view our tutorial videos.
Bay Window Card
by Mary Deatherage
Create a fun fold that resembles a bay window.
Supplies

- Cardstock
- Patterned Paper
- Scoring Board
- Shape Dies
- Adhesive
Step-by-Step
Video!
Your Turn
You've seen the tutorial, now you try it! We've got a section of the gallery set aside for Bay Window Card. Try this technique, then upload your artwork to the gallery. Show us your creations!
***Please note - Internet Explorer/Edge is not a supported browser, and will not allow you to see the videos. Please use Chrome, Firefox or Safari to view our tutorial videos.
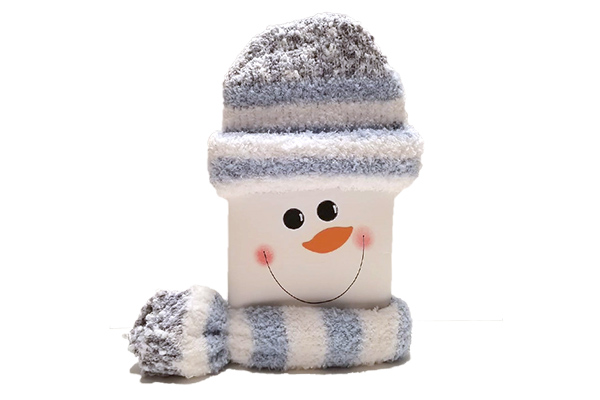
Snowman Popcorn Treat
by Twila Davis
Make an adorable movie night treat with a holiday theme.
Supplies
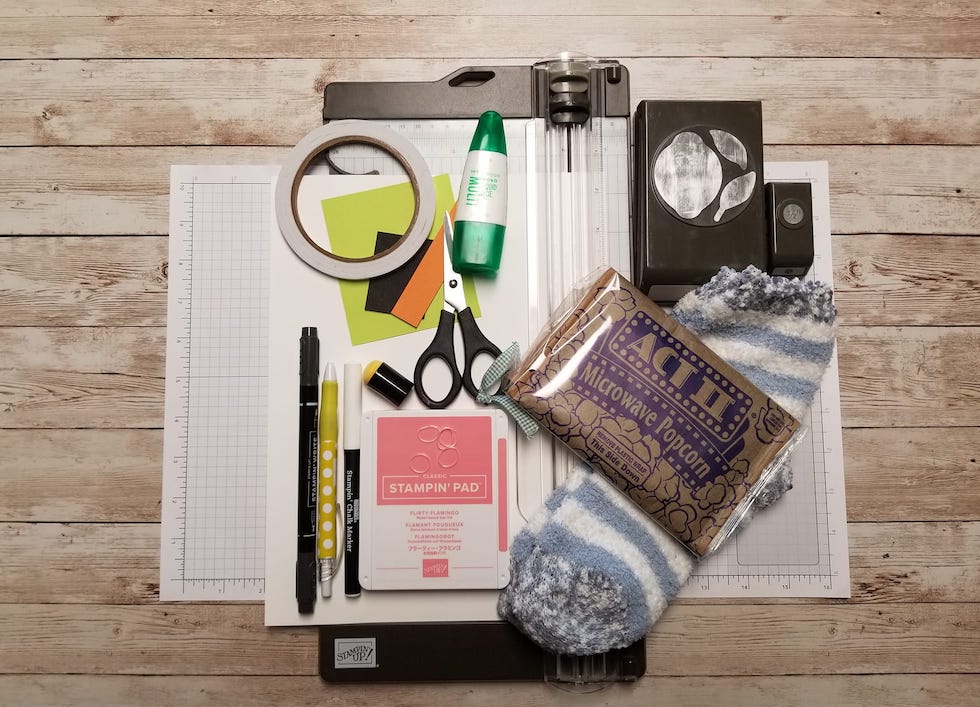
- Cardstock
- Punches, scissors or dies
- Markers, black and white pens
- Fuzzy socks
- Microwave Popcorn
- Clear hair tie or rubberband
- Adhesives
Step-by-Step
Video!
Your Turn
You've seen the tutorial, now you try it! We've got a section of the gallery set aside for Snowman Popcorn Treat. Try this technique, then upload your artwork to the gallery. Show us your creations!
***Please note - Internet Explorer/Edge is not a supported browser, and will not allow you to see the videos. Please use Chrome, Firefox or Safari to view our tutorial videos.
Rice Paper Basics
by Lydia Fiedler
Use rice paper to add texture, pattern and transparency to your projects.
Supplies

- Rice Paper Joggles Rice Paper, Firefly Lights, Black & White Collage #1-3 used here
- Matte Medium (Liquitex used here)
- Foam brushes
- Basic shape dies or embossing folders
- Gold paint(Blick studio gold used here)
- Sentiment strips (Tim Holtz used here)
- Soft spatula or blending stump
Step-by-Step
Video!
Your Turn
You've seen the tutorial, now you try it! We've got a section of the gallery set aside for Rice Paper Basics. Try this technique, then upload your artwork to the gallery. Show us your creations!
***Please note - Internet Explorer/Edge is not a supported browser, and will not allow you to see the videos. Please use Chrome, Firefox or Safari to view our tutorial videos.
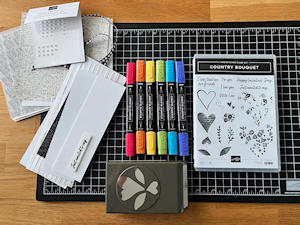
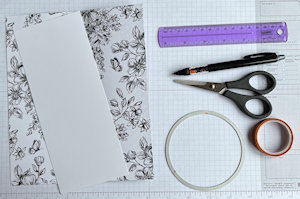
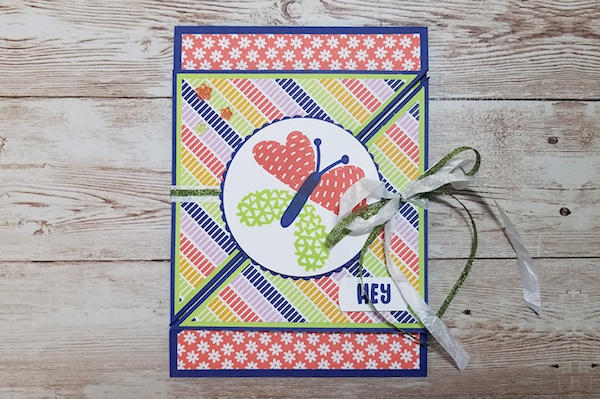
Kimono Card
by Cheryl Hamilton
Cut and fold to create a kimono shaped card.
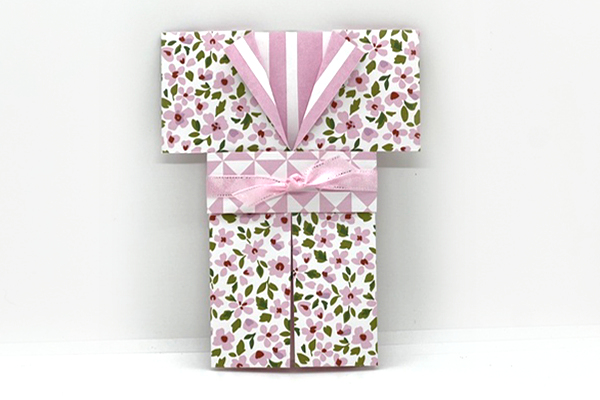
Supplies
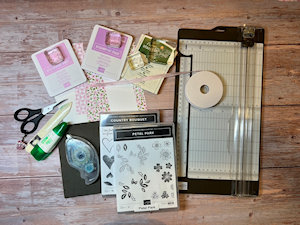
- Patterned paper (Stampin' Up!® Delightfully Eclectic Designer Series Paper used here)
- Cardstock (SU Basic White cardstock used here)
- Trimmer
- Adhesives (Multipurpose Liquid Glue and Stampin' Seal used here)
- Other supplies as needed to complete the project (SU products used here: Petal Park and Country Bouquet photopolymer stamp sets, Basic White medium envelopes, Classic Stampin' Pads (Bubble Bath, Fresh Freesia, Garden Green), 3/8" sheer ribbon)
Step-by-Step
Video!
Your Turn
You've seen the tutorial, now you try it! We've got a section of the gallery set aside for Kimono Card. Try this technique, then upload your artwork to the gallery. Show us your creations!
***Please note - Internet Explorer/Edge is not a supported browser, and will not allow you to see the videos. Please use Chrome, Firefox or Safari to view our tutorial videos.
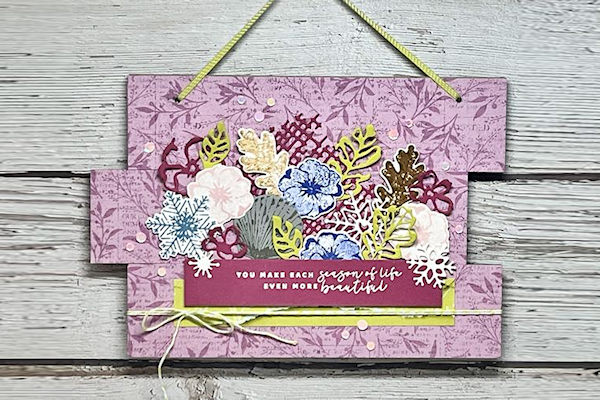
Slat Wall Hanging
by Debbie Henderson
Make a sturdy decor item using chipboard and embellishments.
Supplies
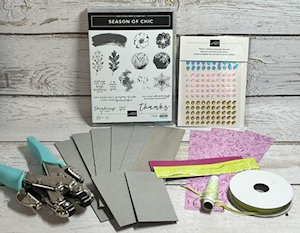
- Thick cardboard or chipboard (six pieces 8” x 2” & two pieces 4” x 2”)
- Liquid Glue
- Patterned paper (Stampin’ Up!® Masterfully Made used here - three pieces 8” x 2”)
- Pencil
- Crop-a-dile or other heavy duty punch
- Other supplies as needed to complete the project: (SU products used here: Season Of Chic stamp set, Gray Granite, Boho Blue, Orchid Oasis, Bubble Bath and Pecan Pie inks, VersaMark ink, Basic White, Berry Burst and Gray Granite cardstock, Ribbon & Twine, Chic Dies, Heat Tool, White Embossing Powder, Stampin’ Dimensionals, Pastel Adhesive-Backed Sequins)
Step-by-Step
Video!
Your Turn
You've seen the tutorial, now you try it! We've got a section of the gallery set aside for Slat Wall Hanging. Try this technique, then upload your artwork to the gallery. Show us your creations!
***Please note - Internet Explorer/Edge is not a supported browser, and will not allow you to see the videos. Please use Chrome, Firefox or Safari to view our tutorial videos.
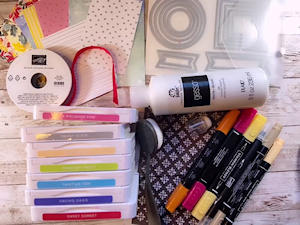
Watercoloring Water
by Dina Kowal
Use layering and mixed media techniques to paint water.

Supplies
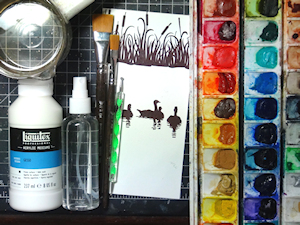
- Watercolor paper (140# Fabriano Studio hot press paper
- Watercolor paints, inks or other water soluble medium (QoR watercolors used here)
- Flat brushes, 3/4" and 1/2" used here
- Water
- Stamped images, lake or ocean theme (Impression Obsession 3263-LG Cattails & Geese used here)
- Waterproof ink (not water-based (solvent or hybrid inks work well, Versafine Clair used here)
- White colored pencil (Derwent Coloursoft pencil used here)
- White gesso or paint
- Acrylic paint pen (Posca White Extra Fine PC1M marker used here)
- Other supplies as needed to complete the project
Step-by-Step
Video!
Your Turn
You've seen the tutorial, now you try it! We've got a section of the gallery set aside for Watercoloring Water. Try this technique, then upload your artwork to the gallery. Show us your creations!
***Please note - Internet Explorer/Edge is not a supported browser, and will not allow you to see the videos. Please use Chrome, Firefox or Safari to view our tutorial videos.
Gilding Polish Techniques
by Tina Wardell
Explore the different ways this shimmery water-soluble medium can be used.
Supplies
- Metallic Gilding Pastes (Creative Expressions Cosmic Shimmer used here) or other water soluble metallic mediums
- Sponge applicator
- Cardstock (black and white used here)
- Embossing folder (Stampin Up!® Cut & Emboss Seashells Embossing Folder used here)
- Stamps (SU Friends Are Like Seashells clear stamp set used here)
- Stencil and brush applicators
- Water mister
- Paint brush
- Other supplies as needed to complete the project
Step-by-Step
Video!
Your Turn
You've seen the tutorial, now you try it! We've got a section of the gallery set aside for Gilding Polish Techniques. Try this technique, then upload your artwork to the gallery. Show us your creations!
***Please note - Internet Explorer/Edge is not a supported browser, and will not allow you to see the videos. Please use Chrome, Firefox or Safari to view our tutorial videos.
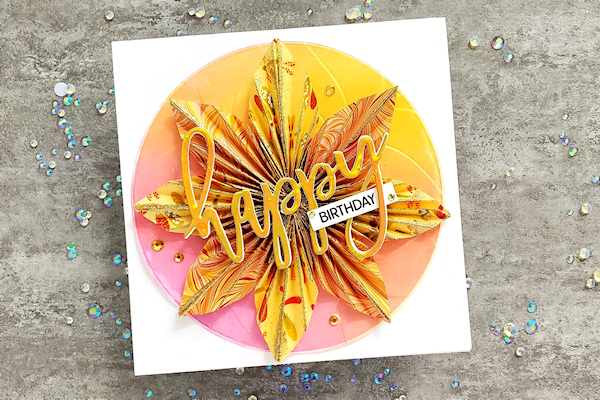
Origami Flower
by Ardyth Percy-Robb
Fold and group paper triangles into a beautiful floral focal.
Supplies
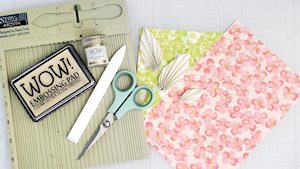
- Thin paper (origami paper used here)
- Score board
- Bone folder
- Liquid glue
- Embossing ink and powder of your choice (optional, gold sparkle used here)
- Other supplies as needed to complete the project (used here: 5.5" square card base (white cardstock, ink blended), Happy die cut, stamped birthday word, gold gems)
Step-by-Step
Video!
Your Turn
You've seen the tutorial, now you try it! We've got a section of the gallery set aside for Origami Flower. Try this technique, then upload your artwork to the gallery. Show us your creations!
***Please note - Internet Explorer/Edge is not a supported browser, and will not allow you to see the videos. Please use Chrome, Firefox or Safari to view our tutorial videos.
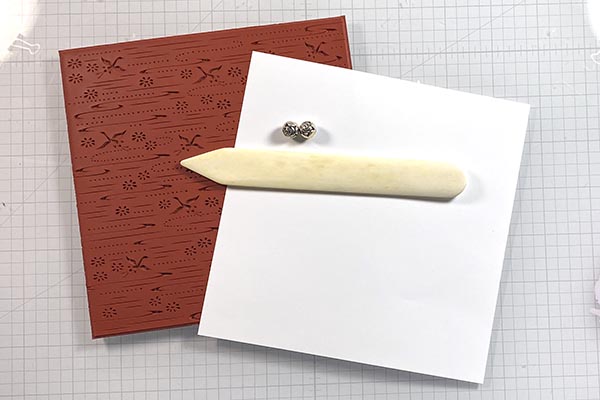
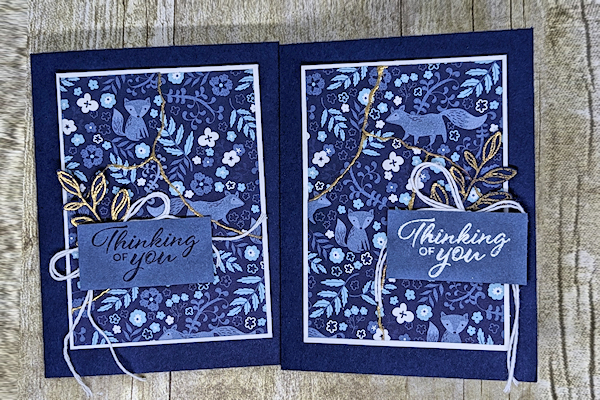
Paper Kintsugi
by Beth Rush
Use paper to create a kintsugi effect. Kintsugi is the Japanese art of repairing broken pottery by mending the cracks with gold, silver, or platinum. The piece is thought to be more beautiful because it has been broken.
Supplies
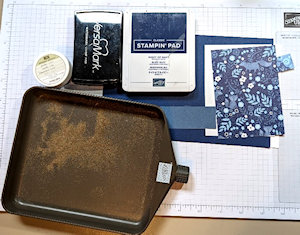
- Patterned paper (Countryside Inn Designer Paper used here)
- Versamark Ink
- Metallic Embossing Powder
- Heat Tool
- Other supplies as needed to complete the project (SU products used here: Night of Navy and Basic White Card Stock, twine, sentiment stamps)
Step-by-Step
Video!
Your Turn
You've seen the tutorial, now you try it! We've got a section of the gallery set aside for Paper Kintsugi. Try this technique, then upload your artwork to the gallery. Show us your creations!
***Please note - Internet Explorer/Edge is not a supported browser, and will not allow you to see the videos. Please use Chrome, Firefox or Safari to view our tutorial videos.
Drywall Tape Techniques
by Dina Kowal
Uses for drywall mesh tape in card making.
Supplies
- Drywall mesh tape
- Substrates of choice (watercolor paper, smooth cardstock, mini canvas used for tutorial)
- Blendable inks, brushes (Distress Oxide inks used here)
- Watercolor paints (QoR watercolors by Golden used here)
- Brush and water
- Stamps (Impression Obsession CL1208 Mother's Love clear set used here)
- Colored pencils
- Sharpener
- Gel plate
- Craft paint
- Brayer
- Tin can or other sturdy cylinder
- Texture medium, palette knife (Liquitex modeling paste used here)
- Other supplies as needed to complete the projects (used here: see notes in gallery entries)
Step-by-Step
Video!
Your Turn
You've seen the tutorial, now you try it! We've got a section of the gallery set aside for Drywall Tape Techniques. Try this technique, then upload your artwork to the gallery. Show us your creations!
***Please note - Internet Explorer/Edge is not a supported browser, and will not allow you to see the videos. Please use Chrome, Firefox or Safari to view our tutorial videos.
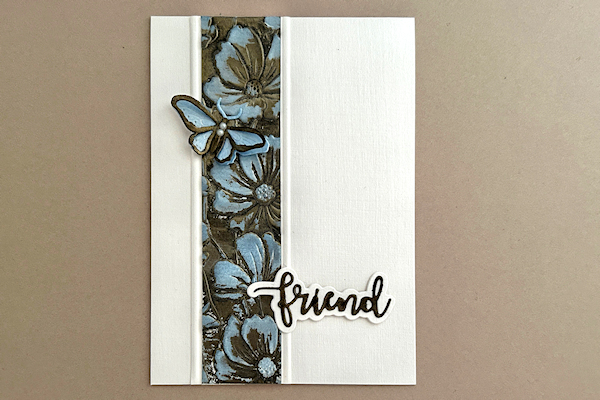
Two Tone Interference
by Chrissie Stokes
Show off the colors of an interference medium by applying it to a black and white base.
Supplies
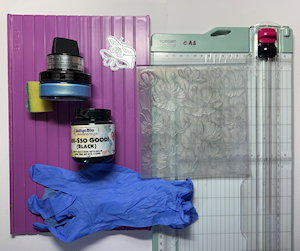
- Cardstock (Silkweave Linen by Syntego used here)
- Embossing folder (3D Embossing folder Poppies by Presscut used here)
- Interference paint or other interference medium (Creative Expressions Cosmic Shimmer Opal Polish - Summer Sky used here)
- Black paint or gesso (IndigoBlu Black GEE-SSO GOOD! used here)
- Gloves (optional)
- Piece of sponge or other applicator
- Other supplies as needed to complete the project (used here: The Greetery Curio: Summer Findings, Crafter's Companion Trimmer & Scoring Board, Optional sentiment dies
Step-by-Step
Video!
Your Turn
You've seen the tutorial, now you try it! We've got a section of the gallery set aside for Two Tone Interference. Try this technique, then upload your artwork to the gallery. Show us your creations!
***Please note - Internet Explorer/Edge is not a supported browser, and will not allow you to see the videos. Please use Chrome, Firefox or Safari to view our tutorial videos.
Emergent Color
by Lydia Fiedler
Learn natural looking blending by coloring the back side of your cardstock.
Supplies

- Dies (Crafty Meraki Canopy Leaf die used here)
- Cardstock (80 lb. neutral cardstock used here)
- Alcohol Markers (OLO Markers used here)
Step-by-Step
Video!
Your Turn
You've seen the tutorial, now you try it! We've got a section of the gallery set aside for Emergent Color. Try this technique, then upload your artwork to the gallery. Show us your creations!
***Please note - Internet Explorer/Edge is not a supported browser, and will not allow you to see the videos. Please use Chrome, Firefox or Safari to view our tutorial videos.
Misted Markers
by Dina Kowal
In this update to the Misting with Markers tutorial, use water and markers with a stamp positioner to create various faux watercolor effects with your stamped image.
Supplies
- Stamp positioner with magnets (MISTI used here)
- Water-soluble markers (Karin Promarkers used here)
- Cling or clear stamps (used here: Impression Obsession E20254 Frilly Floral 2 (retired), E13120 Grunge Circles (retired); Stampscapes 140E Cabin)
- Watercolor paper (Fabriano Studio 140# hot press used here)
- Water mister
- Water and paintbrush
- Paper towel
- Other supplies as needed to complete the project (see gallery entries for supply lists)
Step-by-Step
Video!
Your Turn
You've seen the tutorial, now you try it! We've got a section of the gallery set aside for Misted Markers. Try this technique, then upload your artwork to the gallery. Show us your creations!
***Please note - Internet Explorer/Edge is not a supported browser, and will not allow you to see the videos. Please use Chrome, Firefox or Safari to view our tutorial videos.
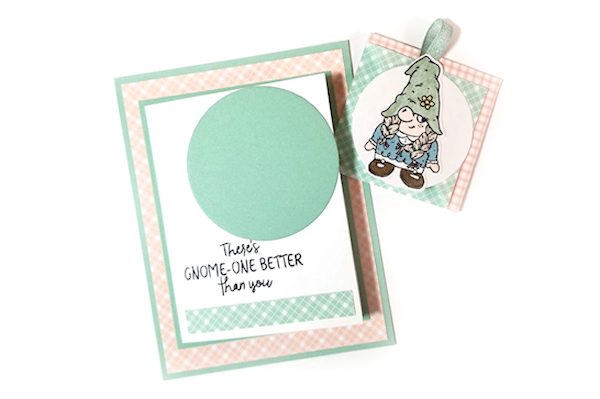
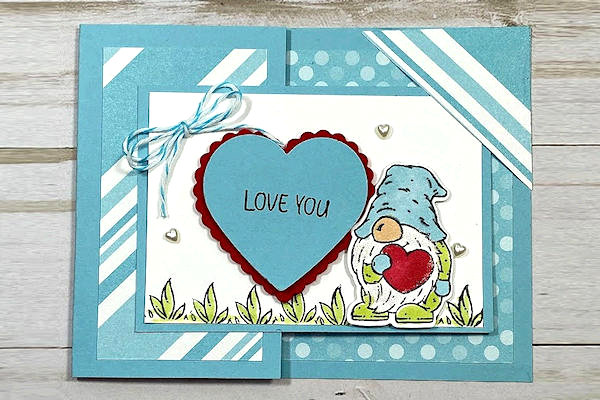
Corner Bookmark Card
by Twila Davis
This card features a removable corner bookmark as a keepsake.
Supplies

- Cardstock (Stampin’ Up!® Mint, Macaron, Basic White cardstock used here)
- Coordinating double-sided paper (SU Country Gingham Designer Series Paper used here)
- Paper trimmer w/ scoring blade
- Adhesive (Stampin’ Seal used here)
- Circle dies or punches (SU Layering Circle Dies used here)
- Other supplies as needed to complete the project (SU supplies used here: Friendly Gnomes Stamp Set, Gnome Dies, Clear Blocks, Tuxedo Black Memento Ink, Stampin’ Blends, Mint Macaron Ribbon, Scissors)
Step-by-Step
Video!
Your Turn
You've seen the tutorial, now you try it! We've got a section of the gallery set aside for Corner Bookmark Card. Try this technique, then upload your artwork to the gallery. Show us your creations!
***Please note - Internet Explorer/Edge is not a supported browser, and will not allow you to see the videos. Please use Chrome, Firefox or Safari to view our tutorial videos.
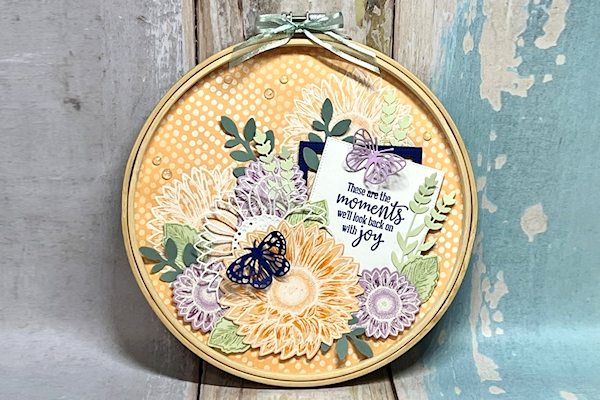
Embroidery Hoop Art
by Debbie Henderson
Create a mini decor piece using die cut shapes in an embroidery hoop frame.
Supplies
- Wooden embroidery hoop, any size (8” used here)
- Pencil
- Scissors
- Patterned papers (Stampin’ Up!® Delicate Desert Designer Series Paper used here)
- Cardstock (SU Starry Sky, Soft Sea Foam, Pale Papaya, Basic White, Soft Succulent, Fresh Freesia used here) Stamped images and die cuts of your choice (SU products used here: Celebrate Sunflowers and Peaceful Moments stamp sets; Brilliant Wings, Sunflowers, and Stylish Shapes Dies; Bough Punch)
- Adhesive (Liquid Glue, Foam Adhesive Strips, Mini Glue Dots, and Stampin’ Dimensionals used here)
- Ribbon (SU Soft Succulent Open Weave Ribbon used here) Other supplies as needed to complete the project (SU products used here: White Embossing Powder, Heat Tool, Opal Rounds)
Step-by-Step
Video!
Your Turn
You've seen the tutorial, now you try it! We've got a section of the gallery set aside for Embroidery Hoop Art. Try this technique, then upload your artwork to the gallery. Show us your creations!
***Please note - Internet Explorer/Edge is not a supported browser, and will not allow you to see the videos. Please use Chrome, Firefox or Safari to view our tutorial videos.
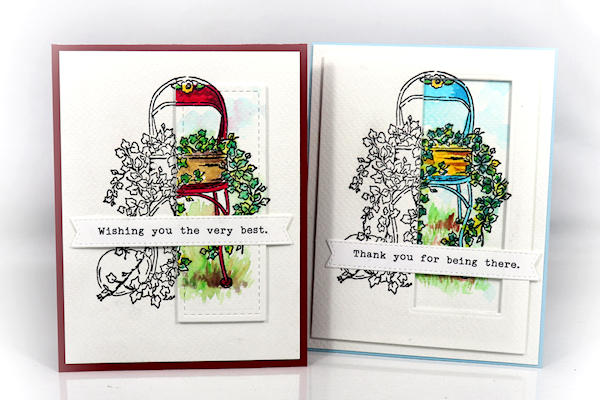
Double Spotlight Stamping
by Dina Kowal
Stamp identical panels, then die cut and layer for two different spotlight techniques.
Supplies
- Cardstock or watercolor paper, cut into 3 identical panels (Fabriano Studio 140# cold press watercolor paper and Prima "Darcelle" paper pad used here)
- Stamp positioner (MISTI used here)
- Stamps (med-lg. image stamp, or a large sentiment - Impression Obsession CL1183 Cottage Ivy Chair clear set and The Stamp Market - Just Checkin In (retired) used here)
- Ink (Versafine and Versafine Clair inks used here)
- Shaped die (Impression Obsession DIE1191 Stitched Slimline Layers and Quickutz Nested Heart used here)
- Coloring medium of your choice (Karin Brushmarkers used here)
- Adhesive craft foam
- Glue (Bearly Art glue used here)
- Die cutting machine
- Other supplies as needed to complete the card (used here: Tonic cardstock, Impression Obsession WP1102 Typewriter Slimline Shorts clear set and DIE1091 Slimline Sentiments Flag die set, Gina Marie Designs matte white enamel dots)
Step-by-Step
Video!
Your Turn
You've seen the tutorial, now you try it! We've got a section of the gallery set aside for Double Spotlight Stamping. Try this technique, then upload your artwork to the gallery. Show us your creations!
***Please note - Internet Explorer/Edge is not a supported browser, and will not allow you to see the videos. Please use Chrome, Firefox or Safari to view our tutorial videos.
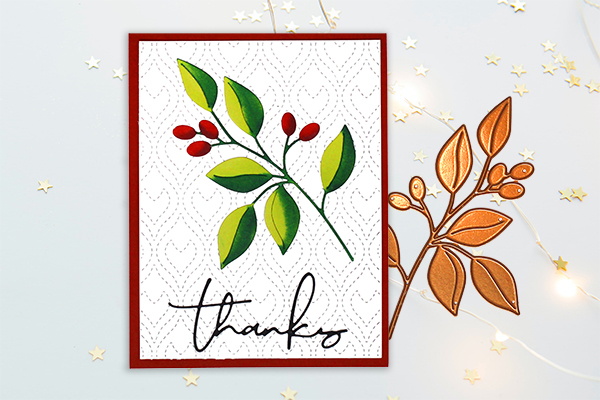
Quick Layered Gel Prints
by Ardyth Percy-Robb
Learn some time-saving tips for layering patterned stencils. For more instruction on how to get started with gel printing, check out our tutorial HERE!
Supplies
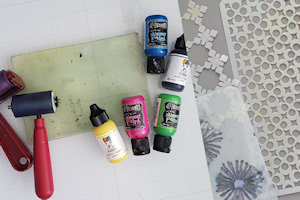
- Gel plate
- Stencils with different size openings (stencils from A Colorful Life Designs used here, listed in steps)
- Acrylic paints (Dylusions Shimmer Paints and Dina Wakley Media Acrylic Paint used here)
- Brayer
- Cardstock or other compatible paper (Neenah Index used here)
- Other supplies as needed to complete the project (used here: SugarPea Designs Thanks word die, Concord & 9th Say Thanks die, Mystic Topaz gems from Crafty Meraki)
Step-by-Step
Video!
Your Turn
You've seen the tutorial, now you try it! We've got a section of the gallery set aside for Quick Layered Gel Prints. Try this technique, then upload your artwork to the gallery. Show us your creations!
***Please note - Internet Explorer/Edge is not a supported browser, and will not allow you to see the videos. Please use Chrome, Firefox or Safari to view our tutorial videos.
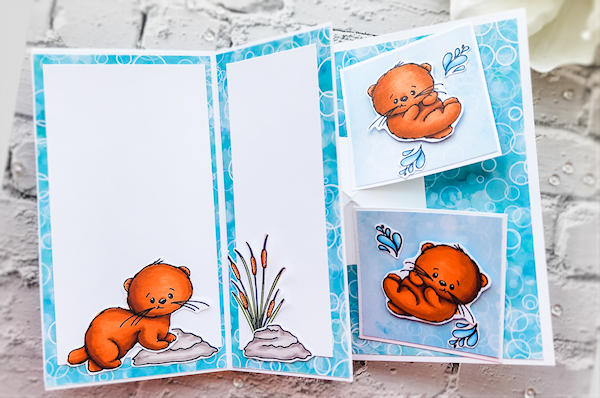
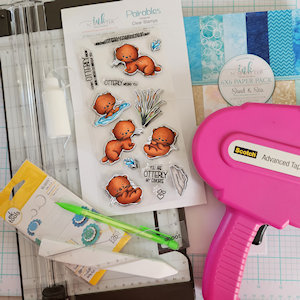
Double Pop-Up Card
by Cristena Bagne
Open this card for the surprise of two pop-up elements.
Supplies
- Cardstock and coordinating papers (white cardstock and Ink n’ Splatter Patterned Paper Sand and Sea used here)
- Ruler and pencil
- Scoring tool
- Bone folder
- Scissors
- Adhesives (tape runner and mono adhesive used here)
- Other supplies as needed to complete the project (used here: foam tape, Copic markers, Ink n’ Splatter Otterly Love clear stamp set)
Step-by-Step
Video!
Your Turn
You've seen the tutorial, now you try it! We've got a section of the gallery set aside for Double Pop-Up Card. Try this technique, then upload your artwork to the gallery. Show us your creations!
***Please note - Internet Explorer/Edge is not a supported browser, and will not allow you to see the videos. Please use Chrome, Firefox or Safari to view our tutorial videos.
Mini Mixed Media Tiles
by Chrissie Stokes
Embellish masked tiles with a variety of products.
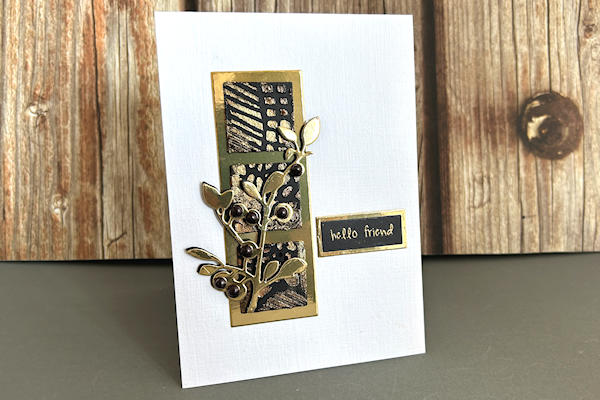
Supplies
- Cardstock (black and gold card, White Silkweave linen cardstock 250 gsm used here)
- Mylar sheet
- Square or other shape dies (Sizzix Triple Square die set 659647 used here)
- Temporary adhesive (Sticky Mat and Crafter’s Companion Stick & Spray Repositionable Adhesive used here)
- Stencil or mask (Lavinia Stamps Leaf Mask ST026 used here)
- Heavy bodied gel medium or texture medium (Indigo Blu Super Thick Slap It On used here)
- Palette knife
- Pigment powders and applicator (Indigo Blu Luscious Pigment Powder in Lime Spritzer & soft brush used here)
- Other mediums (Pretty Gets Gritty Pretty Metallic Spray (Bronze) used here)
- Other supplies as needed to complete the project (used here: Sizzix Foliage Die 664581 B, Flat backed self-adhesive pearls + Black permanent marker, Sentiment stamp, Versamark, Gold Embossing Powder, Sentiment panel dies, Low Tack Tape)
Step-by-Step
Video!
Your Turn
You've seen the tutorial, now you try it! We've got a section of the gallery set aside for Mini Mixed Media Tiles. Try this technique, then upload your artwork to the gallery. Show us your creations!
***Please note - Internet Explorer/Edge is not a supported browser, and will not allow you to see the videos. Please use Chrome, Firefox or Safari to view our tutorial videos.
Corner Tuck Card
by Dee Slater
Use a corner element to hold this fun-fold card closed.
Supplies
- Cardstock (Stampin' Up!® Dandy Designs Designer Series Paper, Balmy Blue, Basic White, and Real Red Cardstock used here)
- Paper trimmer
- Scoring tool and bone folder
- Adhesive (Tombow Multipurpose Liquid Glue used here)
- Other supplies as needed to complete the project (SU supplies used here: Friendly Gnomes Photopolymer Stamp Set, Tuxedo Black Memento Ink, Stampin' Blends, Balmy Blue Classic Stampin' Pad, Stampin' Dimensionals, Heart Punch Pack, Baker's Twine, Heart Pearls, Clear Wink Of Stella Glitter Brush, Gnomes Dies
Step-by-Step
Video!
Your Turn
You've seen the tutorial, now you try it! We've got a section of the gallery set aside for Corner Tuck Card. Try this technique, then upload your artwork to the gallery. Show us your creations!
***Please note - Internet Explorer/Edge is not a supported browser, and will not allow you to see the videos. Please use Chrome, Firefox or Safari to view our tutorial videos.
Layered Stencil Gel Print
by Dina Kowal
Use acrylic paints to print the layers of a stencil set.

Supplies
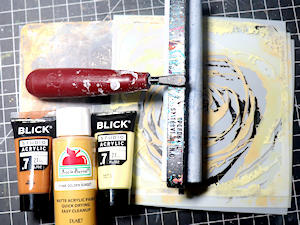
- Gel plate (6” square plate used here)
- Brayer (Speedball 6” brayer used here)
- Acrylic paints (Apple Barrel and Blick brands used here - you'll need a color for each layer of your stencil set)
- Layered stencil set (Impression Obsession STEN016 Layered Rose set used here)
- Cardstock or other surface for gel printing (Accent Opaque cover stock used here)
- Other supplies as needed to complete the project (used here: cardstock for layering, CC458 Cover-a-Card Friendship Script)
Step-by-Step
Video!
Your Turn
You've seen the tutorial, now you try it! We've got a section of the gallery set aside for Layered Stencil Gel Print. Try this technique, then upload your artwork to the gallery. Show us your creations!
***Please note - Internet Explorer/Edge is not a supported browser, and will not allow you to see the videos. Please use Chrome, Firefox or Safari to view our tutorial videos.
Shimmer Sprays
by Lori Craig
Learn to use mica and shimmer sprays to create shine, depth and dimensions on your card projects in this tutorial sponsored by our friends at Tonic Studios.
Supplies
- Watercolor Card or cardstock
- Mica Mist Sprays Vintage Gold shown here
- Shimmer Sprays Wispy Willow, Peacock Plume, and Marine Mist shown here
- Embellishment Mousse Mother-of-Pearl shown here
- Glass Media Mat or craft mat
- heat tool (optional)
- Retractable Craft Pick
- paper trimmer
- stamps and dies (Clocks and Cogs Kit from Tonic Studios used here)
- optional embellishment kit (Clocks and Cogs Add-ons from Tonic Studios used here)
- additional stamp and die options (Wildflower Wonderland or (Country Jugs)
Step-by-Step
Video!
Your Turn
You've seen the tutorial, now you try it! We've got a section of the gallery set aside for Shimmer Sprays. Try this technique, then upload your artwork to the gallery. Show us your creations!
***Please note - Internet Explorer/Edge is not a supported browser, and will not allow you to see the videos. Please use Chrome, Firefox or Safari to view our tutorial videos.
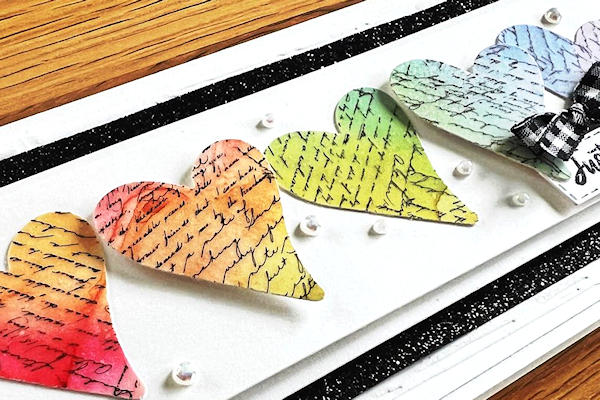
Misted Marker Vellum
by Cindy Coutts
Color and mist alcohol ink on vellum for a softened translucent effect.
Supplies
- Cardstock (Stampin’ Up!® cardstocks used here in Basic White Regular and Basic White Thick)
- Plain or printed vellum (SU Black Scripty Vellum Paper used here)
- Adhesive sheet
- Alcohol markers (SU Stampin’ Blends Markers in Sweet Sorbet Dark, Pumpkin Pie Dark, Daffodil Delight Dark, Granny Apple Green Dark, Tahitian Tide Dark, Highland Heather Dark)
- Spritz bottle
- Household isopropyl alcohol
- Dies or punches (SU Country Bouquet Punch used here)
- Other supplies as needed to complete the project (SU products used here: Iridescent Pearls Basic Jewels, Black and White Gingham Ribbon, Black Glimmer paper, Black Scripty Country Bouquet Stamp Set; Stitched Rectangles Die-Cuts; Stripes Embossing Folder, Die-Cutting Machine, Tear & Tape, Tombow Multipurpose Liquid Glue, Mini Glue Dots, Paper Trimmer, Scoring Tool, Scissors)
Step-by-Step
Video!
Your Turn
You've seen the tutorial, now you try it! We've got a section of the gallery set aside for Misted Marker Vellum. Try this technique, then upload your artwork to the gallery. Show us your creations!
***Please note - Internet Explorer/Edge is not a supported browser, and will not allow you to see the videos. Please use Chrome, Firefox or Safari to view our tutorial videos.
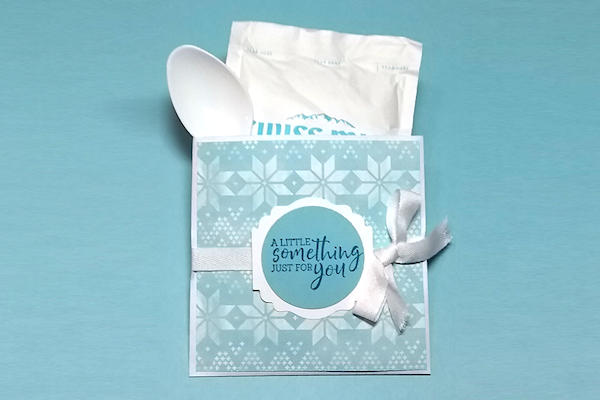
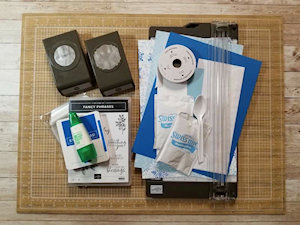
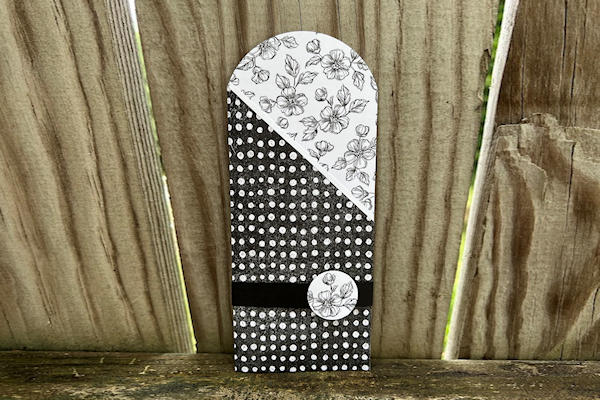
Envelope Gift Pocket
by Twila Davis
Cut pouches from a sealed business envelope to create this gift or treat holder.
Supplies
- Business envelope
- Paper trimmer
- Cardstock (Stampin' Up!® Pacific Point, Bashful Blue and Basic White used here)
- Adhesive of your choice (Tombow Liquid Glue used here)
- Patterned paper (SU Story Book Gnomes used here)
- Cello bag
- Filler items (small sachets and flat items, hot cocoa packet and plastic spoon used here)
- Other supplies as needed to complete the project (SU products used here: Pacific Point Ink, Fancy Phrases stamp set, Label Me Lovely Punch, 1 3/4" Circle Punch, White Classic Weave Ribbon)
Step-by-Step
Video!
Your Turn
You've seen the tutorial, now you try it! We've got a section of the gallery set aside for Envelope Gift Pocket. Try this technique, then upload your artwork to the gallery. Show us your creations!
***Please note - Internet Explorer/Edge is not a supported browser, and will not allow you to see the videos. Please use Chrome, Firefox or Safari to view our tutorial videos.
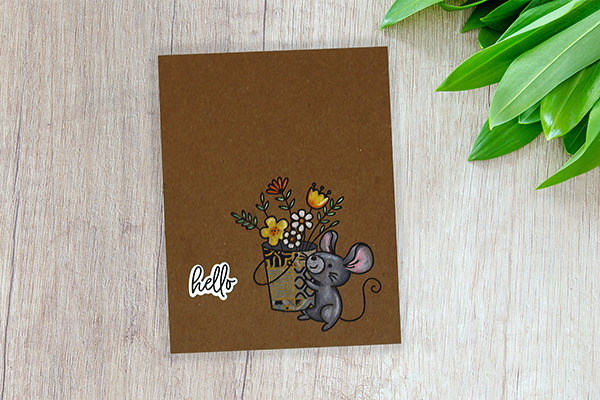
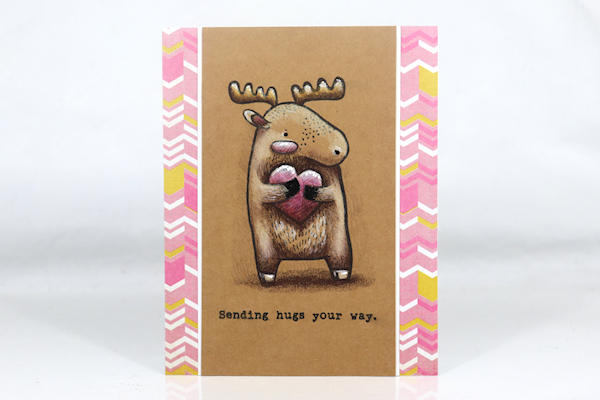
Kraft Pencil Coloring
by Dina Kowal
Learn tips for using colored pencils on kraft paper.
Supplies
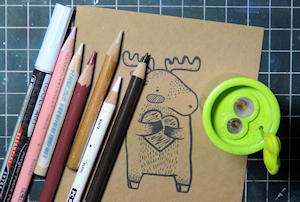
- Colored pencils (Prismacolors work best because of their opacity - light, medium, and dark for each color area, or highlight and shadows if using the kraft color base as the medium tone)
- Colorless blender pencil (optional, Prismacolor brand used here)
- Kraft cardstock (NOTE: kraft is a type of paper, not a color - 300gsm Brown Kraft Cardstock used here)
- Image to color (digital image used here: Folk Animals set from LePetiteMarket, Etsy)
- Acrylic paint pens (optional - black and white Tooli-Art fine pens used here)
- Pencil sharpener (Kum 2-hole sharpener used here)
Step-by-Step
Video!
Your Turn
You've seen the tutorial, now you try it! We've got a section of the gallery set aside for Kraft Pencil Coloring. Try this technique, then upload your artwork to the gallery. Show us your creations!
***Please note - Internet Explorer/Edge is not a supported browser, and will not allow you to see the videos. Please use Chrome, Firefox or Safari to view our tutorial videos.
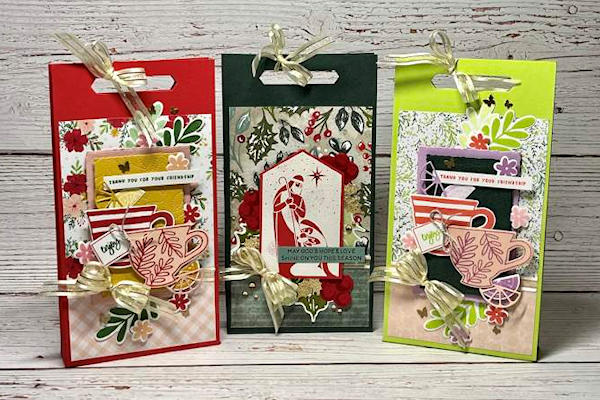
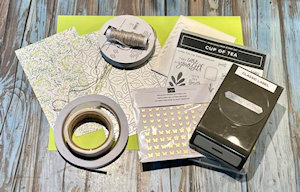
Skinny Gift Bag
by Debbie Henderson
Use a single sheet of cardstock as a base for this slim gift presentation.
Supplies
- Cardstock (Stampin’ Up!® cardstocks used here)
- Coordinating papers (Tea Boutique Designer Paper and additional coordinating colored cardstock scraps used here)
- Adhesives (SU Tear & Tape, Tombow Multipurpose Liquid Glue, Mini Glue Dots used here)
- Paper Trimmer
- Scoring Tool
- Scissors
- Punch for handle (SU Classic Label Punch used here)
- Embellishments of your choice
- Other supplies as needed to complete the project (SU products used here: Deckled Rectangles Dies, Stitched Greenery Die, Stampin’ Dimensionals; Poppy Parade, Parakeet Party, Fresh Freesia, Petal Pink inks; Cup Of Tea stamp set and Tea Cup Dies, Linen Thread, Gold & Vanilla Satin Edged Ribbon)
Step-by-Step
Video!
Your Turn
You've seen the tutorial, now you try it! We've got a section of the gallery set aside for Skinny Gift Bag. Try this technique, then upload your artwork to the gallery. Show us your creations!
***Please note - Internet Explorer/Edge is not a supported browser, and will not allow you to see the videos. Please use Chrome, Firefox or Safari to view our tutorial videos.
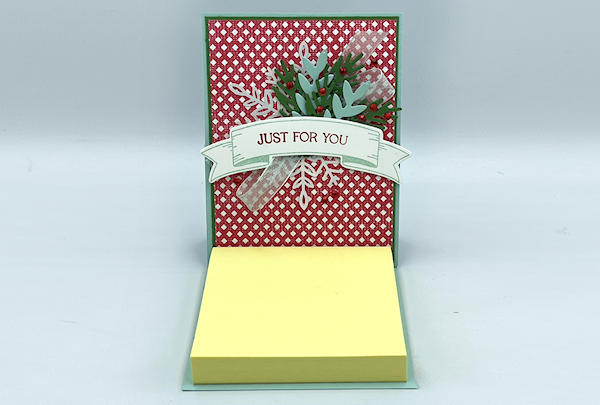
Easel Note Holder
by Mary Deatherage
Make a decorative cover for a sticky note pad.
Supplies
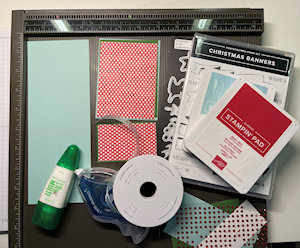
- Cardstock (Stampin' Up!® Pool Party (base & easel), Garden Green (mats) and Basic White (sentiment) cardstock used here)
- Patterned paper (SU Sweetest Christmas DSP used here)
- Score Tool
- Bone Folder
- Adhesive (SU Stampin’ Seal)
- Liquid Glue
- 3" sticky notes
- Other supplies as needed to complete the project (SU products used here: Christmas Banners bundle, Pool Party and Real Red ink, Red Rhinestones, Pool Party 3/8” Sheer Ribbon, Wonderful Snowflake embellishment)
Step-by-Step
Video!
Your Turn
You've seen the tutorial, now you try it! We've got a section of the gallery set aside for Easel Note Holder. Try this technique, then upload your artwork to the gallery. Show us your creations!
***Please note - Internet Explorer/Edge is not a supported browser, and will not allow you to see the videos. Please use Chrome, Firefox or Safari to view our tutorial videos.
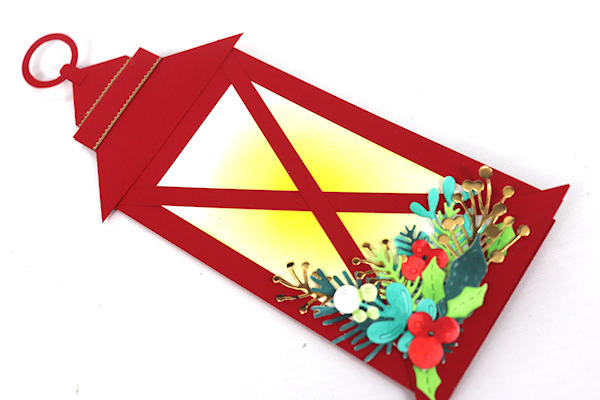
Slimline Lantern Card
by Dina Kowal
Use simple shapes to create a classic lantern shaped card.
Supplies
- Cardstock (red Neenah cardstock and white Accent cover used here)
- Trimmer or craft knife/rotary cutter and ruler
- Circle dies
- Rectangle or oval die (optional)
- Scoring tool
- Liquid glue
- Grid mat (optional but helpful)
- Detail scissors
- Die cuts or other embellishments (Impression Obsession DIE907 Winter Foliage and gold edge stickers used here)
- Other supplies as needed to complete the project (used here: watercolor paper, Copic markers, gold foil paper)
Step-by-Step
Video!
Your Turn
You've seen the tutorial, now you try it! We've got a section of the gallery set aside for Slimline Lantern Card. Try this technique, then upload your artwork to the gallery. Show us your creations!
***Please note - Internet Explorer/Edge is not a supported browser, and will not allow you to see the videos. Please use Chrome, Firefox or Safari to view our tutorial videos.
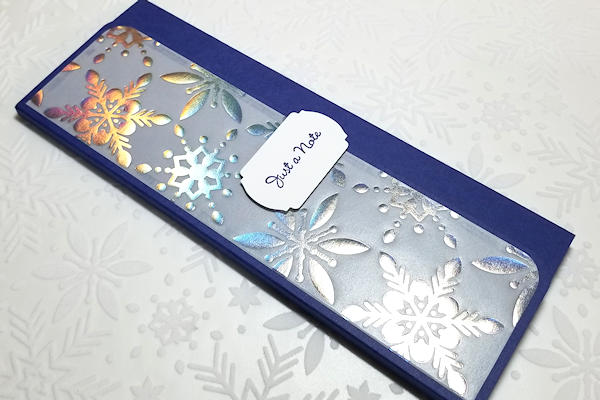
Skinny Notepad Portfolio
by Twila Davis
Make a holder for a slimline notepad.
Supplies
- Cardstock (Stampin' Up!® Starry Sky, Basic White, Snowflake Specialty Vellum used here)
- Adhesive (Double Stick Tape or Liquid Glue)
- Paper Trimmer with Score Blade
- 8 1/4" x 3" notepad
- Small Calendar (opt.)
- Mini Adhesive Velcro Dots
- Other supplies as needed to complete the project (SU products used here: Starry Sky Ink, Go To Greetings stamp set, Label Me Fancy Punch, Detailed Trio Punch, Dimensionals)
Step-by-Step
Video!
Your Turn
You've seen the tutorial, now you try it! We've got a section of the gallery set aside for Skinny Notepad Portfolio. Try this technique, then upload your artwork to the gallery. Show us your creations!
***Please note - Internet Explorer/Edge is not a supported browser, and will not allow you to see the videos. Please use Chrome, Firefox or Safari to view our tutorial videos.
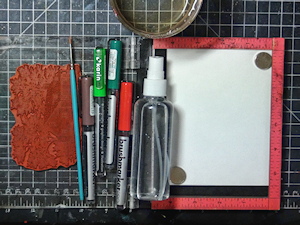
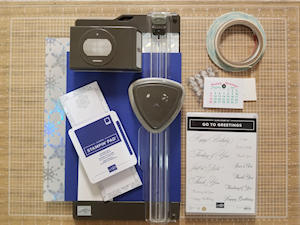
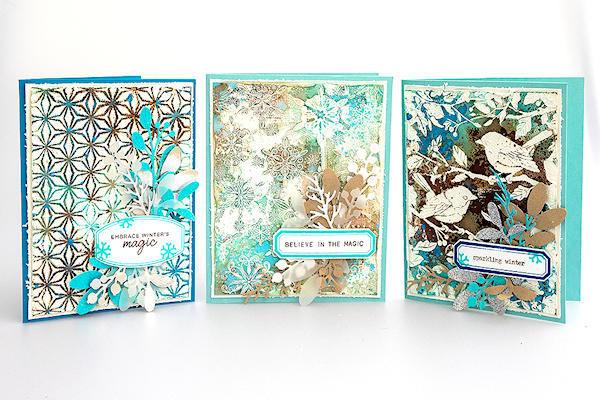
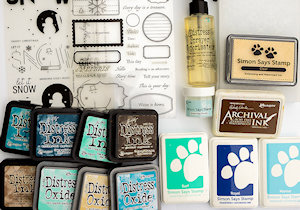
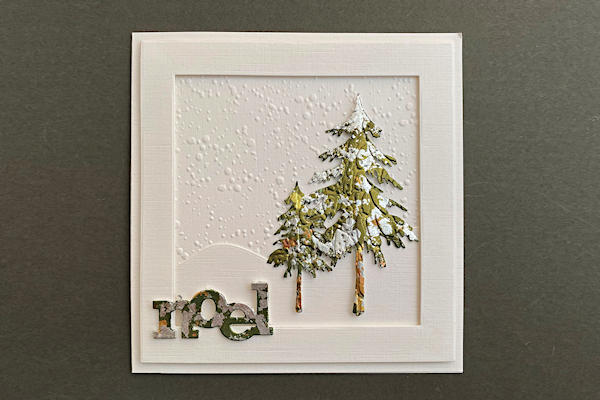
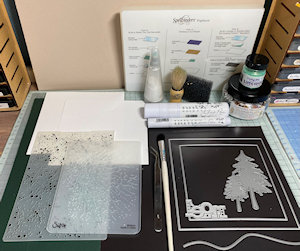
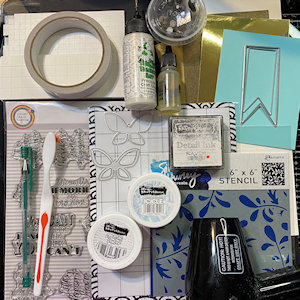
Debossed Inky Resist
by Anna-Karin Evaldsson
Combine debossing with heat embossing for a different background each time.
Supplies
- Watercolor paper (Canson Montval Cold Pressed Watercolor Paper used here)
- Embossing folder (Simon Says Stamp Scandinavian Christmas used here)
- Embossing powder - clear or white (Simon Says Stamp White Detail Powder used here)
- Embossing ink (Simon Says Stamp Clear Embossing and Watermark Ink used here)
- Heat tool
- Die cutting machine
- Non-stick craft sheet
- Distress and Distress Oxide inks (or other water-based inks - Ranger Tim Holtz Distress Ink: Salvaged Patina, Mermaid Lagoon, Uncharted Mariner, Frayed Burlap, Ground Espresso; Ranger Tim Holtz Distress Oxide Ink: Antique Linen, Salvaged Patina, Mermaid Lagoon used here)
- Other supplies as needed to complete the project (used for samples here: Stamps - Simon Says Stamp: Mixed Labels, Let It Snow; Stamper’s Anonymous Tim Holtz Tiny Text Christmas. Ink - Simon Says Stamp Pawsitively Saturated Ink: Surf, Marine, Royal; Ranger Archival Ink: Potting Soil. Embossing folders: Simon Says Stamp: Filigree Snowflakes, Kaleidoscope, Lumen, Friendly Birds; Papers: Vellum, Glimmer Cardstock, Aqua and Silver Glitter Cardstock, Sea Glass Cardstock, Island Blue Cardstock, White Cardstock; Neenah: Solar White, Desert Storm. Die – Simon Says Stamp: Mixed Labels, Budding Branches, Berry Stems; Foam tape)
Step-by-Step
Video!
Your Turn
You've seen the tutorial, now you try it! We've got a section of the gallery set aside for Debossed Inky Resist. Try this technique, then upload your artwork to the gallery. Show us your creations!
***Please note - Internet Explorer/Edge is not a supported browser, and will not allow you to see the videos. Please use Chrome, Firefox or Safari to view our tutorial videos.
Gilded Die Cuts
by Chrissie Stokes
Add shimmer and dimension to your die cuts with gilding flakes and mica powders.
Supplies
- Cardstock (deep green and linen textured 250 gsm from Papermill Direct (a UK-based company) used here)
- Focal dies (Impression Obsession Fir Tree dies used here)
- Gilding/foil flakes (Crafty Notions Variegated Gilding Flakes in Frosted Leaves used here)
- Pigment or mica powders (Indigo Blu Luscious Pigment Powder - Mermaid’s Tail used here, PanPastels or foiling sheets will also work)
- Burnishing sponge or soft cloth (Indigo Blu Scoochie used here)
- Embossing folder (Sizzix texture embossing folder
- Tacky-when-dry glue (Nuvo Glue Pen (Large) used here)
- Tweezers, soft fluffy paintbrush
- Die cutting machine
- Other supplies as needed to complete the project (used here: Foam Tape, Low Tack Tape, Presscut square nesting dies, Hillside die, Sizzix Noel die, Sheena Douglass Snow folder (retired))
Step-by-Step
Video!
Your Turn
You've seen the tutorial, now you try it! We've got a section of the gallery set aside for Gilded Die Cuts. Try this technique, then upload your artwork to the gallery. Show us your creations!
***Please note - Internet Explorer/Edge is not a supported browser, and will not allow you to see the videos. Please use Chrome, Firefox or Safari to view our tutorial videos.
Easy Glue Printing
by Kelly Santi
Create an abstract background with a cardboard tool.

Supplies
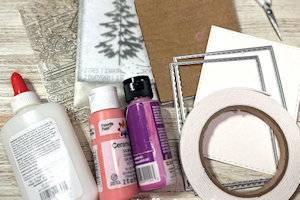
- Heavy weight cardstock (#110 or stronger)
- Acrylic craft paints
- White school glue
- Corrugated cardboard
- Disposable plate for a palette
- Brush/stir stick for mixing
- Other supplies as needed to complete the project (used here: rectangle dies, foam adhesive tape or tape runner, any image/stamped sentiment to add as a focal point)
- Optional for variation: heat gun, shaker card elements such as acetate, shaker filler
Step-by-Step
Video!
Your Turn
You've seen the tutorial, now you try it! We've got a section of the gallery set aside for Easy Glue Printing. Try this technique, then upload your artwork to the gallery. Show us your creations!
***Please note - Internet Explorer/Edge is not a supported browser, and will not allow you to see the videos. Please use Chrome, Firefox or Safari to view our tutorial videos.
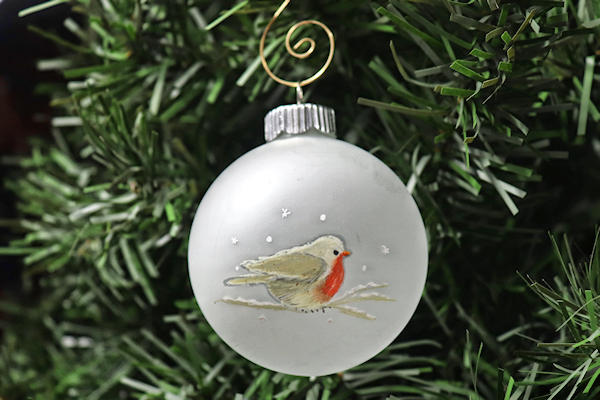
Stamping Frosted Glass
by Dina Kowal
Add a stamped outline image to a frosted glass ornament. Color it in if you like!
Supplies
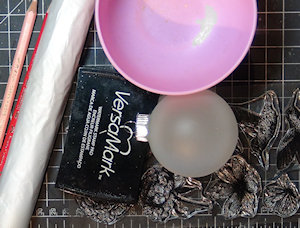
- Frosted glass ornament (Hobby Lobby brand used here, 2-1/2" diameter)
- Glad® Press'n Seal® Food Wrap
- Clear stamp, 2” or less (Impression Obsession WP1057 Winter Branch used here)
- Versamark embossing ink
- Colored pencils (Prismacolor used here)
- Acrylic paint pens (Tooli-Art Extra Fine Paint Pens used here)
- Washi tape roll for stability
Step-by-Step
Video!
Your Turn
You've seen the tutorial, now you try it! We've got a section of the gallery set aside for Stamping Frosted Glass. Try this technique, then upload your artwork to the gallery. Show us your creations!
***Please note - Internet Explorer/Edge is not a supported browser, and will not allow you to see the videos. Please use Chrome, Firefox or Safari to view our tutorial videos.
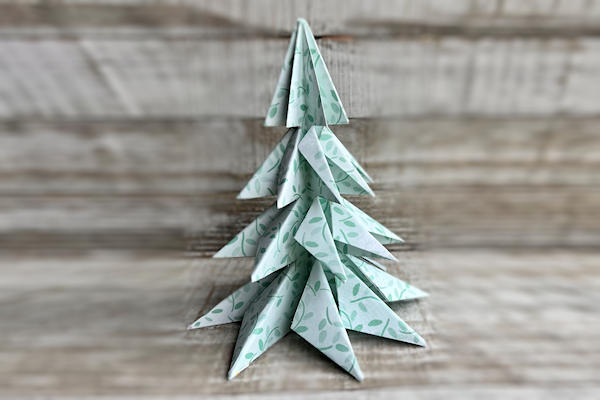
Kirigami Christmas Tree
by Betty Traciak
Fold and cut a sheet of scrapbook paper into a lovely pine tree.
Supplies
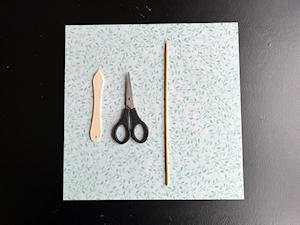
- 12" x 12" scrapbook paper(Stampin' Up!® Design a Daydream Designer Series Paper used here)
- Bone folder
- Scissors
- Wooden skewer(optional)
Step-by-Step
Video!
Your Turn
You've seen the tutorial, now you try it! We've got a section of the gallery set aside for Kirigami Christmas Tree. Try this technique, then upload your artwork to the gallery. Show us your creations!
***Please note - Internet Explorer/Edge is not a supported browser, and will not allow you to see the videos. Please use Chrome, Firefox or Safari to view our tutorial videos.
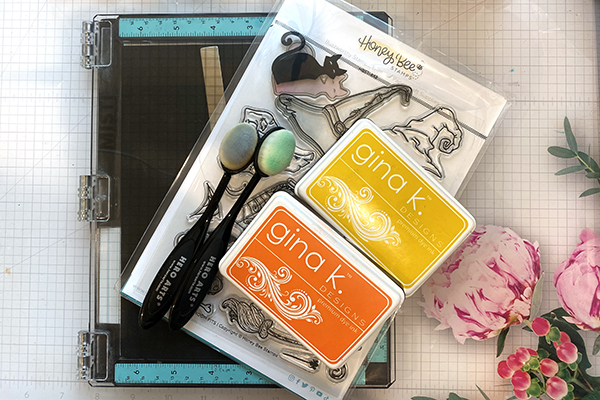
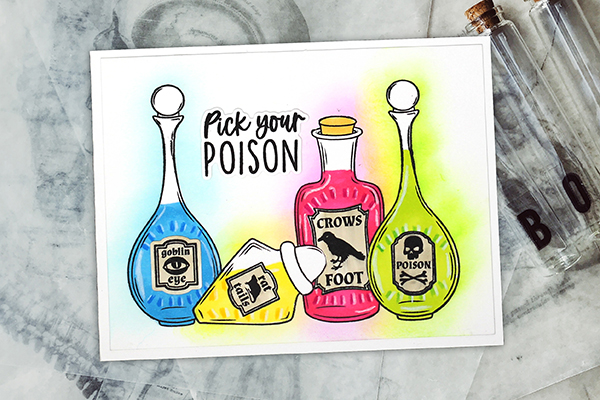
Cut Glass Effect
by Lydia Fiedler
Take simple bottle shapes and turn them into cut glass with easy coloring.
Supplies
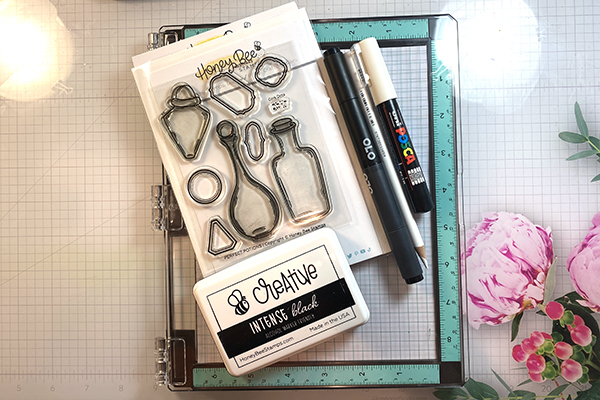
- Simple bottle shape stamp (Honey Bee Perfect Potions used here)
- Hybrid/Alcohol friendly ink
- Alcohol Markers (OLO Markers used here)
- Colored Pencils (Holbein colored pencils used here)
- White Gel Pen or White Paint Pen - optional
Step-by-Step
Video!
Your Turn
You've seen the tutorial, now you try it! We've got a section of the gallery set aside for Cut Glass Effect. Try this technique, then upload your artwork to the gallery. Show us your creations!
***Please note - Internet Explorer/Edge is not a supported browser, and will not allow you to see the videos. Please use Chrome, Firefox or Safari to view our tutorial videos.
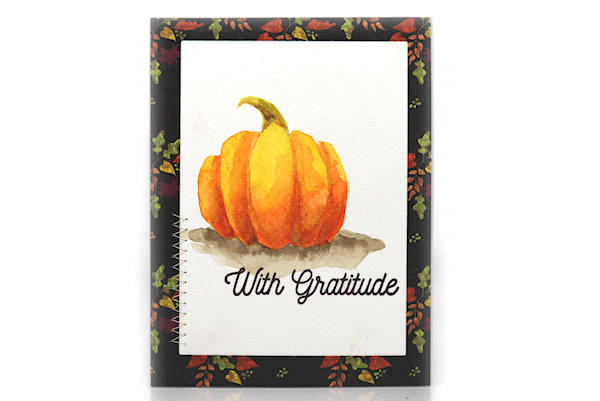
Watercolor Pumpkins
by Dina Kowal
Watercolor a whole patch of pumpkins!
Supplies
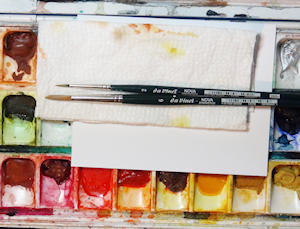
- Watercolor paper (Fabriano Studio 140# cold press paper used here)
- Watercolor brushes (DaVinci Nova #6 and #2 round brushes used here)
- Watercolor paint (QoR watercolors used here: Indian Yellow, Transparent Pyrrol Orange, Green Gold, Quinacrodone Gold Deep, Raw Umber Natural)
- Water
- Paper towel
- Other supplies as needed to complete the project (used here: Impression Obsession MC1163 Happy Thanksgiving clear stamp set and Fall Floral paper pack, Versafine Clair ink, Spellbinders A2 rectangle die, sewing machine)
Step-by-Step
Video!
Your Turn
You've seen the tutorial, now you try it! We've got a section of the gallery set aside for Watercolor Pumpkins. Try this technique, then upload your artwork to the gallery. Show us your creations!
***Please note - Internet Explorer/Edge is not a supported browser, and will not allow you to see the videos. Please use Chrome, Firefox or Safari to view our tutorial videos.
Quilled Pumpkin Card
by Debbie Henderson
Make a focal pumpkin with rolled paper strips.

Supplies

- Cardstock (Stampin' Up!® Pumpkin Pie, Soft Sea Foam, Shaded Spruce, Basic White cardstock used here)
- Half-inch roller (SU Water Painter used here, a dowel, pen, or other handled tool would also work)
- Adhesive (glue dots and liquid glue used here)
- Other supplies as needed to complete the project (SU products used here: Celebrate Sunflowers Bundle and Painted Pheasant stamp sets, Soft Sea Foam ink, Butterfly Kisses DSP, Linen Thread, Evening Evergreen Windowpane Check Ribbon, Deckled Rectangles Dies, Sunflowers Dies, Stampin’ Dimensionals)
Step-by-Step
Video!
Your Turn
You've seen the tutorial, now you try it! We've got a section of the gallery set aside for Quilled Pumpkin Card. Try this technique, then upload your artwork to the gallery. Show us your creations!
***Please note - Internet Explorer/Edge is not a supported browser, and will not allow you to see the videos. Please use Chrome, Firefox or Safari to view our tutorial videos.
Double Door Pop-Up Card
by Vy Tran
Make a card with doors that open when the top is lifted. This card is decorated to create a barn scene.

Supplies
- Cardstock (Stampin’ Up!® Basic White, Garden Green, Parakeet Party, Real Red, Smoky Slate, Tahitian Tide cardstock used here)
- Stamps (SU This Birthday Piggy and Friends Are Like Seashells stamp sets used here)
- Dies (SU Playful Piggy die set used here)
- Wood grain stamp or embossing folder (SU Timber embossing folder used here)
- Ink (Memento Tuxedo Black and SU Cajun Craze, Pumpkin Pie, Smoky Slate inks used here)
- Adhesive (SU Stampin’ Seal, Tombow Multipurpose Liquid Glue used here)
- Die cutting machine
- Trimmer
- Scissors
- Scoring tool/bone folder
- Other supplies as needed to complete the project (SU Blends Markers, sponge dauber used here)
Step-by-Step
Video!
Your Turn
You've seen the tutorial, now you try it! We've got a section of the gallery set aside for Double Door Pop-Up Card. Try this technique, then upload your artwork to the gallery. Show us your creations!
***Please note - Internet Explorer/Edge is not a supported browser, and will not allow you to see the videos. Please use Chrome, Firefox or Safari to view our tutorial videos.
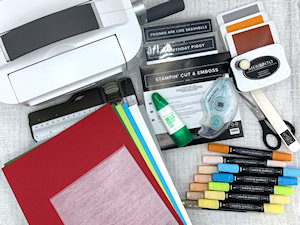
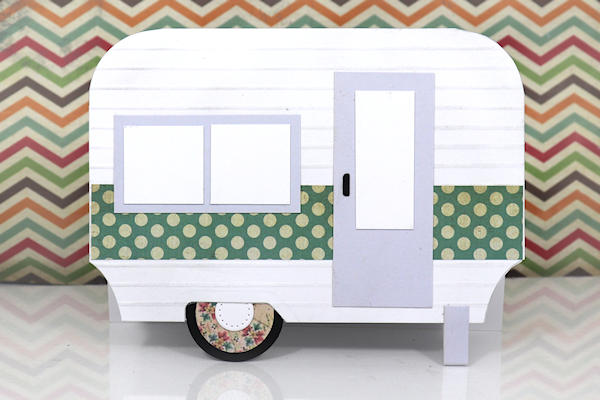
Vintage Camper Card
by Dina Kowal
Use simple shapes to create an adorable vintage camper card, inspired by a 1973 Bell Travel Trailer.
Supplies
- Cardstock for base, scraps for other pieces
- Circle dies for wheel and corner template (1/2", 1", 1 1/4" and 1 1/2" sizes used here, various brands)
- Other dies for cutaways and handle - use what you have! (Quickutz oval, Sizzix tag, Whimsy Stamps letter B die used here)
- Trimmer
- Scissors
- Pencil
- Scoring board and tool
- Adhesive
- Blender brush
- Grey ink
Step-by-Step
Video!
Your Turn
You've seen the tutorial, now you try it! We've got a section of the gallery set aside for Vintage Camper Card. Try this technique, then upload your artwork to the gallery. Show us your creations!
***Please note - Internet Explorer/Edge is not a supported browser, and will not allow you to see the videos. Please use Chrome, Firefox or Safari to view our tutorial videos.
Double Stamped Vellum
by Chrissie Stokes
Stamp on both sides of a vellum sheet for a unique background effect.
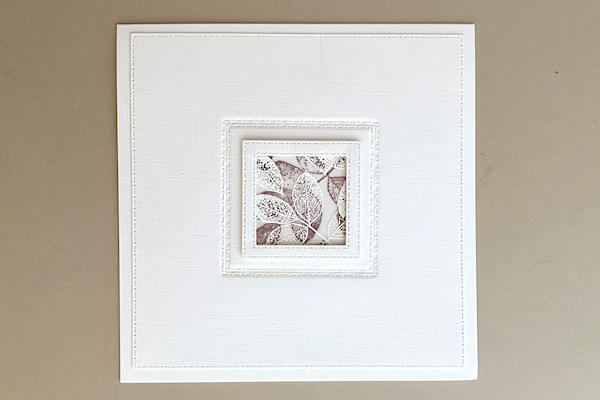
Supplies
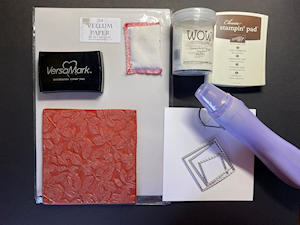
- Vellum sheet
- Background stamp (Impression Obsession Rose Leaves background stamp
- Versamark or other embossing ink
- Anti-static bag
- Heat gun
- Embossing powder (WOW Opaque White embossing powder used here)
- Colored ink (Stampin’ Up!® ink pad in Early Espresso used here)
- Other supplies as needed to complete the card (used here: Linen textured cardstock from Papermill Direct, Presscut double stitched square nesting dies, foam tape)
Step-by-Step
Video!
Your Turn
You've seen the tutorial, now you try it! We've got a section of the gallery set aside for Double Stamped Vellum. Try this technique, then upload your artwork to the gallery. Show us your creations!
***Please note - Internet Explorer/Edge is not a supported browser, and will not allow you to see the videos. Please use Chrome, Firefox or Safari to view our tutorial videos.
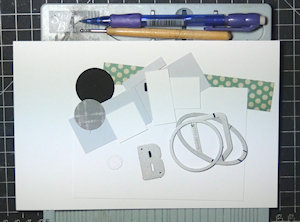
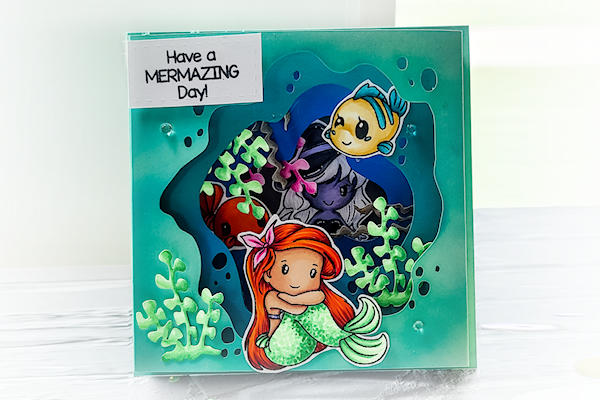
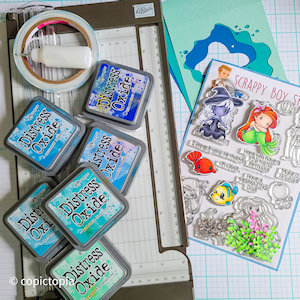
Diorama Full Card
by Cristena Bagne
Make a card with a dimensional diorama on the front. Technique by Irina Blount.
Supplies
- Cardstock (Stampin’ Up!® Pool Party Cardstock with Grey, Teal, and Navy Blue cardstock used here)
- Shape dies of different sizes or Copictopia Cave SVG Cut File
- Stamps (Scrappy Boy Stamps Mermazing Clear Stamp Set used here)
- Adhesive (SU Tear Tape used here)
- Scissors
- Scoring tool/ bone folder
- Decorations of your choice
- Other supplies as needed to complete the project (used here: Copic markers, Distress Oxide Inks, blending brushes, Tweezers, Silhouette cutting machine)
Step-by-Step
Video!
Your Turn
You've seen the tutorial, now you try it! We've got a section of the gallery set aside for Diorama Full Card. Try this technique, then upload your artwork to the gallery. Show us your creations!
***Please note - Internet Explorer/Edge is not a supported browser, and will not allow you to see the videos. Please use Chrome, Firefox or Safari to view our tutorial videos.
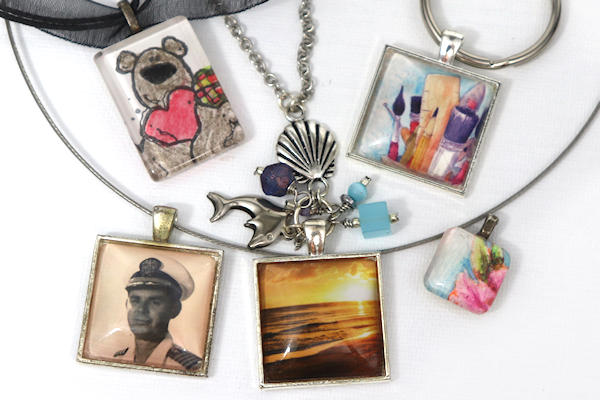
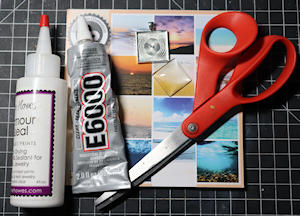
Glass Pendants
by Dina Kowal
Preserve a memory or favorite image behind glass in a beautiful charm.
Supplies
- Image sized to your project (printed image, book page, photo, gel-printed, painted or stamped image - index image from Impression Obsession paper pack used here - please see video for more hints on paper choice)
- Glass cabochon, slide, or flat-backed marble
- Matching metal tray or metal jewelry bail
- PVA glue (white liquid glue – Annie Howe’s Glamour Seal (Etsy) or Bearly Art Glue recommended)
- Jewelry adhesive (E6000) or red liner sheet
- Scissors
- Rubbing alcoholand soft cotton cloth
- Nonstick sheet (label release sheet used here)
Step-by-Step
Video!
Your Turn
You've seen the tutorial, now you try it! We've got a section of the gallery set aside for Glass Pendants. Try this technique, then upload your artwork to the gallery. Show us your creations!
***Please note - Internet Explorer/Edge is not a supported browser, and will not allow you to see the videos. Please use Chrome, Firefox or Safari to view our tutorial videos.
Partial Die Cut Slimline Card
by Betty Traciak
Add a decorative touch to your slimline design.
Supplies
- Cardstock (Stampin’ Up!® Basic White and Basic Black Cardstock used here)
- Scoring tool
- 3 1/2” circle die
- Die cutting machine
- Ruler and pencil
- Scissors or trimmer
- Other supplies as needed to complete the project (SU products used here: Butterfly Brilliance stamp set, Perfectly Penciled Designer Series Paper, Stampin’ Blends Alcohol Markers, Momento Ink Tuxedo Black, washi tape, 1 1/4” Circle Punch)
Step-by-Step
Video!
Your Turn
You've seen the tutorial, now you try it! We've got a section of the gallery set aside for Partial Die Cut Slimline Card. Try this technique, then upload your artwork to the gallery. Show us your creations!
***Please note - Internet Explorer/Edge is not a supported browser, and will not allow you to see the videos. Please use Chrome, Firefox or Safari to view our tutorial videos.
Triangle Trifold Card
by Twila Davis
Create a trifold card with a triangular twist.
Supplies
- Cardstock (Stampin' Up!® Basic White, Parakeet Party, Starry Sky used here)
- Patterned paper (SU Butterfly Kisses 6" x 6" used here)
- Paper trimmer
- Ruler and pencil
- Layering circle dies (or punches)
- Adhesive (Dimensionals and Tombow mono liquid adhesive used here)
- Die cut machine
- Scissors
- Ribbon (White Crinkled Seam Binding Ribbon used here)
- Other supplies as needed to complete the project (SU products used here: Parakeet Party 1/8" Metallic Woven Ribbon, Small Circle Punch, Fun Flower Resin Shapes)
Step-by-Step
Video!
Your Turn
You've seen the tutorial, now you try it! We've got a section of the gallery set aside for Triangle Trifold Card. Try this technique, then upload your artwork to the gallery. Show us your creations!
***Please note - Internet Explorer/Edge is not a supported browser, and will not allow you to see the videos. Please use Chrome, Firefox or Safari to view our tutorial videos.
Upscaled Scrapbook Paper
by Kelly Rose
Transform decorative paper using stamps and coloring tools.
Supplies
- Patterned scrapbooking paper
- Rubber stamps
- Inks, markers, alcohol ink markers in coordinating colors
- Stencils (Stampin’ Up!® decorative masks used here)
- Watercolor pencils
- Blender pen
- Blending brush
- Sponge dauber
- White gesso
- Pencil
- Ruler
- Quality white art eraser
- Other supplies as needed to complete your cards or projects: card stock, die cuts, ribbon, gems, greeting stamps, adhesive
Step-by-Step
Video!
Your Turn
You've seen the tutorial, now you try it! We've got a section of the gallery set aside for Upscaled Scrapbook Paper. Try this technique, then upload your artwork to the gallery. Show us your creations!
***Please note - Internet Explorer/Edge is not a supported browser, and will not allow you to see the videos. Please use Chrome, Firefox or Safari to view our tutorial videos.
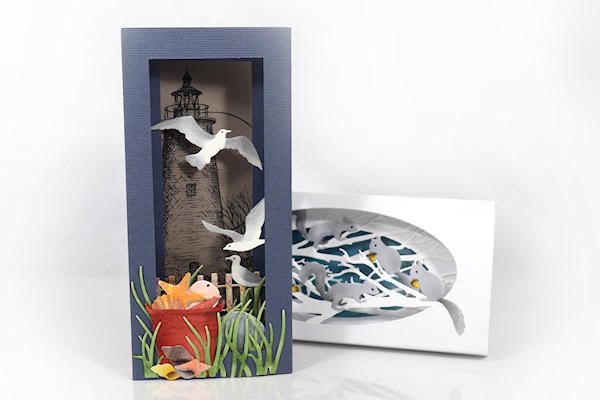
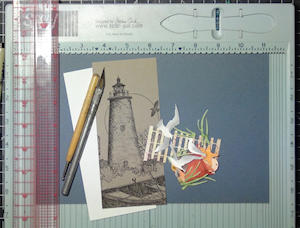
Slimline Diorama Card
by Dina Kowal
Create a tri-fold diorama card with slimline dimensions.
Supplies
- Cardstock
- Scoring tool (Scor-Pal and ball stylus used here)
- Nesting slimline dies or craft knife and ruler (Spellbinders Mega Ovals (retired) as well as Xacto knife and MISTI Cut-Align used here)
- Die cuts and/or embellishments (multiple Impression Obsession dies used here - see gallery entries for details)
- Glue or strong double-sided tape (Bearly Art glue used here)
- Other supplies as needed to complete the project (used here: Copic markers, Impression Obsession F1814-DG Ocracoke Lighthouse digital stamp)
Step-by-Step
Video!
Your Turn
You've seen the tutorial, now you try it! We've got a section of the gallery set aside for Slimline Diorama Card. Try this technique, then upload your artwork to the gallery. Show us your creations!
***Please note - Internet Explorer/Edge is not a supported browser, and will not allow you to see the videos. Please use Chrome, Firefox or Safari to view our tutorial videos.
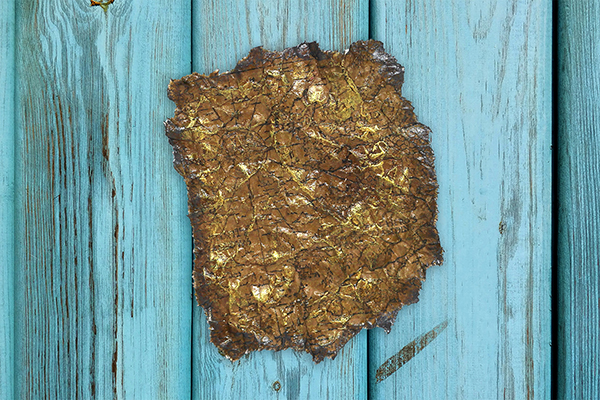
Faux Leather Treasure Map
by Lydia Fiedler
Create pliable, realistic faux leather with paper and a cosmetic product.
Supplies
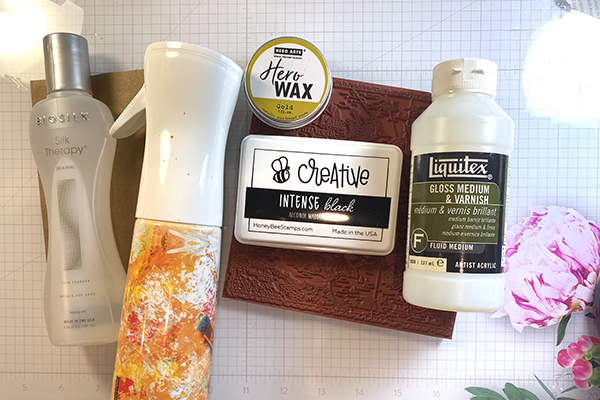
- Brown paper grocery bag
- Water mister with a fine sprayer
- Hair silk or similar
- Waterproof ink
- Map stamp (Hero Arts Antique Hero Map used here)
- Matte or gloss medium
- Gilding Wax or gold ink (Hero Arts Hero Wax Gold used here)
Step-by-Step
Video!
Your Turn
You've seen the tutorial, now you try it! We've got a section of the gallery set aside for Faux Leather Treasure Map. Try this technique, then upload your artwork to the gallery. Show us your creations!
***Please note - Internet Explorer/Edge is not a supported browser, and will not allow you to see the videos. Please use Chrome, Firefox or Safari to view our tutorial videos.
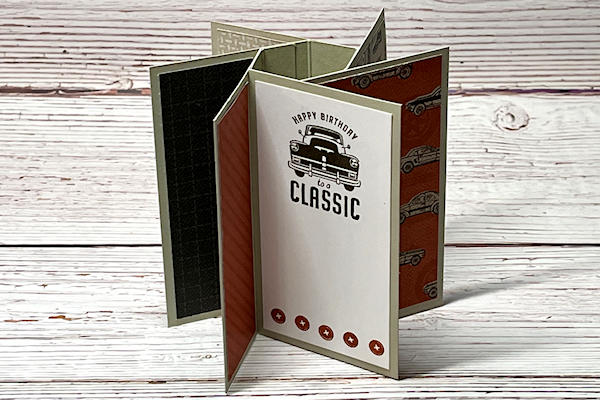
6-Sided Pinwheel Card
by Debbie Henderson
Create a standing flip card with a hexagonal base.
Supplies
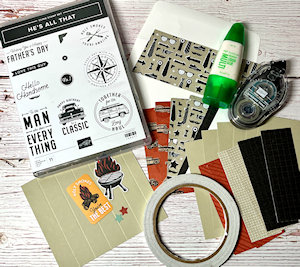
- Cardstock (Stampin’ Up!® Sahara Sand & Basic White Cardstock used here)
- Stamps and embellishments (SU He’s All That stamp set and All That Dies)
- Adhesives (Tape Runner, Tear & Tape, Tombow Multipurpose Liquid Glue)
- Trimmer
- Scoring tool
- Scissors
- Other supplies as needed to complete the project (SU products used here: He’s The Man Specialty Designer Paper, Early Espresso Ink, Cajun Craze Ink)
Step-by-Step
Video!
Your Turn
You've seen the tutorial, now you try it! We've got a section of the gallery set aside for 6-Sided Pinwheel Card. Try this technique, then upload your artwork to the gallery. Show us your creations!
***Please note - Internet Explorer/Edge is not a supported browser, and will not allow you to see the videos. Please use Chrome, Firefox or Safari to view our tutorial videos.
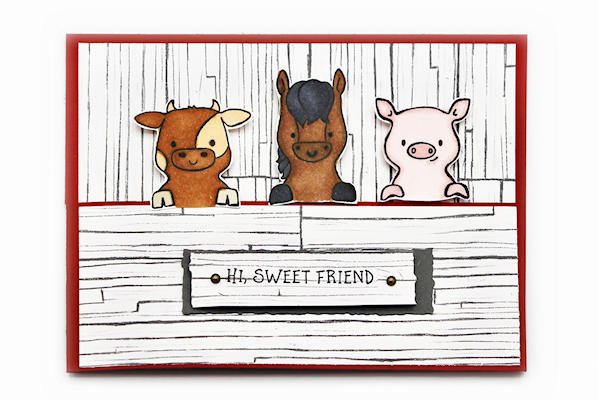
Barn Door Card
by Robyn Rasset
Animals peek out over the front flap of this cute card.
Supplies
- Cardstock (Stampin' Up!® Real Red, Basic White and Basic Gray cardstock used here)
- Patterned paper (SU Heart & Home (Boards Pattern) DSP used here)
- Ink (Memento Tuxedo Black used here)
- Character stamps (SU Peekaboo Farm and Mischievous Mice sets used here)
- Paper trimmer
- Foam tape (SU Dimensionals used here)
- Other supplies as needed to complete the project (SU products used here: Rustic Metallic Dots, Stampin’ Blend Alcohol Markers, Deckle Dies)
Step-by-Step
Video!
Your Turn
You've seen the tutorial, now you try it! We've got a section of the gallery set aside for Barn Door Card. Try this technique, then upload your artwork to the gallery. Show us your creations!
***Please note - Internet Explorer/Edge is not a supported browser, and will not allow you to see the videos. Please use Chrome, Firefox or Safari to view our tutorial videos.
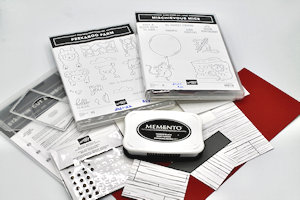
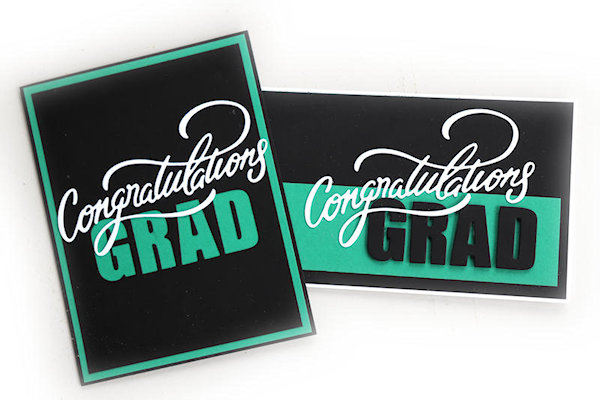
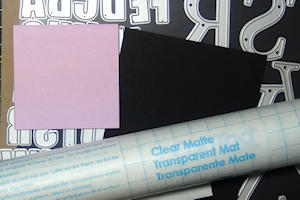
Aligning Letter Dies
by Dina Kowal
Learn tricks for lining up alphabet dies and die cut letters.
Supplies
- Cardstock
- Alphabet die set with individual letters (Whimsy Stamps Bold ABC Die Set used here)
- Sticky notes
- Repositionable shelf liner, masking paper, transfer paper, or Glad® Press'n Seal® Food Wrap (Con-Tact® Self-Adhesive Shelf Liner, Clear Matte used here)
- Ruler or straight edge (Cut-Align by My Sweet Petunia used here)
- Adhesive (Bearly Art glue and 3M foam tape used here)
- Other supplies as needed to complete the project (used here: Impression Obsession DIE682 Congratulations)
Step-by-Step
Video!
Your Turn
You've seen the tutorial, now you try it! We've got a section of the gallery set aside for Aligning Letter Dies. Try this technique, then upload your artwork to the gallery. Show us your creations!
***Please note - Internet Explorer/Edge is not a supported browser, and will not allow you to see the videos. Please use Chrome, Firefox or Safari to view our tutorial videos.
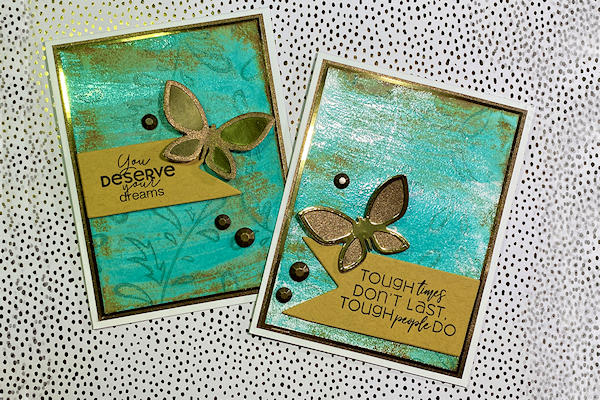
Faux Copper Patina
by Shannon Smith
Use paper crafting products to create the look of weathered metal.
Supplies
- Cardstock in Aqua/Turquoise color range
- Gel pen (Teal shade used here - Gold, Bronze, or Copper could work too)
- Clear embossing powder (Brutus Monroe Icicle used here)
- White embossing powder (Brutus Monroe Alabaster used here)
- Embossing reinker or pad (FSJ used here)
- Toothbrush
- Heat tool (Ranger Heat It used here)
- Stencil (Grand Greenery by Simon Hurley Create/Ranger used here)
- Brown water reactive ink (Grrr by Simon Hurley Create/Ranger used here)
- Spritz bottle
- Other supplies as needed to complete the project (used here: Glass mat, Brutus Monroe Stick & Stamp Mat, Icrafter foam squares, Tissue Tape, Bearly Art Glue, FSJ Gold Foil paper, Metallic brown layering weight cardstock, white A2 card base, A Pocketful of Happiness Butterfly dies, Die’sire Pennant dies)
Step-by-Step
Video!
Your Turn
You've seen the tutorial, now you try it! We've got a section of the gallery set aside for Faux Copper Patina. Try this technique, then upload your artwork to the gallery. Show us your creations!
***Please note - Internet Explorer/Edge is not a supported browser, and will not allow you to see the videos. Please use Chrome, Firefox or Safari to view our tutorial videos.
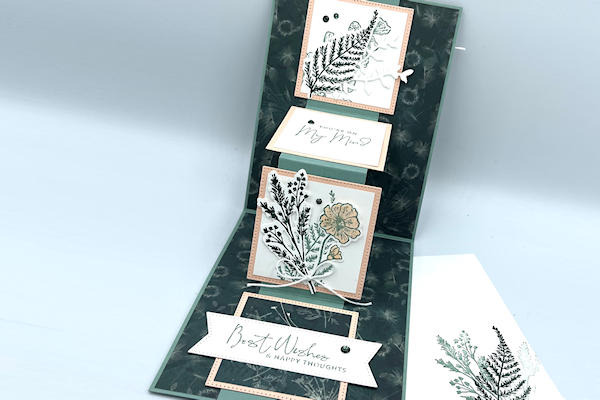
W Fold Card
by Mary Deatherage
Make a unique card with a folded feature.
Supplies
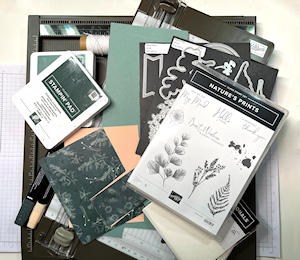
- Cardstock (Stampin' Up!® Soft Succulent, Petal Pink, Basic White cardstock used here)
- Patterned papers (SU Pretty Prints DSP used here)
- 2 1/8" and 2 3/8” square dies (SU Stylish Shapes Die used here)
- Die cutting machine
- Paper trimmer
- Score tool
- Bone folder
- Liquid glue
- Stampin’ Dimensionals
- Other supplies as needed to complete the project (SU products used here: Natural Prints die set, Stylish Shapes 1 3/4” wide circle die, Stampin’ Blends in Dark Petal Pink to color the flower image and Dark Evening Evergreen to color the rhinestones; SU! Evening Evergreen Ink; SU! Soft Succulent Ink, Rhinestone Basic Jewels, White Baker’s Twine, Nature’s Prints Bundle and Pretty Prints DSP)
Step-by-Step
Video!
Your Turn
You've seen the tutorial, now you try it! We've got a section of the gallery set aside for W Fold Card. Try this technique, then upload your artwork to the gallery. Show us your creations!
***Please note - Internet Explorer/Edge is not a supported browser, and will not allow you to see the videos. Please use Chrome, Firefox or Safari to view our tutorial videos.
Vase Pop-Up Card
by Gloria Plunkett
Surprise your recipient with a dimensional vase of flowers.
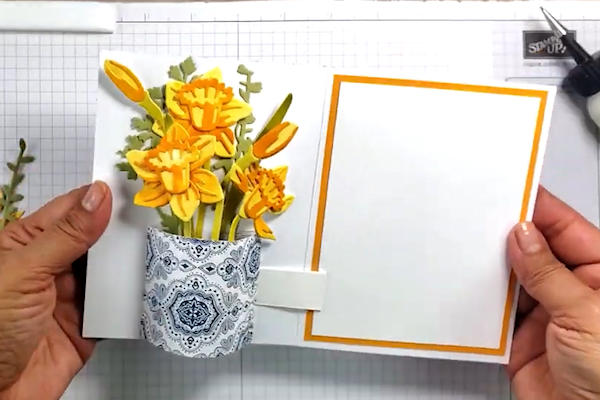
Supplies
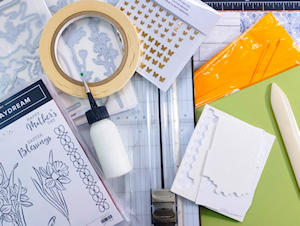
- Cardstock (Stampin’ Up!® Thick Basic White Cardstock used here)
- Stamps and embellishments (SU Daffodil Daydream stamp set, Daffodil Dies and Meadow Dies used here)
- Adhesives (liquid adhesive, double sided tape and foam dimensionals used here)
- Trimmer
- Scoring tool
- Scissors
- Other supplies as needed to complete the project (SU products used here: brass butterflies, watercolor paper, SU reinkers, Aquapainter, Heart and Home Designer Series Paper, Mango Melody and Basic White cardstock)
Step-by-Step
Video!
Your Turn
You've seen the tutorial, now you try it! We've got a section of the gallery set aside for Vase Pop-Up Card. Try this technique, then upload your artwork to the gallery. Show us your creations!
***Please note - Internet Explorer/Edge is not a supported browser, and will not allow you to see the videos. Please use Chrome, Firefox or Safari to view our tutorial videos.
Chocolate Bar Card
by Dina Kowal
Delight a friend with a card shaped like a bar of chocolate.
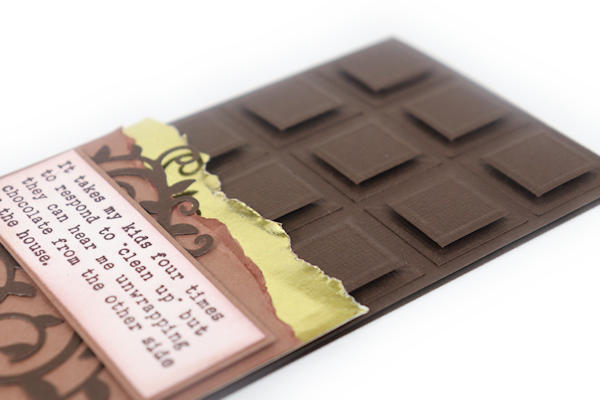
Supplies
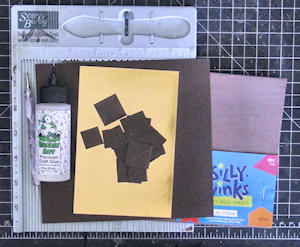
- Brown cardstock
- Trimmer or square dies (1" and 3/4")
- Adhesives (Bearly Art Glue and brown adhesive craft foam sheets used here)
- Scoring tool
- Foil paper
- Other supplies as needed to complete the project (used here: Impression Obsession C13861 Unwrapping Chocolate, Spellbinders Aug 2018 Small Die of the Month kit (flourish dies))
Step-by-Step
Video!
Your Turn
You've seen the tutorial, now you try it! We've got a section of the gallery set aside for Chocolate Bar Card. Try this technique, then upload your artwork to the gallery. Show us your creations!
***Please note - Internet Explorer/Edge is not a supported browser, and will not allow you to see the videos. Please use Chrome, Firefox or Safari to view our tutorial videos.
Punch Board Party Favor
by Dina Kowal
Use an envelope punch board for a quick edition of Andrea Walford's Party Favor.
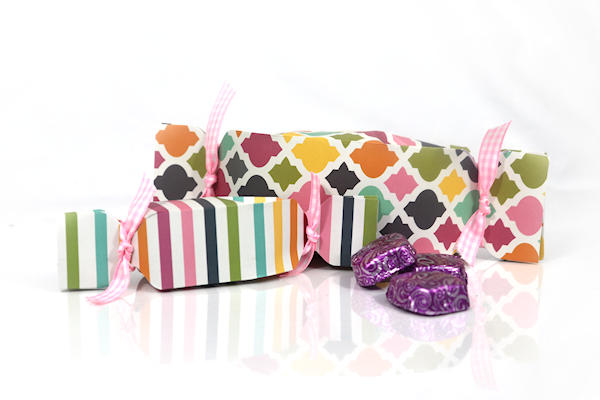
Supplies

- Scrapbook paper
- Trimmer
- Scoring board and tool
- Envelope Punch Board
- Adhesive
- Ribbon
Step-by-Step
Video!
Your Turn
You've seen the tutorial, now you try it! We've got a section of the gallery set aside for Punch Board Party Favor. Try this technique, then upload your artwork to the gallery. Show us your creations!
***Please note - Internet Explorer/Edge is not a supported browser, and will not allow you to see the videos. Please use Chrome, Firefox or Safari to view our tutorial videos.
Mini Jar Treat Holder
by Christy Fulk
Deliver a treat in this sweet jar holder.
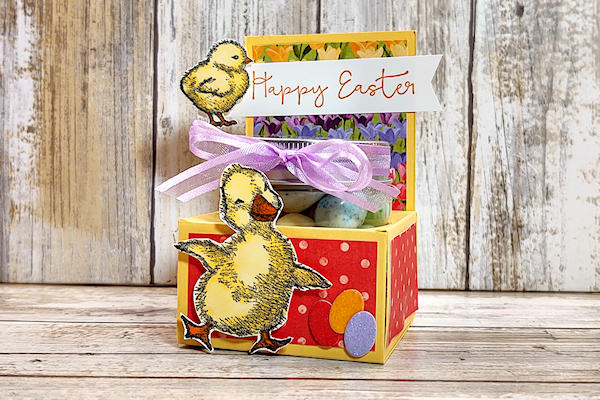
Supplies
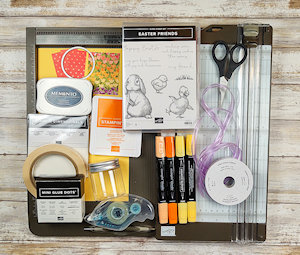
- Cardstock (Stampin’ Up!® So Saffron & Basic White used here)
- Patterned paper (SU Flowering Fields Designer Series Paper & Ombre Specialty Paper used here)
- Scoring tool (SU Simply Scored Scoring Tool used here)
- Scissors and paper cutter (SU Paper Snips & Paper Trimmer used here)
- Small jar with lid (SU Mini Jam Jar (2-1/8” around & 2-1/2” tall) used here)
- Strong adhesive (SU Tear & Tape Adhesive used here)
- Adhesive (SU Stampin’ Dimensionals, Mini Glue Dots, & Stampin’ Seal used here)
- Other supplies as needed to complete the project (SU supplies used here: Easter Friends Stamp Set, Layering Circles Dies, Suit & Tie Dies (small oval die), ink pads-Pumpkin Pie & Tuxedo Black Memento Pads, alcohol markers-So Saffron & Pumpkin Pie Stampin’ Blends, Die-Cutting Machine, Banners Pick a Punch, & Fresh Freesia Open Weave Ribbon)
Step-by-Step
Video!
Your Turn
You've seen the tutorial, now you try it! We've got a section of the gallery set aside for Mini Jar Treat Holder. Try this technique, then upload your artwork to the gallery. Show us your creations!
***Please note - Internet Explorer/Edge is not a supported browser, and will not allow you to see the videos. Please use Chrome, Firefox or Safari to view our tutorial videos.
Gilded Ribbon
by Betty Traciak
Embellish ribbon with foil flakes.
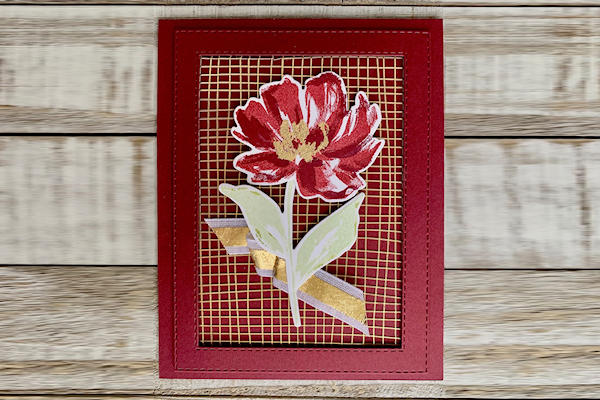
Supplies
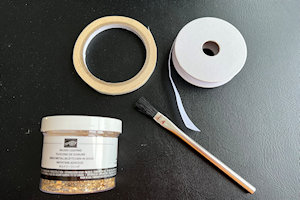
- Metallic leafing (Stampin' Up!® Gilded Leafing used here)
- Ribbon (SU Flowers for Every Season Ribbon Combo Pack used here)
- Double-sided adhesive tape (SU Tear & Tape used here)
- Stiff paintbrush
- Metal stylus or pick tool
- Other supplies as needed to complete the project (SU products used here: Art Gallery stamp set, Merry Merlot and Whisper White cardstock)
Step-by-Step
Video!
Your Turn
You've seen the tutorial, now you try it! We've got a section of the gallery set aside for Gilded Ribbon. Try this technique, then upload your artwork to the gallery. Show us your creations!
***Please note - Internet Explorer/Edge is not a supported browser, and will not allow you to see the videos. Please use Chrome, Firefox or Safari to view our tutorial videos.
Layered Retiform
by Dina Kowal
Fill an abstract grid with layered colors to create a unique background panel.
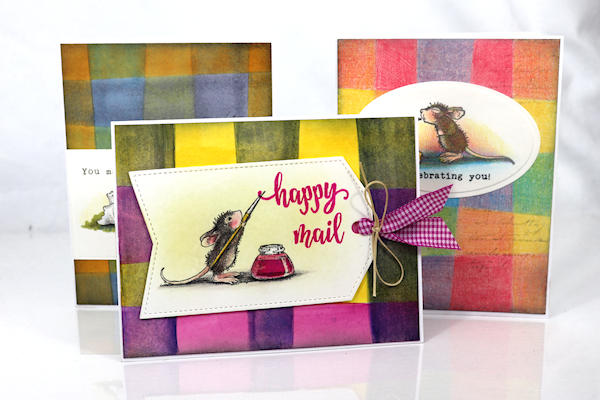
Supplies

- Cardstock or watercolor paper
- Transparent or semi-transparent coloring medium (used for samples: Copic markers, QoR watercolors, Polychromos colored pencils)
- Ruler and pencil
- Other supplies as needed to complete the project (used here: Stampabilities HMIR1018 Sugar Crash, Impression Obsession WP1102 Typewriter Slimline Shorts)
Step-by-Step
Video!
Your Turn
You've seen the tutorial, now you try it! We've got a section of the gallery set aside for Layered Retiform. Try this technique, then upload your artwork to the gallery. Show us your creations!
***Please note - Internet Explorer/Edge is not a supported browser, and will not allow you to see the videos. Please use Chrome, Firefox or Safari to view our tutorial videos.
Lace Shaker Card
by Lydia Fiedler
Take a used piece of lace and turn it into an edge to edge shaker card.
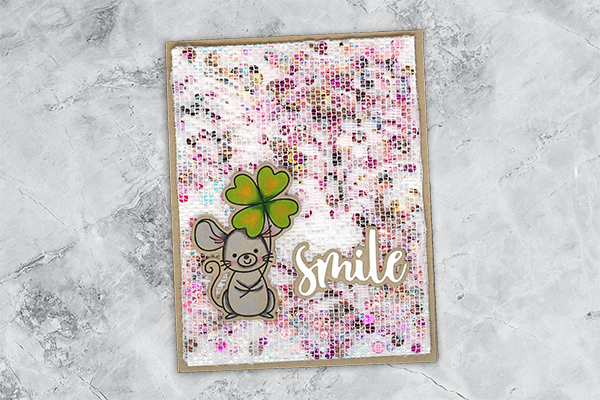
Supplies
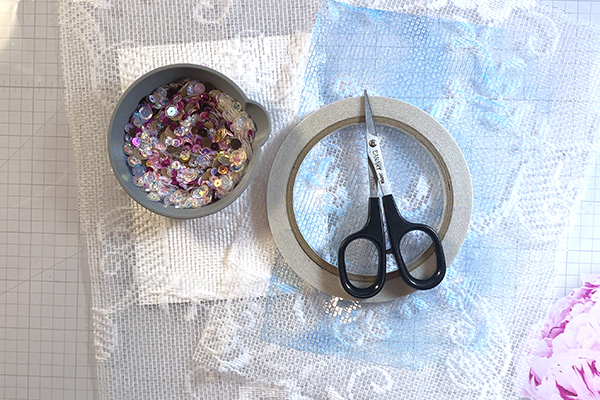
- Lace
- Sequins
- Strong double-sided adhesive
- Sequin pouring tool (The Rabbit Hole Designs Bunny Bowl used here)
- Gel Press monoprinting plate (optional)
- Acrylic Paint (optional)
- Brayer (optional)
Step-by-Step
Video!
Your Turn
You've seen the tutorial, now you try it! We've got a section of the gallery set aside for Lace Shaker Card. Try this technique, then upload your artwork to the gallery. Show us your creations!
***Please note - Internet Explorer/Edge is not a supported browser, and will not allow you to see the videos. Please use Chrome, Firefox or Safari to view our tutorial videos.
Wall Tile Background
by Kelly Santi
Use a textured surface for a smooshed ink background.
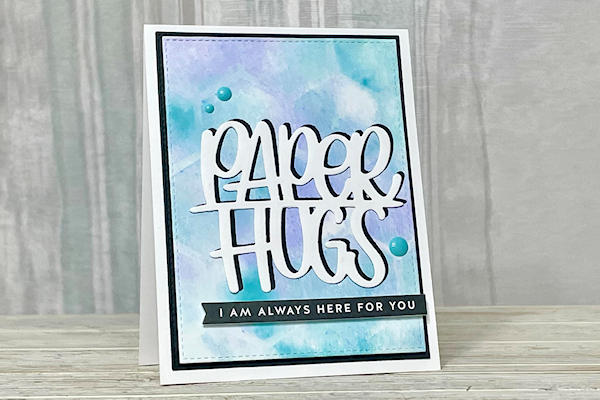
Supplies
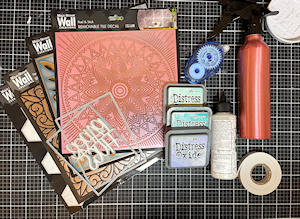
- Removable wall tiles (Store Dollar sections or in hardware stores)
- Cardstock (Neenah Paper Classic Crest #110 cover used here)
- Distress oxide inks - any 3 colors
- Water spray bottle
- Other supplies as needed to complete the project (used here: Simon Says Stamp Paper Hugs die and Sentiment Strips by CZDesign, liquid glue/adhesive, trimmer, die cutter, scissors, heat tool, enamel dots/sequins, dimensional adhesive foam, colored cardstock)
Step-by-Step
Video!
Your Turn
You've seen the tutorial, now you try it! We've got a section of the gallery set aside for Wall Tile Background. Try this technique, then upload your artwork to the gallery. Show us your creations!
***Please note - Internet Explorer/Edge is not a supported browser, and will not allow you to see the videos. Please use Chrome, Firefox or Safari to view our tutorial videos.
Bubble Background
by Dina Kowal
Catch bubbles on cardstock to create a unique background every time.
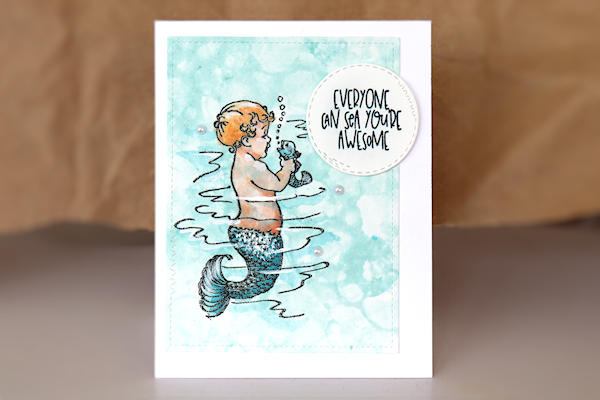
Supplies
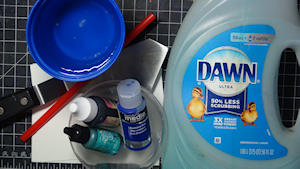
- Container
- Water
- Dish soap
- Water-soluble medium (watercolor powder, dye reinker, acrylic/craft paint, etc - alcohol inks will even work)
- Drinking straw
- Heavy cardstock or watercolor paper
- Palette knife (opt.)
- Other supplies as needed to complete the project (used here: Inkadinkado vintage stamp 9072X, Sweet 'n Sassy Stamps Fin-tastic Friends Clear Stamp Set, Versafine Clair inks, black detail embossing powder, Impression Obsession DIE797 Crazy Stitched Set and DIE837 Wacky Stitched Circles, bleach and nylon brush, QoR watercolors, flat back pearls, white acrylic craft paint, foam tape)
Step-by-Step
Video!
Your Turn
You've seen the tutorial, now you try it! We've got a section of the gallery set aside for Bubble Background. Try this technique, then upload your artwork to the gallery. Show us your creations!
***Please note - Internet Explorer/Edge is not a supported browser, and will not allow you to see the videos. Please use Chrome, Firefox or Safari to view our tutorial videos.
Shaped Window Treat Box
by Twila Davis
Show off the treats in this box through a diecut window.
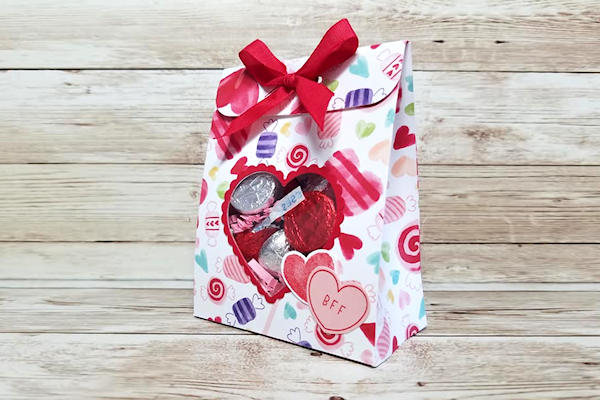
Supplies
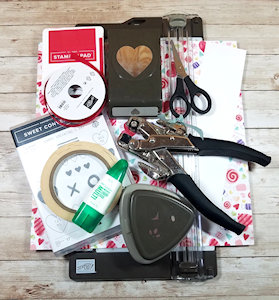
- Cardstock (scraps of Stampin' Up!® Real Red, Basic White, & Petal Pink used here)
- Patterned paper (SU Sweet Talk used here)
- Paper trimmer
- Scoring tool
- Crop-a-dile or other heavy duty hole punch
- Scissors
- Shaped punch or die (Heart Duo & Detailed Trio used here)
- Corner rounder
- Ribbon (Real Red 3/8" Faux Linen Ribbon used here)
- Adhesive (Mono Liquid Glue, Tear Tape and Dimensionals used here)
- Clear plastic sheet
- Chocolates and paper shred or filler of your choice
- Other supplies as needed to complete the project (SU supplies used here: Real Red ink, Sweet Conversations stamp set)
Step-by-Step
Video!
Your Turn
You've seen the tutorial, now you try it! We've got a section of the gallery set aside for Shaped Window Treat Box. Try this technique, then upload your artwork to the gallery. Show us your creations!
***Please note - Internet Explorer/Edge is not a supported browser, and will not allow you to see the videos. Please use Chrome, Firefox or Safari to view our tutorial videos.
Tie-Back Curtain
by Beth Rush
Fold a pleated curtain embellishment.
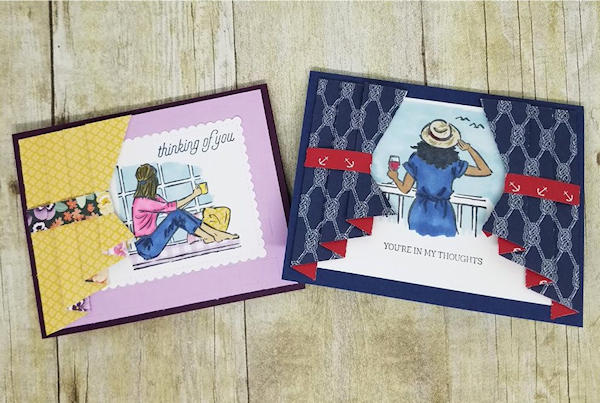
Supplies
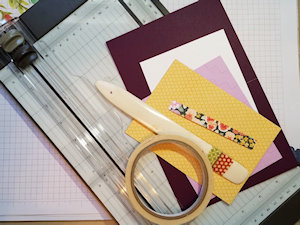
- Cardstock
- Double-sided paper
- Bone folder
- Scissors
- Scoring tool
- Other supplies as needed to complete the project (Stampin' Up!® products used here: ln the Moment Stamp set, Stampin' Blends Markers, Memento Tuxedo Black ink pad)
Step-by-Step
Video!
Your Turn
You've seen the tutorial, now you try it! We've got a section of the gallery set aside for Tie-Back Curtain. Try this technique, then upload your artwork to the gallery. Show us your creations!
***Please note - Internet Explorer/Edge is not a supported browser, and will not allow you to see the videos. Please use Chrome, Firefox or Safari to view our tutorial videos.
Fold Back Pop-Up Card
by Robyn Rasset
Several small layers peek out from this fun fold card.
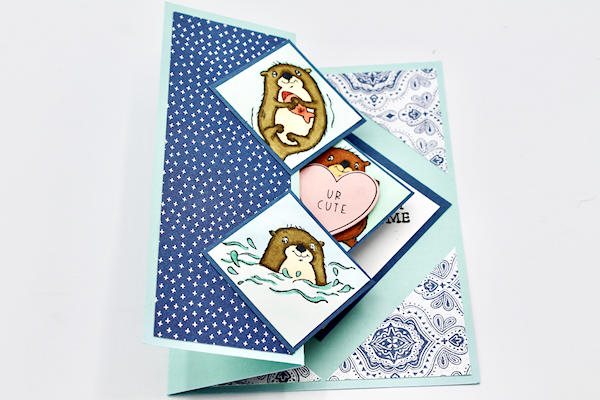
Supplies
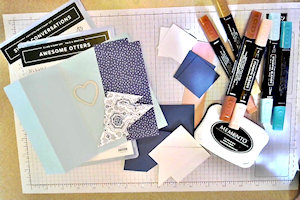
- Cardstock (Stampin' Up!® Pool Party, Misty Moonlight and Basic White cardstock used here)
- Patterned paper (SU Sunshine and Rainbows and Heart & Home Designer Series Paper)
- Stamps (SU Awesome Otters and Sweet Conversations stamp sets)
- Ink (Memento Tuxedo Black ink used here)
- Coloring medium (SU Stampin' Blends used here)
- Adhesive (Tombow mono adhesive used here)
- Other supplies as needed to complete the project (SU products used here: Sweet Heart Dies)
Step-by-Step
Video!
Your Turn
You've seen the tutorial, now you try it! We've got a section of the gallery set aside for Fold Back Pop-Up Card. Try this technique, then upload your artwork to the gallery. Show us your creations!
***Please note - Internet Explorer/Edge is not a supported browser, and will not allow you to see the videos. Please use Chrome, Firefox or Safari to view our tutorial videos.
Plastic Wrap Watercolor
by Kelly Rose
Use plastic wrap to add texture to a watercolored background.

Supplies
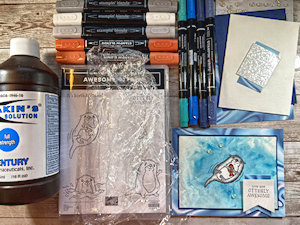
- Watercolor paper (Stampin’ Up!® Fluid 100 used here)
- Water painter (dry) or other synthetic paintbrush
- Kitchen plastic wrap and paper towels
- Water spritzer
- Dakin’s solution or bleach
- Water based markers in the same color family (SU Bermuda Bay, Pacific Point, Misty Moonlight, Night of Navy used here - other dye based mediums can also be used (reinkers, watercolor powders)
- Stamp positioner (SU Stamparatus used here)
- Open image stamp (SU Awesome Otters used here)
- Black solvent or hybrid ink (StazOn Jet black used here)
- Coloring tools – optional (SU Stampin’ Blends used: Light and dark Smoky Slate and Color lifter)
- Other supplies as needed to complete the project (SU products used here: Basic White thick cardstock, Night of Navy cardstock, Simply Marbleous and Mother of Pearl specialty paper, Tailored tag punch, Opal Rounds, Adhesive foam dimensionals)
Step-by-Step
Video!
Your Turn
You've seen the tutorial, now you try it! We've got a section of the gallery set aside for Plastic Wrap Watercolor. Try this technique, then upload your artwork to the gallery. Show us your creations!
***Please note - Internet Explorer/Edge is not a supported browser, and will not allow you to see the videos. Please use Chrome, Firefox or Safari to view our tutorial videos.
Easel Card Treat Box
by Cristena Bagne
Prop up the decorative top of this treat holder.
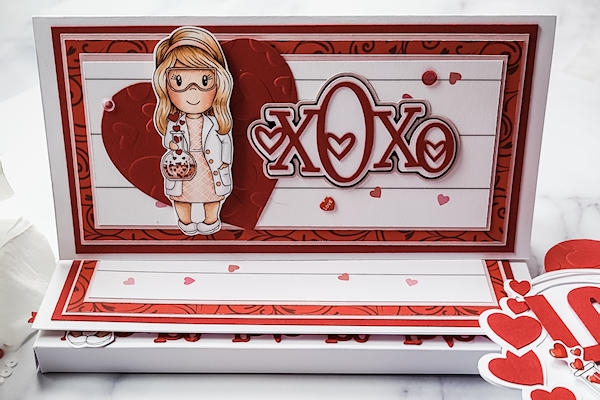
Supplies
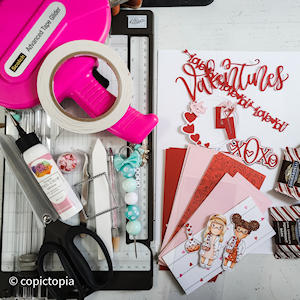
- Cardstock (Stampin’ Up!® Real Red and Whisper White Cardstock used here)
- Patterned papers (Echo Park Cupid & Co. Pattern Paper used here)
- Adhesives (Tear Tape, liquid glue and Mono adhesive used here)
- Scissors
- Scoring tool
- Square die cut (or other window shape)
- Bone folder
- Acetate
- Other supplies as needed to complete the project (used here: Tweezers, Sequins, Poky tool, Paper Nest Dolls Digital Stamps: Love Potion Set, Silhouette 9 Nested Hearts by Alaa’k, Silhouette Hearts Wreath Circle by Alaa’k, Silhouette Happy Valentines Day by Lilliam Pixel SVG, Silhouette Valentine Word Borders by Kolette Hall, Silhouette Love by Graphic House Design, Silhouette Love #9 Potion Bottle Label by Hearthsewn, Silhouette XOXO Heart by Miss Kate Cuttables)
Step-by-Step
Video!
Your Turn
You've seen the tutorial, now you try it! We've got a section of the gallery set aside for Easel Card Treat Box. Try this technique, then upload your artwork to the gallery. Show us your creations!
***Please note - Internet Explorer/Edge is not a supported browser, and will not allow you to see the videos. Please use Chrome, Firefox or Safari to view our tutorial videos.
Grand Piano Card
by Dina Kowal
Use our free template to create a piano easel card.
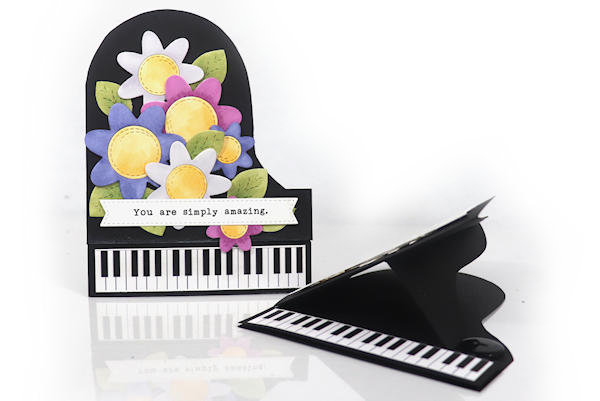
Supplies
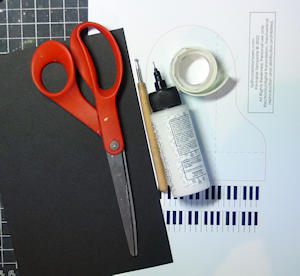
- Cardstock
- Printable piano template
- Scissors
- Scoring tool
- Liquid adhesive
- Foam tape
- Easel stopper (button used here, die cut mounted on foam tape or other semi-flat embellishment can also be used)
- Other supplies as needed to complete the project (used here: Spellbinders DOM JUL20 - Ornamental Floral Card Creator Die Set, Copic markers, Impression Obsession DIE1091 Slimline Sentiments Flag, WP1102 Typewriter Slimline Shorts)
Step-by-Step
Video!
Your Turn
You've seen the tutorial, now you try it! We've got a section of the gallery set aside for Grand Piano Card. Try this technique, then upload your artwork to the gallery. Show us your creations!
***Please note - Internet Explorer/Edge is not a supported browser, and will not allow you to see the videos. Please use Chrome, Firefox or Safari to view our tutorial videos.
Standing Calendar
by Gloria Plunkett
Make a sturdy stand for a desktop calendar.
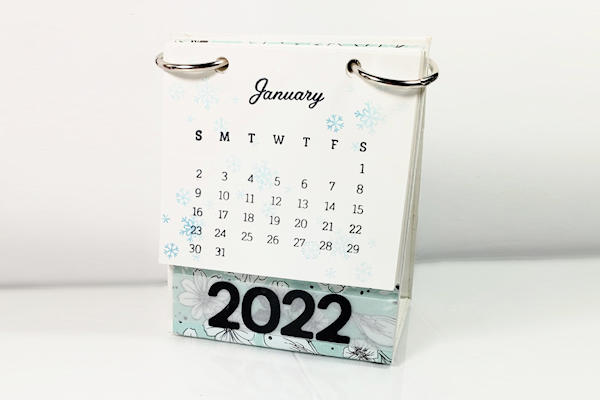
Supplies
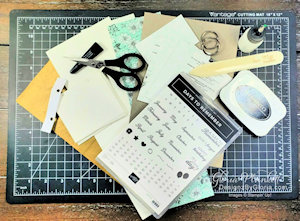
- Sturdy chipboard or cardboard
- Cardstock (Stampin' Up!® Basic White Cardstock, Thick Basic White Cardstock, and Basic Black Cardstock used here)
- Scissors or craft knife
- Adhesive (SU Liquid Glue and Tear & Tape used here)
- Tyvek envelope (Optional)
- Stamps and embellishments (SU Playful Alphabet Dies, Days to Remember Stamp Set, Welcoming Woods Stamp Set, Balmy Blue Classic Ink, Memento Tuxedo Black Ink used here)
- Binder rings or other binding system
- Punch (Crop-O-Dile II used here)
- Other supplies as needed to complete the project (Colorway Arts Corner Miter Tool)
Step-by-Step
-
Step 1
Cut chipboard pieces for the stand:
3 1/2" x 2” (base)
3 1/2” x 4 1/4" (cut 2) -
TIP:
Layer additional pieces together for stability as needed. -
Step 2
Cut a piece of cardstock to 4 1/2" x 12”. Adhere the chipboard pieces with about 1/8” between them in the center of this cardstock and an even border around the edges.
-
Step 9 (Optional)
Add double sided adhesive at the top of the stand to hold the sides together in a point.
-
Step 10
Cut cardstock for the calendar pieces (for the sample these are 3 1/2" x 3”). Use the punching template to mark and punch the holes.
-
Step 12
Decorate the stand as desired, with the year or another motif.
TIP:
Add the year to a removable vellum strip so that it can be changed out in coming years. -
Step 13
Complete the project.

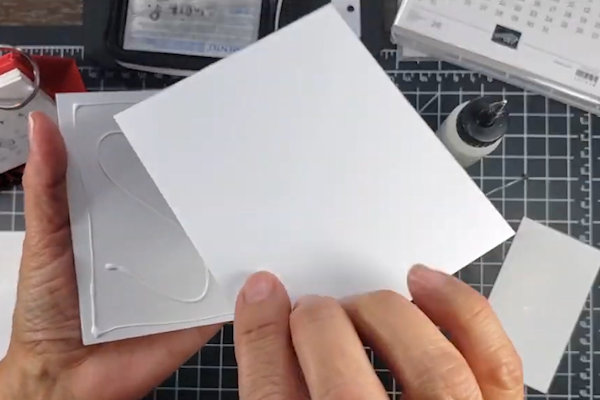
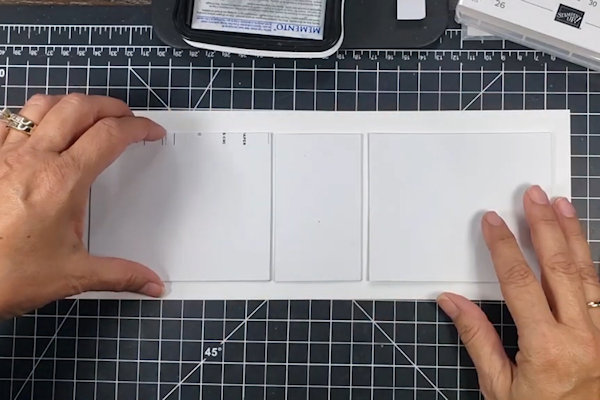
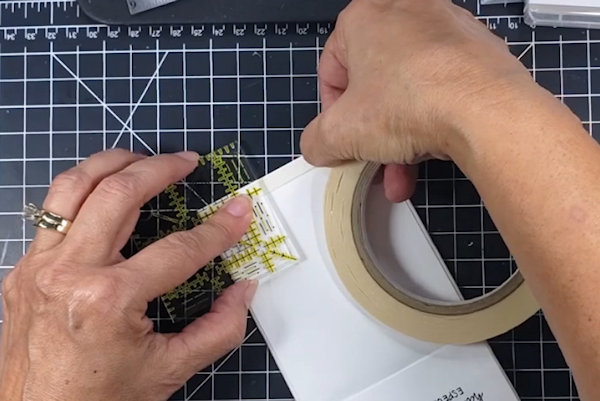
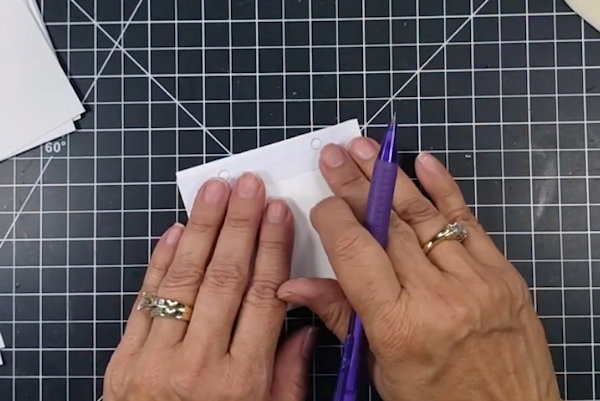

Video!
Your Turn
You've seen the tutorial, now you try it! We've got a section of the gallery set aside for Standing Calendar. Try this technique, then upload your artwork to the gallery. Show us your creations!
***Please note - Internet Explorer/Edge is not a supported browser, and will not allow you to see the videos. Please use Chrome, Firefox or Safari to view our tutorial videos.
Crate Card
by Helen Gullett
Make a pop-up card that looks like a classic wood crate.
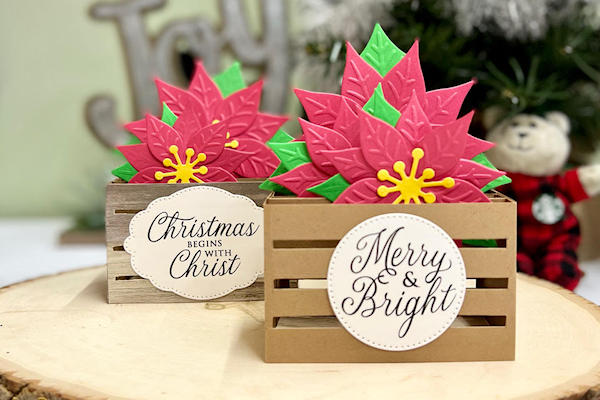
Supplies
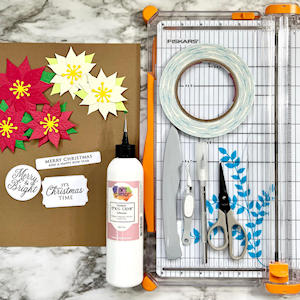
- Kraft cardstock (patterned paper, optional)
- Paper flowers (premade or diecuts, Darice Poinsettia set used here)
- Sentiments (optional, Paper Poinsettias Mega digital stamp set from Graciellie Designs used here)
- Paper trimmer
- Kraft knife
- Scissors
- Bone folder
- Double sided tape
- Permanent adhesive glue
- Other supplies as needed to complete the project (used here: Dare 2B Artzy Double Dots Circle Die Set and Oval Scalloped Framelit Dies)
Step-by-Step
-
Step 1
Prepare kraft cardstock base by cutting strips:
2 1/4” x 11”
1” x 4 1/2" (cut three)
1” x 2 1/4" -
Prepare die cut flowers, sentiments, or other ‘fillers’ for your crate.
-
Step 2
Score the large strip at 2”, 5 1/2", and 7 1/2".
-
Step 3
Score the three 4 1/2" strips 1/2" from each end.
-
Score the smallest strip down the center from a short side.
-
Step 4
You can leave the box as is without the crate look, or you can cut slats. Measure and mark at the end of each long side at 1/2” and 5/8” from the top and bottom, and 1 1/16” and 1 3/16” (center).
-
Step 5
Trace between the marks 1/8” from the score lines.
-
Cut away the strips to create the slatted look.
-
Step 6
Fold and burnish all score lines.
-
Fold the three 4 1/2" strips in a Z. Fold the small piece in half.
-
Step 7
The small piece will act as a hinge to glue the box together. Trim one side if needed so it doesn’t show through the slats. Use glue or double sided tape to create the box corner.
-
Step 8
Add double sided tap to the tabs on the inner strips.
-
Adhere the tabs to the short sides of the inside of the box, lining the up the strips with the top of the box, and making sure the strips go straight across. Repeat with the remaining strips, spacing them evenly across. The box should fold flat.
-
Step 9
Adhere the flowers or other die cuts onto the inner strips to fill the box. Take care in positioning so the card can still fold flat.
-
Step 10
Embellish the front of the card if desired to complete the project.
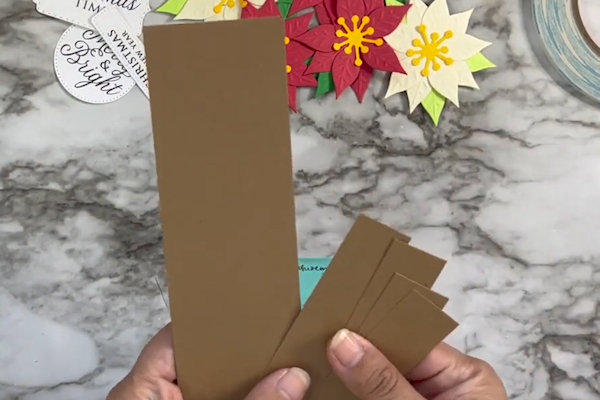


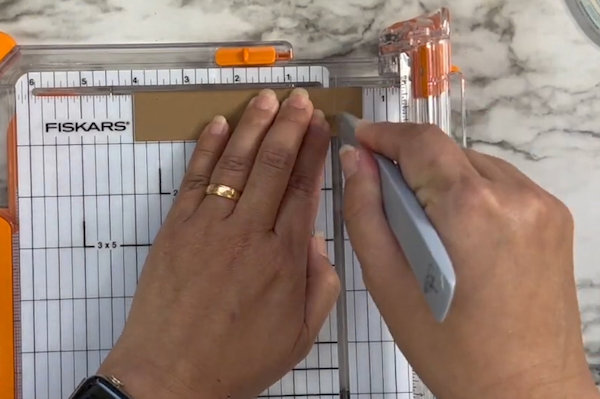
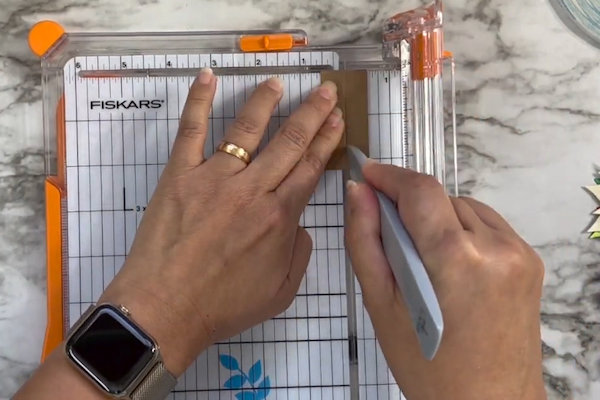

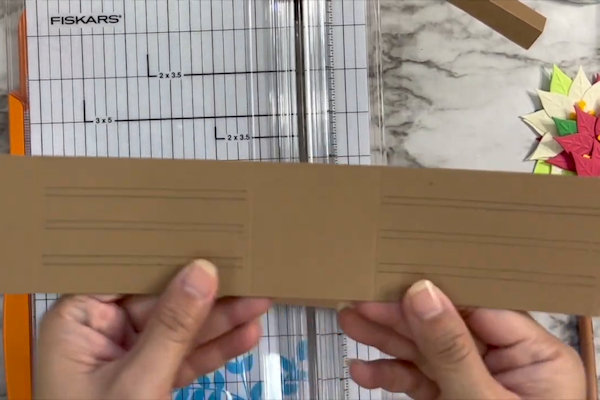
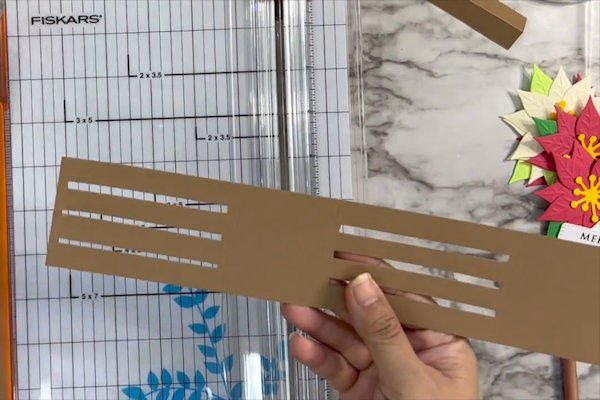
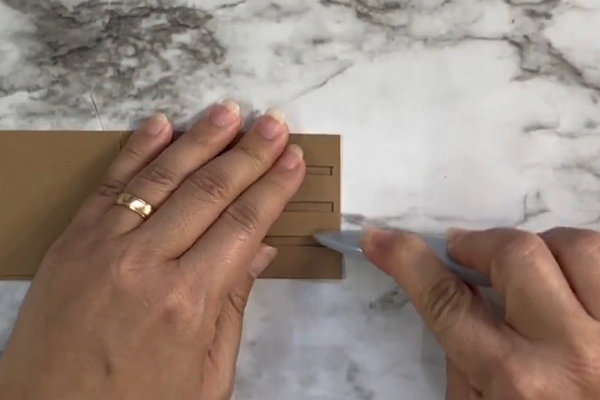


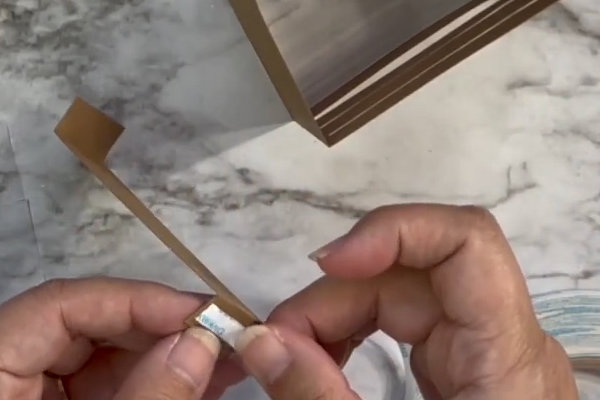

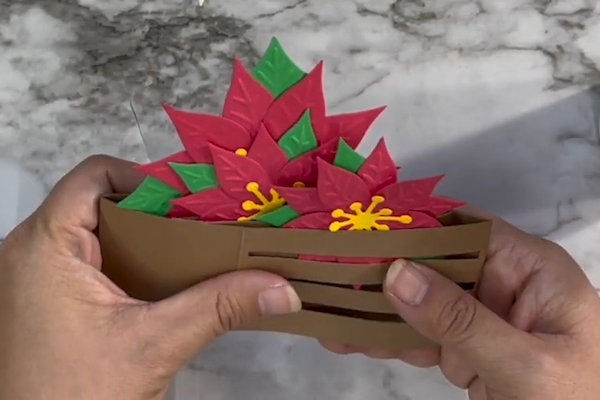
Video!
Your Turn
You've seen the tutorial, now you try it! We've got a section of the gallery set aside for Crate Card. Try this technique, then upload your artwork to the gallery. Show us your creations!
***Please note - Internet Explorer/Edge is not a supported browser, and will not allow you to see the videos. Please use Chrome, Firefox or Safari to view our tutorial videos.
Santa Tag Treat Holder
by Twila Davis
Use punches and simple shapes to make a fun holiday favor.
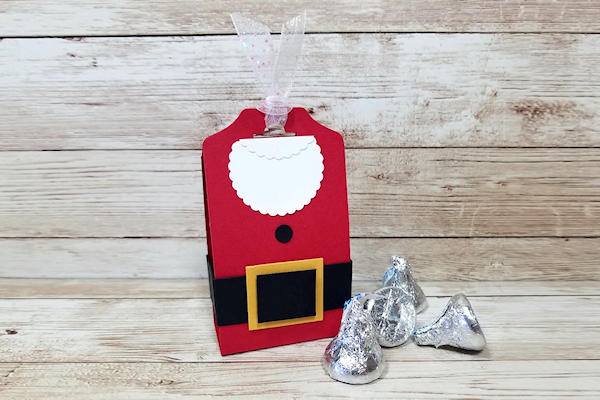
Supplies
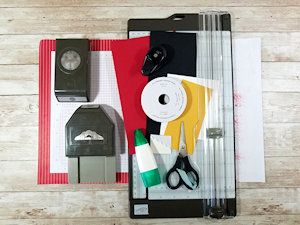
- Cardstock in red, black, white, yellow (scraps of Stampin' Up!® Real Red, Basic Black, Crushed Curry and Whisper White cardstocks used here)
- Ribbon (White Glittered Organdy Ribbon used here)
- Paper cutter
- Scissors
- Punches (SU Tag Topper, 1 3/8" Scallop Circle, 1/4" Circle used here)
- Adhesive (Mono Liquid Glue and Dimensionals used here)
- Treats and small bag to tuck inside
Step-by-Step
-
Step 1
To make Santa's suit:
Cut red cardstock to 2" x 8 1/2". On the long side score at 3 3/4" and 4 3/4". Punch both long ends with a tag punch or cut with a tag or border die. -
Step 2
To make Santa's belt:
Cut black cardstock to 3/4" x 8 1/2". From this cut it down again to a 6" piece. Score at 1", 2", 4"and 5". From the remaining piece cut a piece to 7/8" x 3/4". -
Step 3
Adhere the belt to the suit as shown using glue or other adhesive.
-
Step 4
Cut a piece of yellow cardstock to 1 1/8" x 1".
To make Santa's beard:
Punch a scalloped circle from white cardstock and cut some of the top off.
For a button, punch out a 1/4" circle with black cardstock. -
Step 5
Attach the yellow cardstock to the front of the belt and add the 7/8" x 3/4" piece of Black on top of the Yellow piece with a Dimensional.
Layer the two white cardstock pieces together with glue and adhere to the top of the suit underneath the small hole. -
Step 6
Add some small treats to a bag and put inside treat holder. (The belt will hold treats in, thus bigger treats may not require a bag.)
-
Step 7
Cut a 5" piece of ribbon and tie it to the top to complete the project.
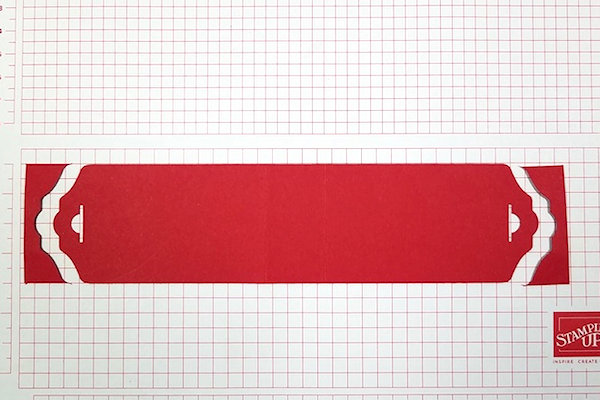
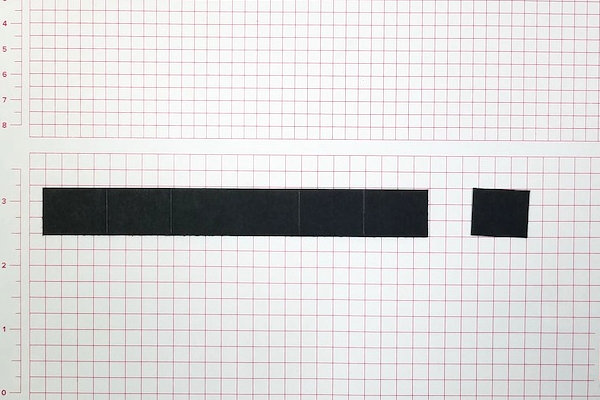
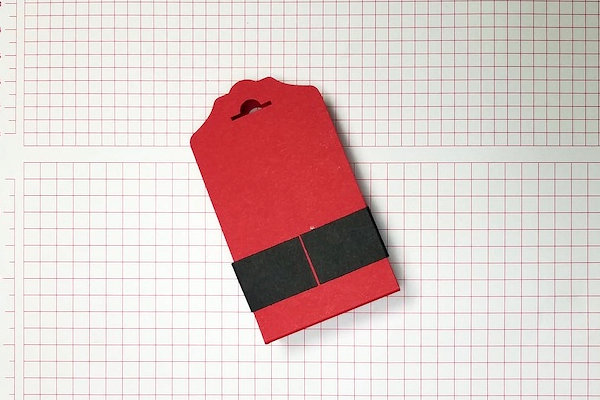
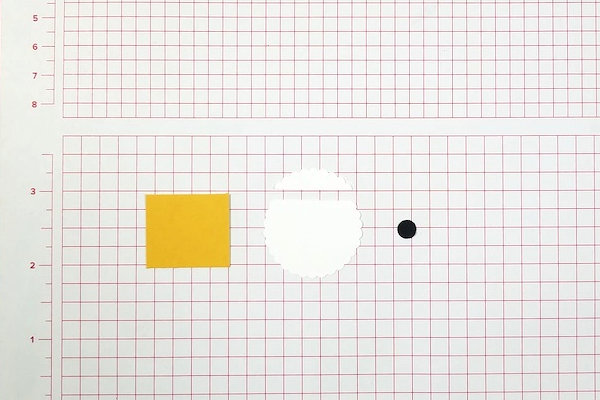
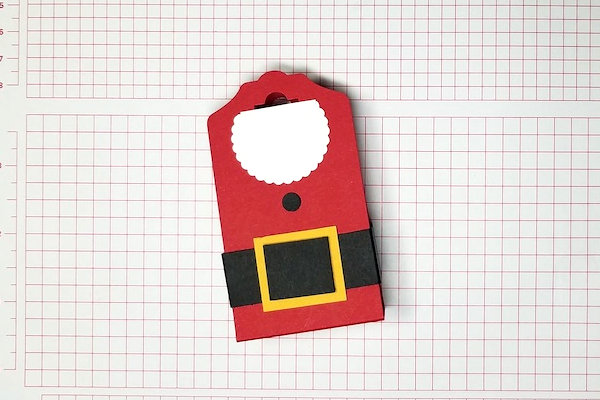
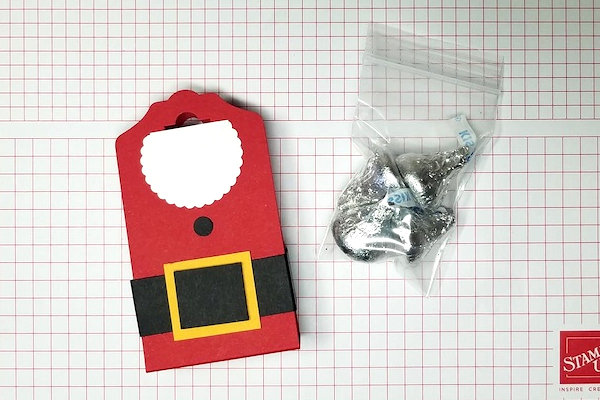
Video!
Your Turn
You've seen the tutorial, now you try it! We've got a section of the gallery set aside for Santa Tag Treat Holder. Try this technique, then upload your artwork to the gallery. Show us your creations!
***Please note - Internet Explorer/Edge is not a supported browser, and will not allow you to see the videos. Please use Chrome, Firefox or Safari to view our tutorial videos.
Sky View Scene
by Dina Kowal
Use masks and stencils to create a starry night sky.
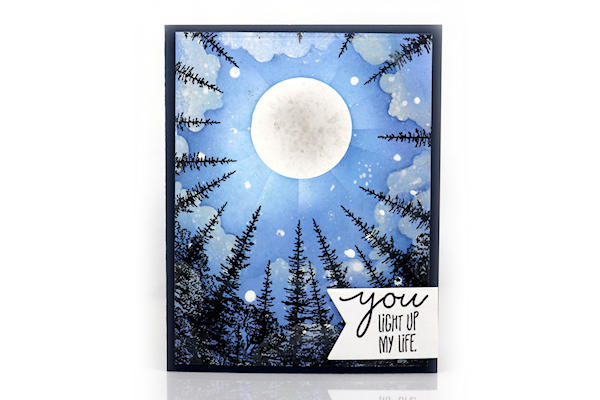
Supplies
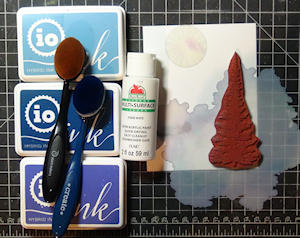
- Circle mask (A Colorful Life Designs Marvelous Mask Circles used here - a die cut circle would work fine)
- Blendable inks in sky colors, light, medium and dark (Impression Obsession hybrid inks used here)
- Blending tools
- Cloud stencil (A Colorful Life Designs Cloud Edger Set used here - if you don't have a cloud stencil, click HERE to see how to use a scalloped circle punch, or cut your own)
- acrylic paint (optional)
- Paint brush
- Tree stamp (Stampscapes Pine and Rubber Stampede Oak Tree used here)
- Compatible ink (can stamp over acrylic paint - Versafine used here)
- Other supplies as needed to complete the project (used here: Impression Obsession You Light sentiment, Sizzix tag die, Scor-Buddy, ball stylus, Neenah cardstock)
Step-by-Step
-
Step 1
Prepare a cardstock panel. Mask off a circle for the moon in your scene. It can be placed anywhere, but a centered position toward the top is best for placement of trees later.
-
Step 2
Select three ink colors for the sky – light, medium, and dark. Beginning with the light color, brush ink lightly around the masked moon.
-
Continue inking with the medium and then the darkest color, working out to the edges of the panel. Soft and uneven inking will add to the texture of the clouds.
-
Step 3
Use the medium color ink to brush lightly against the edge of the cloud mask.
-
Continue around the panel to create a ring of clouds around the moon. Add more clouds to fill the space as needed.
-
Step 4
Use a ray stencil to add some lightly brushed rays around the moon, OR use the straight edge of a piece of paper to create a ray effect. Align the paper across the center of the moon, and brush ink lightly across the edge.
-
Work around the moon, adding rays until you have the effect you want.
-
Step 5
If you have a stencil set with the negative piece, use it to highlight the edges of the clouds with white paint. A white colored pencil could also be used.
TIP:
If using a blending brush for paint, tap out most of the paint before lightly applying it along the edge of the stencil. -
-
Step 6
Remove the moon mask. Dilute some of the white paint and splatter it onto the panel with a brush (roll the brush in the paint and tap the brush against your finger to create small droplets. Additional dots can be added by dipping the end of the paintbrush into the paint and dotting on the panel. Allow the paint to dry.
-
Step 7
Position a tree stamp at the bottom center of the card panel, pointing toward the moon. Ink and stamp with an ink that will dry over paint (solvent, hybrid, archival, Versafine).
-
Note the position of the moon in the stamp positioner. Try to keep it in the same place as you rotate the panel for the next stamp impression. Stamp around the edges of the panel until you have the fullness that you want in your forest.
TIP:
Place a magnet in the center of the moon – this makes it easy to rotate it in place. -
Step 8
Fill in toward the bottom of the panel with additional tree images if desired.
-
Step 9
The splattered paint should have created some raised spots on the moon. Brush with grey ink to highlight them and add some texture to the moon.
-
Step 10
Heat set the ink to dry, especially where it covers painted areas.
-
Step 11
Embellish and complete the project.
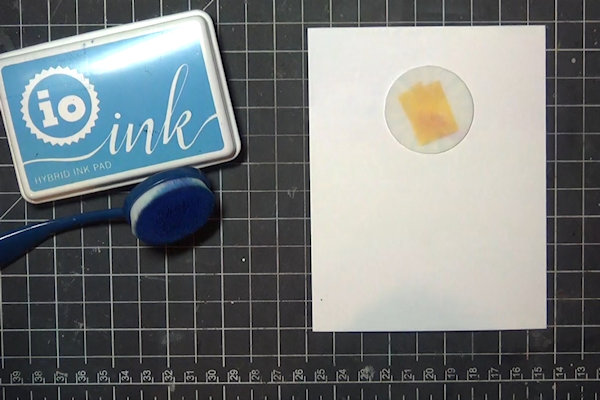


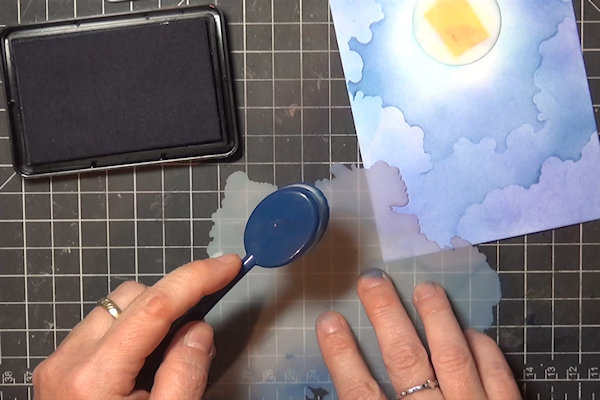
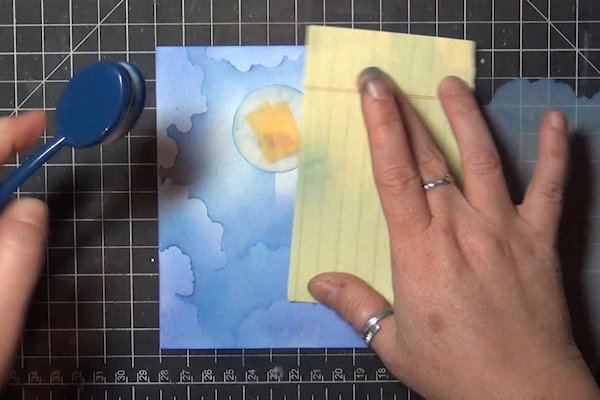

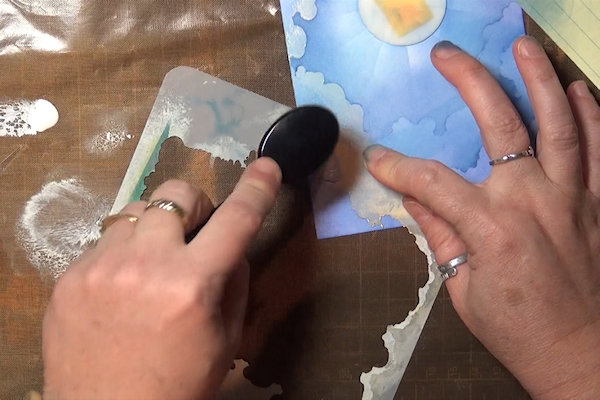
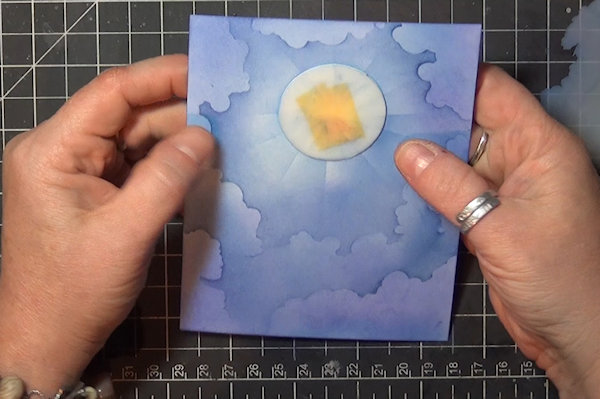
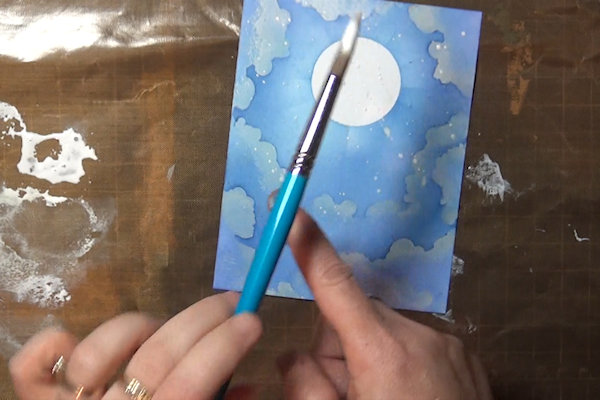
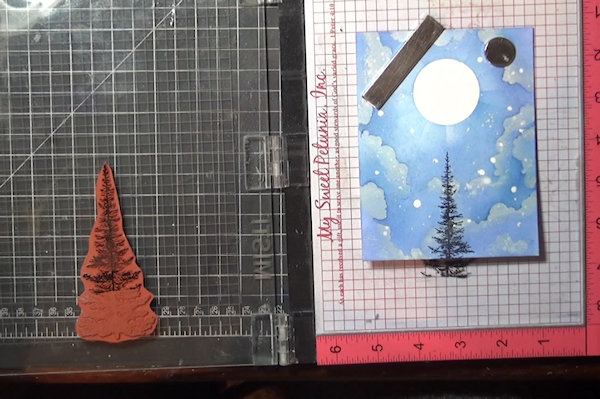


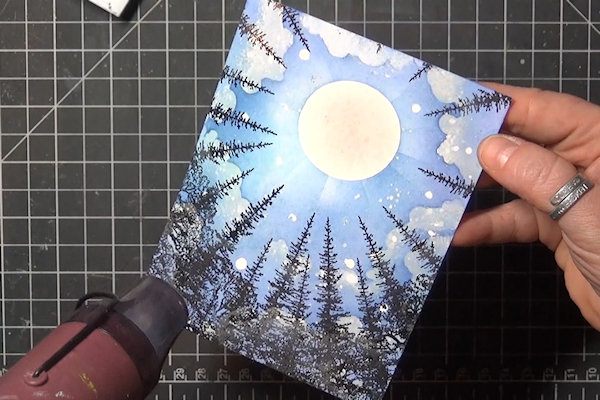
Video!

Your Turn
You've seen the tutorial, now you try it! We've got a section of the gallery set aside for Sky View Scene. Try this technique, then upload your artwork to the gallery. Show us your creations!
***Please note - Internet Explorer/Edge is not a supported browser, and will not allow you to see the videos. Please use Chrome, Firefox or Safari to view our tutorial videos.
Standing Pop-Up Card
by Christy Fulk
Pop-up layers allow this fun fold card to stand.

Supplies
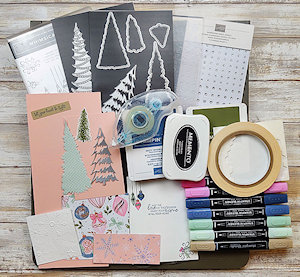
- Cardstock (Stampin’ Up!® Blushing Bride, Crumb Cake, & Basic White used here)
- Patterned paper (SU Whimsy & Wonder Specialty Designer Series Paper used here)
- Scoring tool (SU Simply Scored Scoring Tool used here)
- Strong adhesive (SU Tear & Tape Adhesive used here)
- Adhesive (SU Stampin’ Dimensionals & Stampin’ Seal used here)
- Other supplies as needed to complete the project (SU supplies used here: Whimsical Trees Stamp Set, Christmas Trees Dies, silver foil, Misty Moonlight, Mossy Meadow, & Tuxedo Black Memento inks; Crumb Cake, Mint Macaron, Misty Moonlight, & Polished Pink Stampin’ Blends alcohol markers, Die-Cutting Machine, & Wintry 3D Embossing Folders)
Step-by-Step
-
Step 1
Cut a 4 1/4” x 10 1/2” piece of cardstock for the card base. With a 10 1/2” side along the top, score the piece at 1/2”, 1 3/4”, 3 3/4”, and 5”.
-
Cut a 3” x 5” piece of cardstock (same color as card base used here). With a 5” side along the top, score the piece at 1/2” and 1-3/4”.
-
Step 2
With a 4-1/4” side of the card base on top, and the score lines on the bottom, attach a 4” x 4” piece of patterned paper to the top of the card base. Make sure the top and side cardstock borders around the patterned paper are even. Fold all of the score lines up, and then flatten back out.
-
Turn the piece over, and put the score lines are on top. Attach a strip of strong adhesive along the top, narrow section. Attach a 4” x 1-3/4” piece of patterned to the center of the third section.
-
Step 3
Fold the third score line from the bottom up. The smaller patterned paper should now be showing on the bottom and everything should be lying flat against each other. Remove the paper backing from the strong adhesive on the narrow section. Fold the narrow section back, and attach it to the card base.
-
Bring the folded score lines down a bit to form a rectangle, box-like base.
-
Step 4
Put the 3” side (with the score lines) of the second scored piece on the top, and attach a 2-3/4” x 3” piece of cardstock or patterned paper to the center of the bottom section. Fold all of the score lines back and then flatten back out. Put a piece of strong adhesive along the top, narrow section of the piece.
-
Turn the piece over so the score lines are still on the top. Put a piece of strong adhesive along the bottom edge of the piece.
-
Step 5
Turn the piece back over, keeping the score lines on the top. Remove the paper backing from the top strip of strong adhesive. Fold the bottom score line back. Line the folded score line with the top edge of the card base, centering the piece left and right, and attach.
-
Step 6
Fold the top piece up, and remove the paper backing from the strong adhesive strip. Fold the bottom “box-like” section flat so the bottom section showing is cardstock, and the top section is the smaller patterned paper.
-
Fold the top score line of the top piece down, lining the score line with the top edge of the card base as before, and attach the bottom of the piece with the flattened “box-like” piece of the card base.
-
Step 7
Cut 4” x 5 1/4” piece of neutral cardstock. Stamp/decorate, if desired. Attach the piece to the back of the card base.
-
Step 8
Keeping the card flat, decorate it as desired, and then pop it back up so it stands up to complete the project.
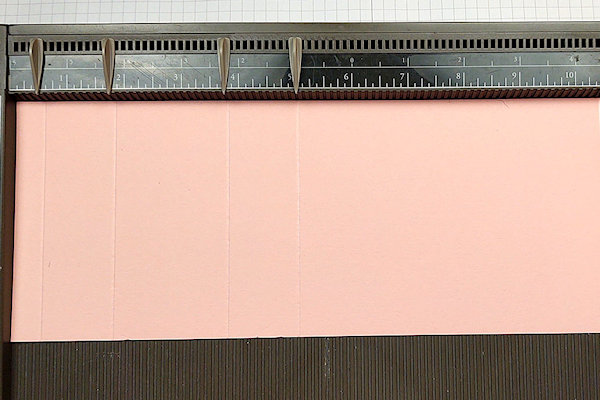
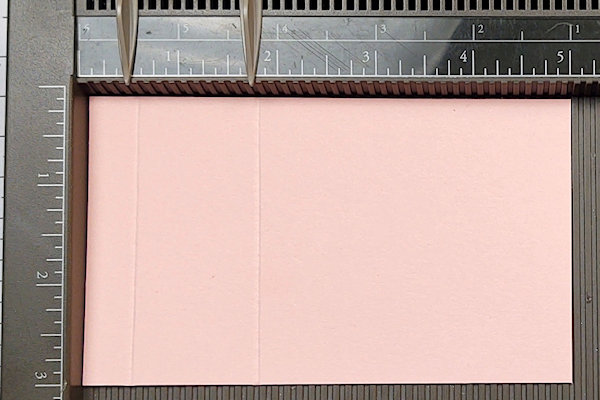
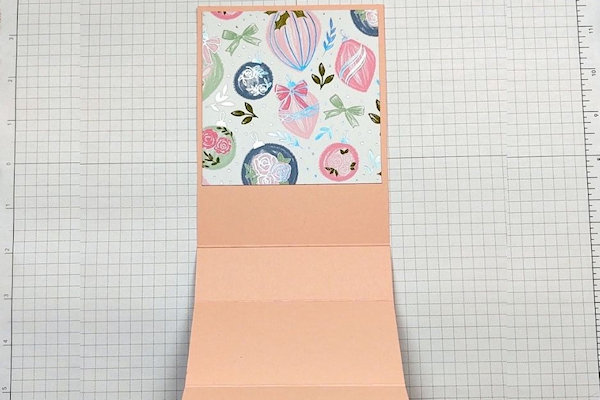
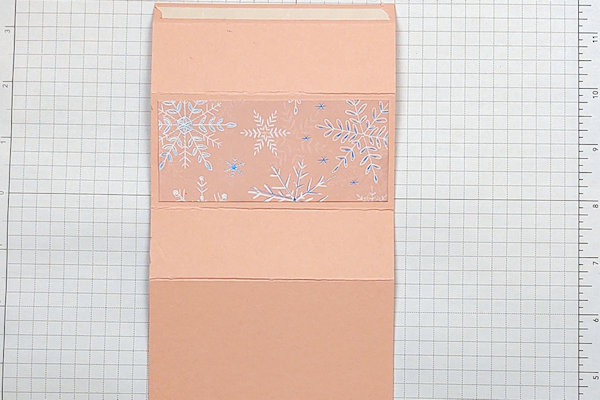
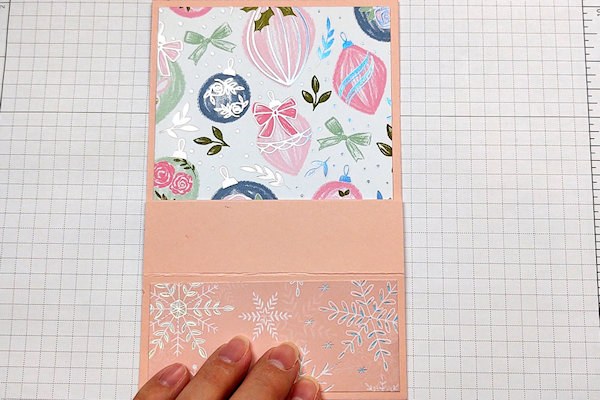
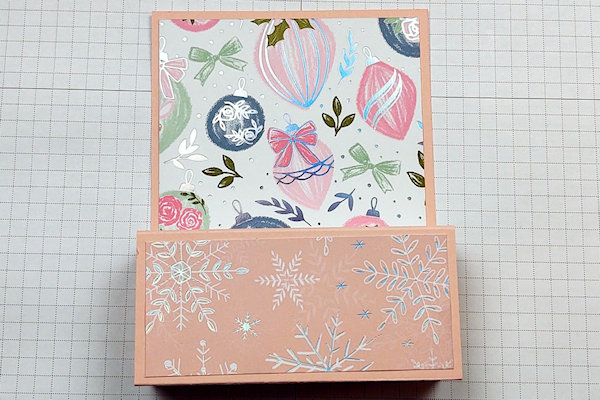
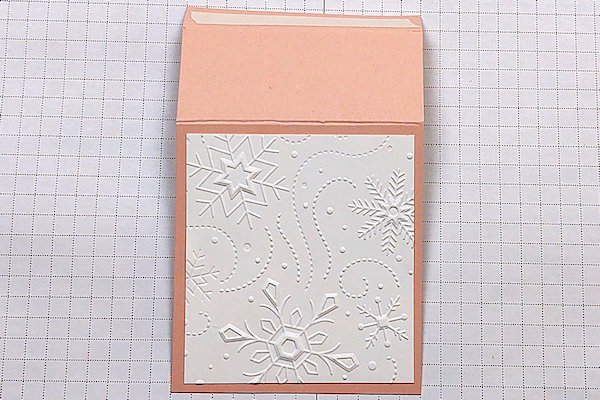
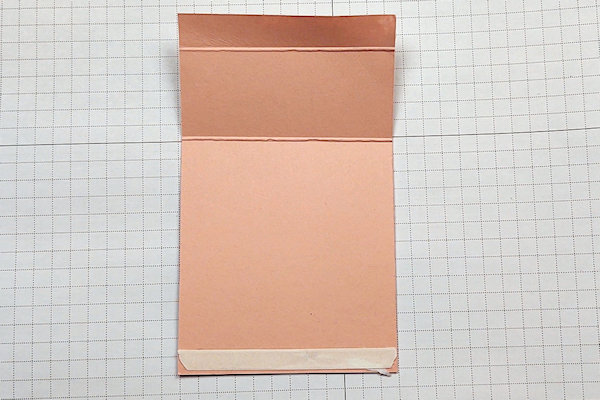
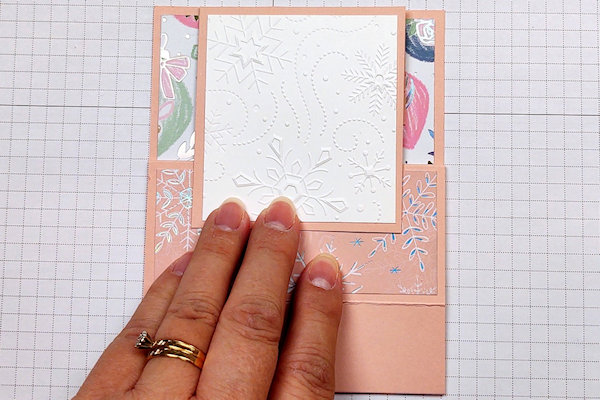

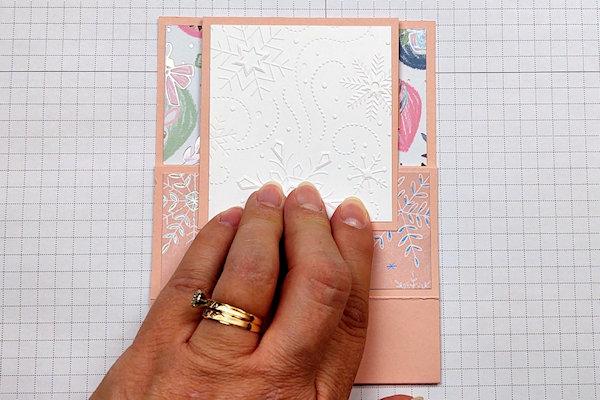

Video!
Your Turn
You've seen the tutorial, now you try it! We've got a section of the gallery set aside for Standing Pop-Up Card. Try this technique, then upload your artwork to the gallery. Show us your creations!
***Please note - Internet Explorer/Edge is not a supported browser, and will not allow you to see the videos. Please use Chrome, Firefox or Safari to view our tutorial videos.


 *
*
Questions and Comments
We'd love to get your feedback or questions. Leave your comment below.