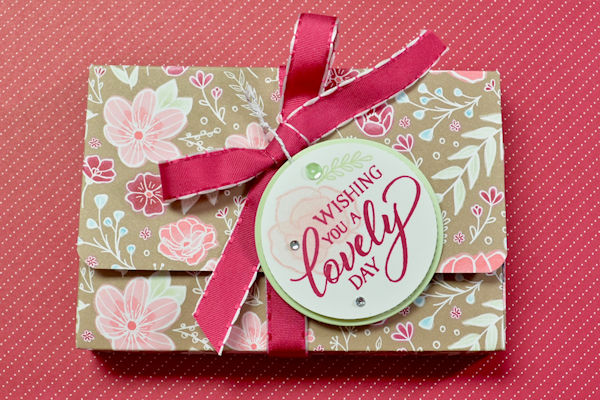
Note Card Clutch
by Chris Slogar
Create a sweet clutch to hold a set of note cards.
Supplies
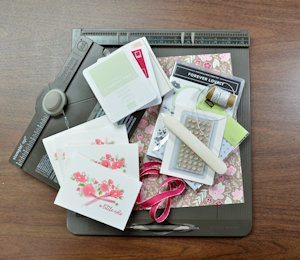
- Cardstock (Stampin’ Up!® Soft Sea Foam and Whisper White used here)
- Designer paper (SU All My Love used here)
- Paper trimmer
- Scoring tool
- Corner rounder (Envelope Punch Board used here)
- Adhesive (Tombow Multi-purpose glue and SU Fast Fuse and Dimensionals used here)
- Other supplies as needed to complete the project (SU supplies used here: Lovely Lipstick Ribbon, Silver and White Baker’s Twine, Basic Adhesive Sequins, Rhinestones, Forever Lovely Stamp Set, Whisper White Note Cards and Envelopes, 2 ¼” Circle Punch, Stitched Shapes Framelits, Big Shot Die Cutting Machine, Lovely Lipstick Ink, Powder Pink Ink, and Soft Sea Foam Ink)
Step-by-Step
-
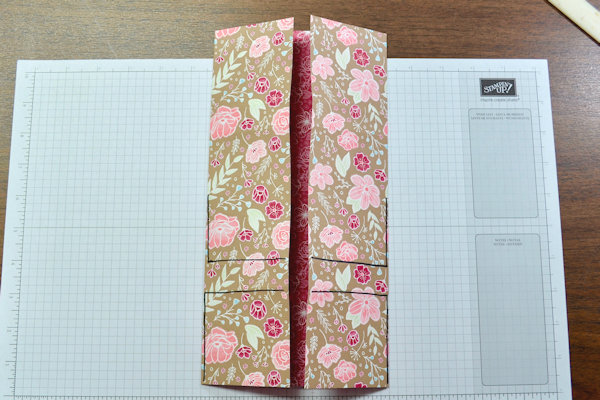
Step 1
Cut designer paper to 11” x 11”. If the pattern is directional, place on the scoring tool in proper orientation (top of design at top of scoring tool).
Score at 2 3/4” and 8 1/4”. Rotate paper 90 degrees and score at 2 3/4”, 3 1/2”, 7 1/2” and 8 1/4”. -
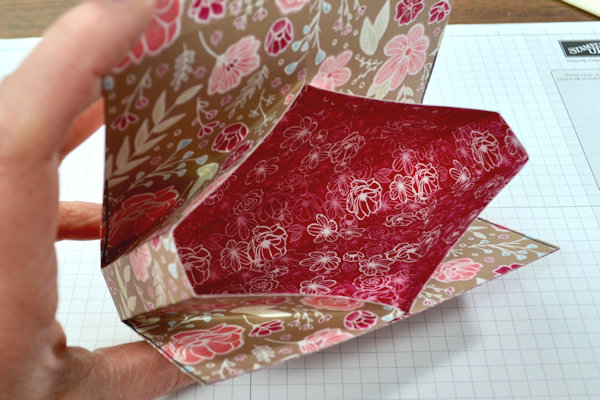
Step 2
Burnish all score lines. Fold along the first two score lines so that edges of paper meet as shown. If the pattern is directional, rotate the paper so that the pattern is upside-down.
NOTE:
The photo shows black markings along critical score lines for the next step – it is not necessary to mark your paper this way.
Note that there are four 90-degree markings. -
Step 3
Form four 3-D corners of pouch by folding at each 90-degree marking shown in the picture for Step 2. At each marking, fold to match one segment of the marking to the other, creating a diagonal fold between them.
-
Step 4
Open up paper and apply glue to limits shown. Refold along original two score lines. Round corners on flap end of clutch.
-
Step 5
Secure lining to front and back panels of clutch with adhesive.
-
-
Step 6
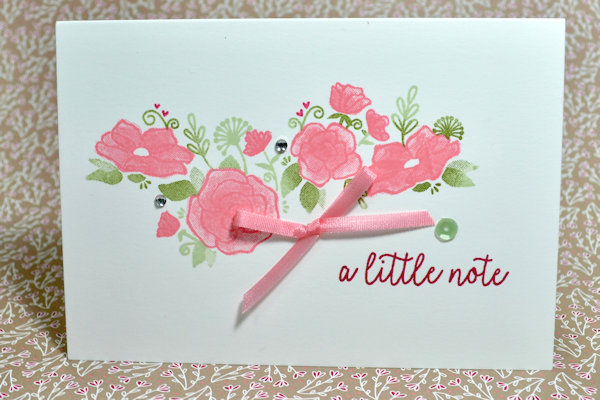
Add note cards (3 1/2" x 5" - A1 size) and envelopes, and tie clutch closed with ribbon.
-
Step 7
Add a tag if desired to complete the project.


Video!
Variations
For a clutch that holds A2 cards (4 1/4" x 5 1/2") and envelopes:
Using a 12"x12" sheet of paper, make your first scores at 3" and 9". Rotate, and score at 3", 3-5/8", 8-3/8" and 9". Follow the instructions above.
Your Turn
You've seen the tutorial, now you try it! We've got a section of the gallery set aside for Note Card Clutch. Try this technique, then upload your artwork to the gallery. Show us your creations!
***Please note - Internet Explorer/Edge is not a supported browser, and will not allow you to see the videos. Please use Chrome, Firefox or Safari to view our tutorial videos.

Questions and Comments
We'd love to get your feedback or questions. Leave your comment below.
I have used a belly band on mine instead of a ribbon tie. (I used the 1" x 11" piece cut from the side of the DSP sheet.)
Project has been uploaded to the gallery.
What size notecards?
I haven’t been able to find envelopes to fit
A card 5-1/4x4
Do you have any suggestions
Page 1 of 1 pages