Northern Lights
by Melissa Banbury
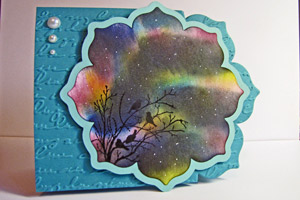
Create a background that looks like Northern lights.
Supplies
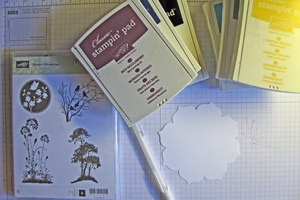
- White Cardstock, Stampin' UP!'s Whisper White used here
- Sponges, or Blending Tools
- Yellow Dye ink, Stampin' Up!'s Daffodil Delight used here
- Green Dye ink, Stampin' Up!'s Old Olive used here
- Turquoise Dye ink, Stampin' Up!'sTempting Turquoise used here
- Purple Dye ink, Stampin' Up!'s Rich Razzleberry used here
- Dark Blue Dye ink, Stampin' Up!'s Night of Navy used here
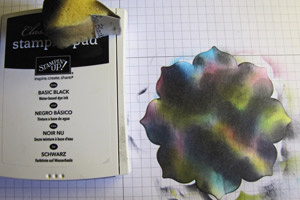
- Basic Black ink
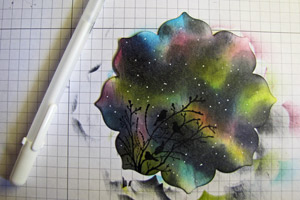
- White Gel Pen
- Silhouette (Solid) image stamp
Step-by-Step
-
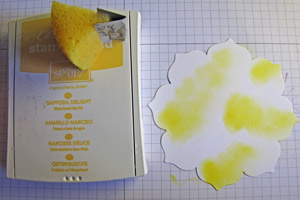
Step 1
Using a rubbing motion apply yellow ink with a sponge randomly across the piece of white cardstock.
-
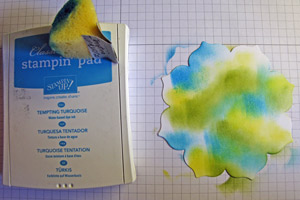
Step 2
With green ink and the same rubbing motion apply the ink just below the yellow ink.

-
Step 3
Begin filling in some of the remaining white space with turquoise ink. Use the previous two colors as a guideline for color placement.
-
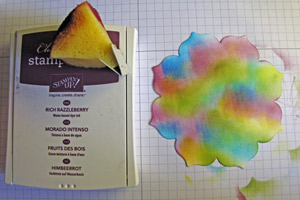
Step 4
Fill in any remaining white space on the cardstock using purple ink. This is a good step to blend some of the ink colors together slightly.
-
Step 5
Sponge dark blue ink randomly just a few areas over top of the previous colors.
This step defines the shape that the Northern Lights will take in the finished project so take time with this step! Leave some areas light and bright; others darker and shadowed for a realistic effect.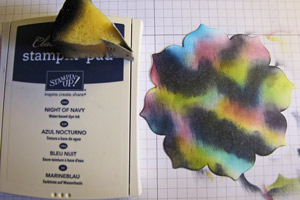
-
Step 6
Sponge black ink along the edges of the dark blue ink to help add further depth to the image.
-
Step 7
Stamp a solid or silhouette image stamp using black ink.
Hint:
If using an image such as a tree line, sponge black ink along the ground line before stamping the image so the images do not appear to “float” in the sky.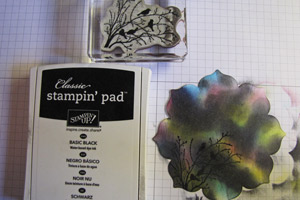
-
Step 8
Add dots randomly over your background with white gel pen.
-
Step 9
Finish your card.
Video!
Your Turn
You've seen the tutorial, now you try it! We've got a section of the gallery set aside for Northern Lights. Try this technique, then upload your artwork to the gallery. Show us your creations!
***Please note - Internet Explorer/Edge is not a supported browser, and will not allow you to see the videos. Please use Chrome, Firefox or Safari to view our tutorial videos.

Questions and Comments
We'd love to get your feedback or questions. Leave your comment below.
Thanks for sharing this.
TFS!!!
Page 1 of 2 pages 1 2 >