Nail Polish Marbling

by Kyra Sanders

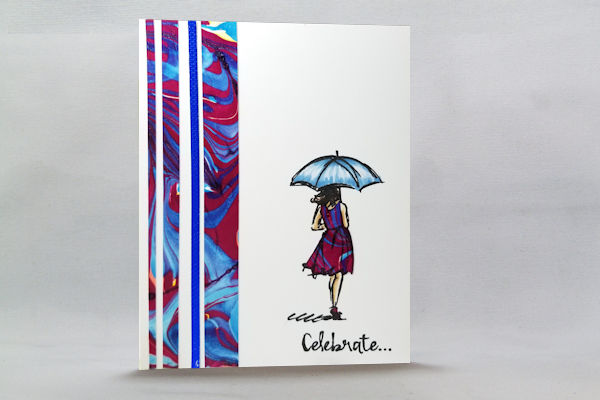
Use nail polish to create a marbled effect.
Supplies
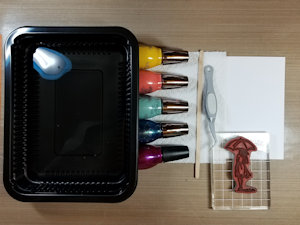
  • Disposable container, large enough for cardstock
  • Water, about 1/2 inch of depth
  • Nail polish (several colors, any brand, any quality)
  • Stir stick (coffee stirrer used here)
  • Cardstock cut to size
  • Tweezers
  • Drying space
  • Paper towels
  • Disposable gloves (optional)
  • Other supplies as needed to complete the project (Stampin’ Up!® Beautiful You stamp set used here)

Step-by-Step

  1. Step 1

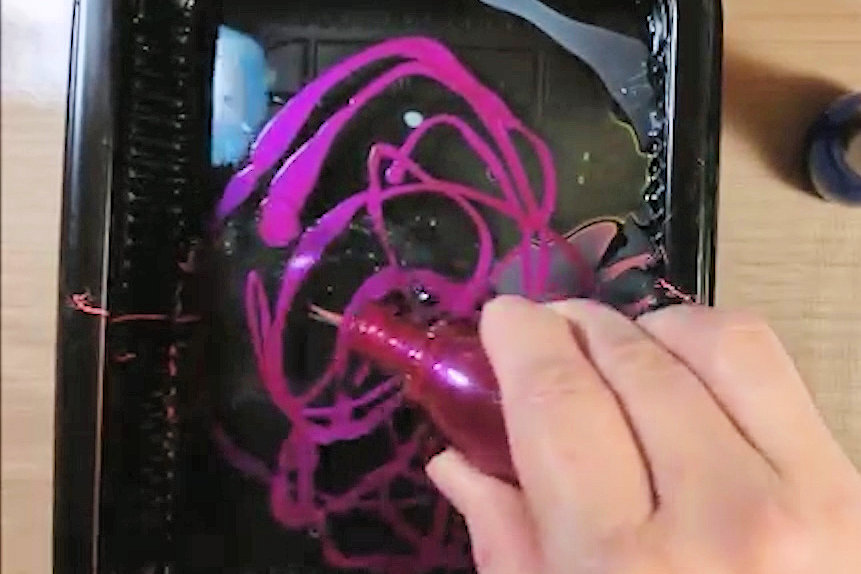
    Prepare a container for the technique, filling with about a 1/2 inch of water. Cut cardstock to size.

    Slowly pour nail polish over the surface of the water in the disposable container.

  2. Step 2

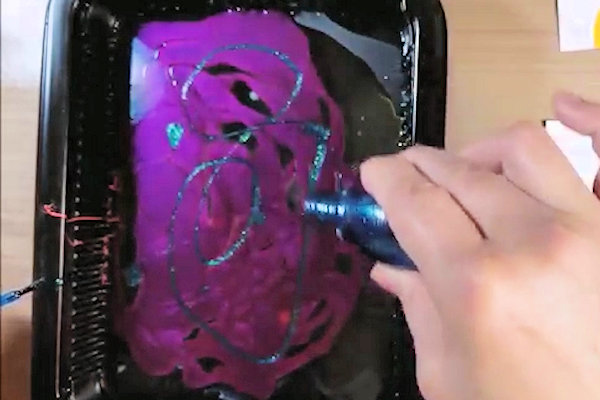
    Repeat Step 1 with additional colors.

  3. Step 3

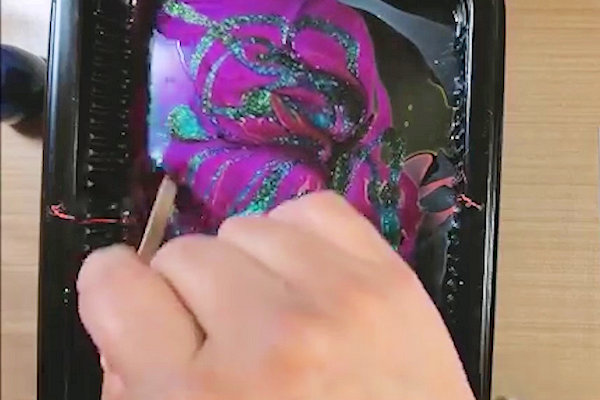
    Use a craft stick or other stirrer to gently stir the polish for a swirly blend.

  4. Step 4

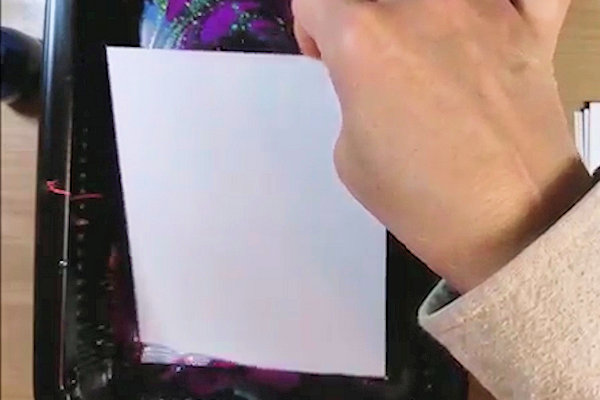
    Gently lay the cardstock over the surface of the water and tap lightly to ensure good contact with the polish.

  5. Step 5

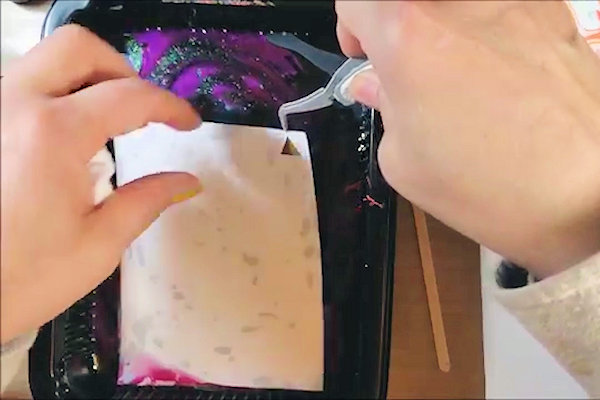
    Lift out the cardstock.

  6. Lay it aside to dry.

  7. Step 6

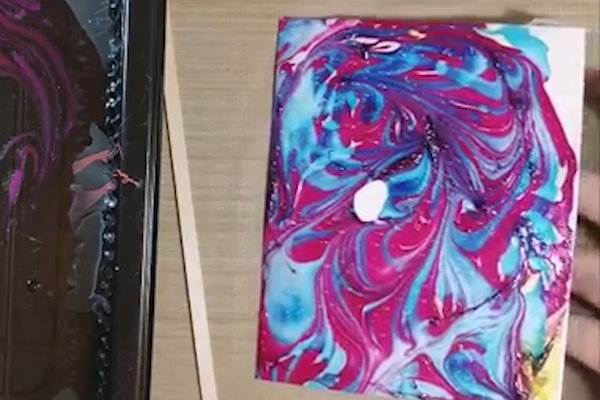
    Use the beautifully marbled piece to complete a project.

    Some ideas include die cutting the marbled paper, using the paper to piece any image, or cutting it up in shapes and strips for your project.

Video!

Your Turn

You've seen the tutorial, now you try it! We've got a section of the gallery set aside for Nail Polish Marbling. Try this technique, then upload your artwork to the gallery. Show us your creations!

***Please note - Internet Explorer/Edge is not a supported browser, and will not allow you to see the videos. Please use Chrome, Firefox or Safari to view our tutorial videos.
Questions and Comments

We'd love to get your feedback or questions. Leave your comment below.

Fabulous tutorial! Can't wait to try this. Off to the dollar store after work. :-D
Susan Handsom  |  Wed May 23, 2018 at 4:23 AM
Love this technique and your card is beautiful. Do you use special coated paper?
Miranda Degenaars  |  Wed May 23, 2018 at 4:24 AM
Wowzers! This is crazy cool! I can't wait to try it!!!
angela bode  |  Wed May 23, 2018 at 6:52 AM
how do you dispose of the leftover water?
Peggy Parenteau  |  Wed May 23, 2018 at 7:22 AM
What a great way to use nail polish. Thank you for sharing your talent. Beautiful card!
Maria Binish  |  Wed May 23, 2018 at 8:48 AM
I was very skeptical that I'd get anything pretty because my limited nail polishes were dark colors. Wow! Was I surprised! So cool! Is there a way to keep water droplets from forming?
muscrat  |  Wed May 23, 2018 at 9:35 AM
I have seen this technique used on clear ornaments, never realized it could be used on cardstock! I will have to lock my cat out of the room for this one smile
Linda Crowley  |  Wed May 23, 2018 at 12:30 PM
This looks amazing! I was going to throw out some nail polishes but now I will try this. I am wondering as well, how do you dispose of the leftover water?

Thank you
Shirl
Shirley Baker  |  Wed May 23, 2018 at 1:50 PM
WOW, what a fun technique and your card is gorgeous. Off to Dollar General to see what nail polish they have!
Sharon Coleman  |  Wed May 23, 2018 at 4:12 PM
I have been using this technique for ages now, used to use the marbling paints. I don�t know what made me try, but once I did...I couldn�t stop! As for the water, I lift most of the polish off with scrap card then just strain the rest of the water through a piece of muslin or similar.....water down sink, debris in cloth!
Ivy  |  Wed May 23, 2018 at 11:40 PM
Ivy, thank you!!!! I saw the question was asked many times, but I didn't see an answer until yours. Thank you very much!!!
Jennifer Hovermale  |  Thu May 24, 2018 at 12:44 AM
I love this technique too... saw it over on youtube many moons ago. Love the Purple colors too... I'm a purple fan as well. smile You can also do this marbling with Alcohol Inks and water. Thanks for sharing. smile
Robin Moore  |  Thu May 24, 2018 at 6:11 PM
Fabulous! I�ve never had anyone answer my question about disposing of the water since you can�t put the polish down the drain. What do you do with it?
Kathy Harrison  |  Thu May 24, 2018 at 7:42 PM
I had no clue we could use fingernail polish on water, with regular cardstock! These are stunning!! I always felt intimated to try pours but this looks like maybe even I can try it. Thank you, Kyra!
Rosy Newlun  |  Thu May 24, 2018 at 7:57 PM
Miranda Degenaars
No, I used cheap white cardstock. Nothing special there.
Ky Sanders  |  Thu May 31, 2018 at 2:39 PM
Peggy Parenteau
The nail polish is fairly all used up. The bit that remains is usually stuck in part to the pan, so the water just slips out without polish. Then I recycle the pan or keep it for later play.
Ky Sanders  |  Thu May 31, 2018 at 2:40 PM
muscrat
The water droplets - I'm guessing you mean blank spaces in the print? My suggestion is to make sure you swirl the polish enough to not leave gaps. The other thing that might be messing you up is not getting good contact with the paper and polish. I tap mine down before I lift to make sure it has good adhesion.
Ky Sanders  |  Thu May 31, 2018 at 2:42 PM
Shirley Baker

The nail polish is fairly all used up. The bit that remains is usually stuck in part to the pan, so the water just slips out without polish. Then I recycle the pan or keep it for later play.
Ky Sanders  |  Thu May 31, 2018 at 2:43 PM
We bought some inexpensive polish at the Dollar Tree and found that there was a film on the water and all the polish "clumped" on the stir stick. Any suggestions or ideas so we can get this to work???? Thanks!
Beverly Terry  |  Sat Jun 2, 2018 at 9:53 AM
I had the same experience as Beverly - there was a film on the water and the polish clumped on my swirling stick. I thought it might be the kind of polish I used but I'm not sure.
Anna S  |  Fri Jun 8, 2018 at 6:58 PM

Page 1 of 2 pages  1 2 >

You need to be logged in to comment

GET OUR NEWSLETTER


Splitcoaststampers's privacy policy