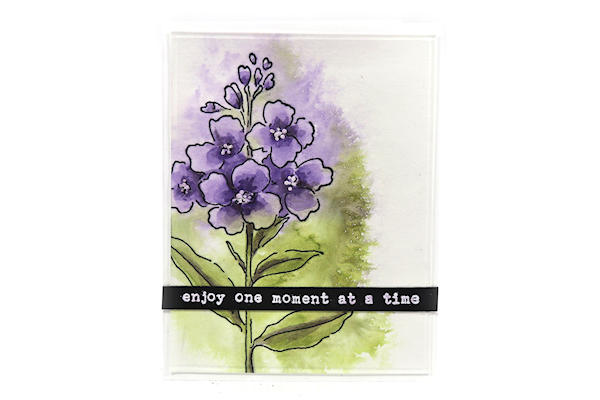
Misted Watercolor
by Dina Kowal
Use a water mister with watercolors for an atmospheric effect.
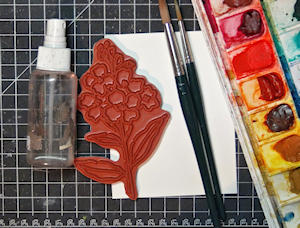
Supplies
- Watercolor paper (Fabriano Studio 140# hot press paper used here)
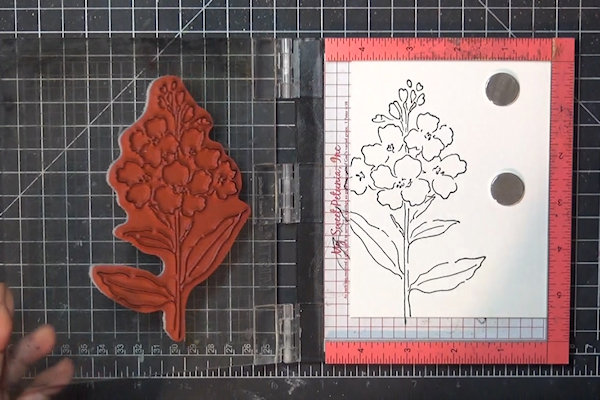
- Outline stamp (Impression Obsession L20926 Evening Primrose used here)
- Waterproof ink (Versafine Clair Nocturne used here)
- Water mister
- Watercolor medium (QoR tube watercolors used here)
- Watercolor brushes (#6 and #12 round used here, Da Vinci Nova brand)
- White acrylic paint (Apple Barrel brand used here)
- Small ball stylus
- Colored pencil (Caran d’Ache Pablo Bistre pencil used here)
- Other supplies as needed to complete the project (MISTI stamp positioner, Spellbinders white card base, Fabriano Black Black cardstock scrap, Impression Obsession C13977 One Moment, Versafine ink, Stampendous detail white embossing powder)
Step-by-Step
-
Step 1
Stamp an outline image onto watercolor paper using waterproof ink.
-
Step 2
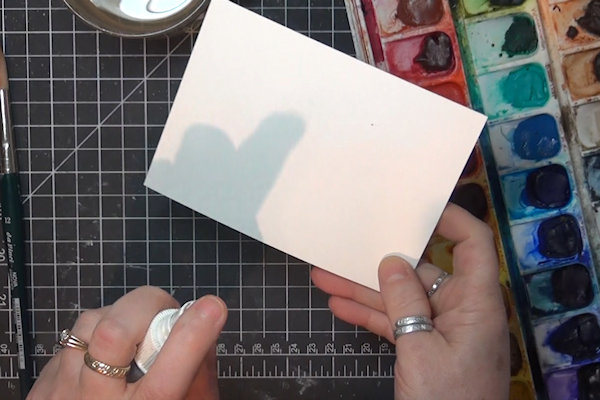
Tape down the watercolor panel or mist the back to counter the bend that will happen when the front is misted.
-
Step 3
Mist the front of the panel within the outline of the image, allowing some water to spray outside the outline.
-
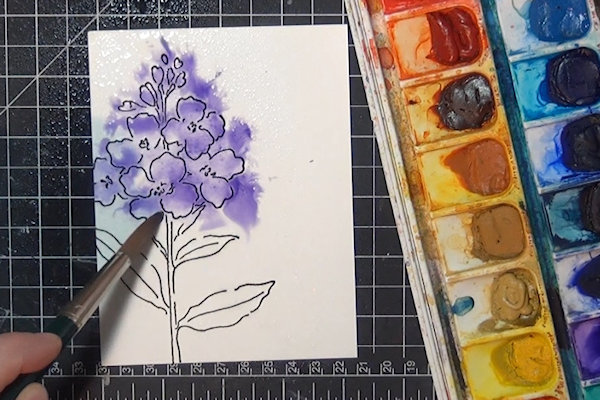
Step 4
Using a larger brush (#12 round used here) loosely paint the image with watercolor paints or dye reinkers, allowing the misted water to pull the paint out into the sprayed pattern. This step is very imprecise! Just get the color on there. Mist lightly again to encourage movement if the paint is not flowing as you’d like.
-
Allow the panel to dry completely before continuing.
-
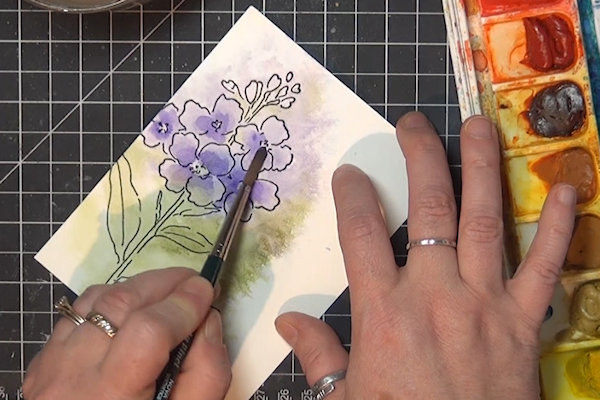
Step 5
Switch to a small brush to add details and shading. For floral images, add shading to the flower centers and blend out with water. Dot in additional paint while these areas are still damp.
In general, shaded portions are areas that are hidden behind something, areas that are lower, and areas that are farther away or curving away. -
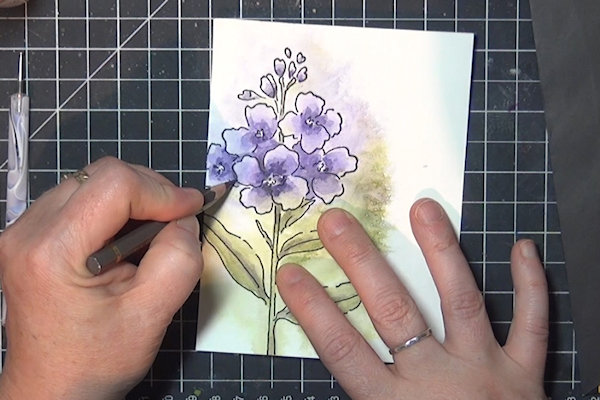
Step 6
Allow the panel to dry, and add in more shading as needed. Repeat this step as many times as necessary.
-
Step 7 (Optional)
You can use a dark colored pencil to deepen and sharpen shadowed areas.
-
Highlights can be added with white acrylic paint. Here a small ball stylus was used to add dots of paint to the flower centers.
-
Step 8
Use the finished panel to complete a card or other project.


Video!
Your Turn
You've seen the tutorial, now you try it! We've got a section of the gallery set aside for Misted Watercolor. Try this technique, then upload your artwork to the gallery. Show us your creations!
***Please note - Internet Explorer/Edge is not a supported browser, and will not allow you to see the videos. Please use Chrome, Firefox or Safari to view our tutorial videos.

Questions and Comments
We'd love to get your feedback or questions. Leave your comment below.
Page 1 of 1 pages