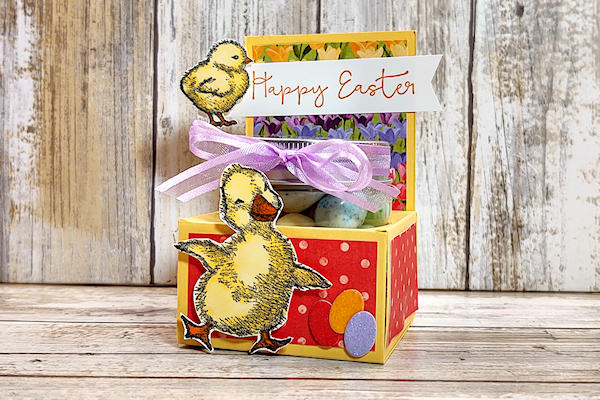
Mini Jar Treat Holder
by Christy Fulk
Deliver a treat in this sweet jar holder.
Supplies
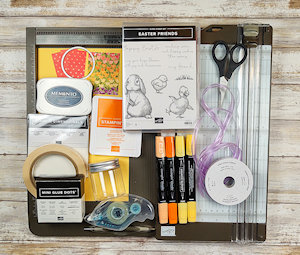
- Cardstock (Stampin’ Up!® So Saffron & Basic White used here)
- Patterned paper (SU Flowering Fields Designer Series Paper & Ombre Specialty Paper used here)
- Scoring tool (SU Simply Scored Scoring Tool used here)
- Scissors and paper cutter (SU Paper Snips & Paper Trimmer used here)
- Small jar with lid (SU Mini Jam Jar (2-1/8” around & 2-1/2” tall) used here)
- Strong adhesive (SU Tear & Tape Adhesive used here)
- Adhesive (SU Stampin’ Dimensionals, Mini Glue Dots, & Stampin’ Seal used here)
- Other supplies as needed to complete the project (SU supplies used here: Easter Friends Stamp Set, Layering Circles Dies, Suit & Tie Dies (small oval die), ink pads-Pumpkin Pie & Tuxedo Black Memento Pads, alcohol markers-So Saffron & Pumpkin Pie Stampin’ Blends, Die-Cutting Machine, Banners Pick a Punch, & Fresh Freesia Open Weave Ribbon)
Step-by-Step
-
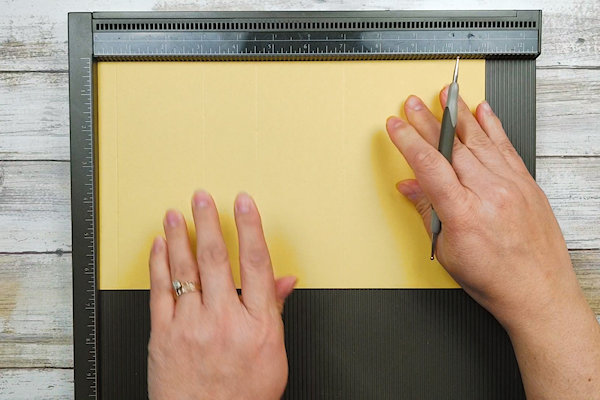
Step 1
Get a 6 1/2” x 11” piece of cardstock. With an 11” side along the top, score the piece at 1/2”, 3”, 4 1/2”, and 7”.
-
With a 6 1/2” side along the top, score the piece at 1/2”, 2”, 4 1/2”, and 6”.
-
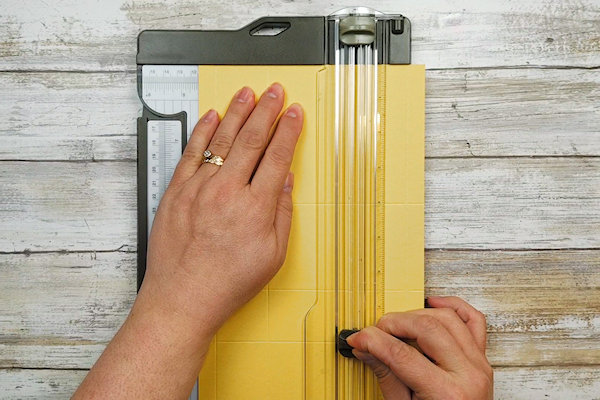
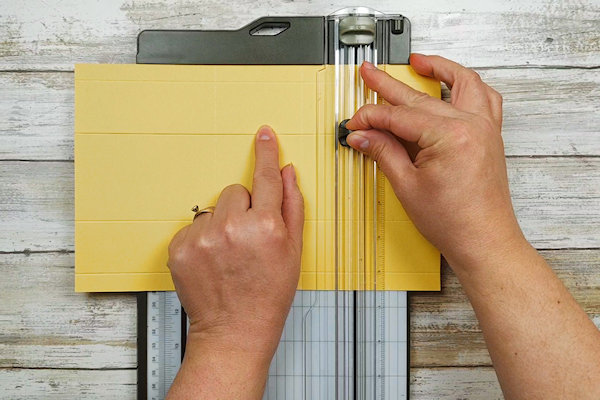
Step 2
Hold the piece so the 6-1/2” sides are on the top & bottom, and make the narrow section be across the bottom. Cut along the second from the right, vertical score line, and stop at the first horizontal score line. Then, cut the along the same horizontal score line to cut these two sections off. Repeat this step on the left side of the piece so both sides look the same and only the center section is left.
-
Step 3
Starting from the top (opposite end) of the piece, line the second vertical score line from the right along the track in a paper trimmer, and cut down to the last horizontal score line.
-
Rotate a quarter-turn (counter clockwise). Line the score line you just cut down to along the track in the paper trimmer, and cut this whole section off.
-
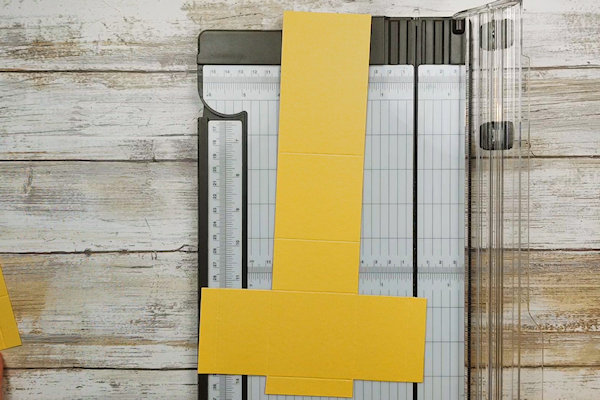
Step 4
Repeat Step 3 to cut off the opposite side of the piece. You’ll be leaving only the center row of the top three sections.
-
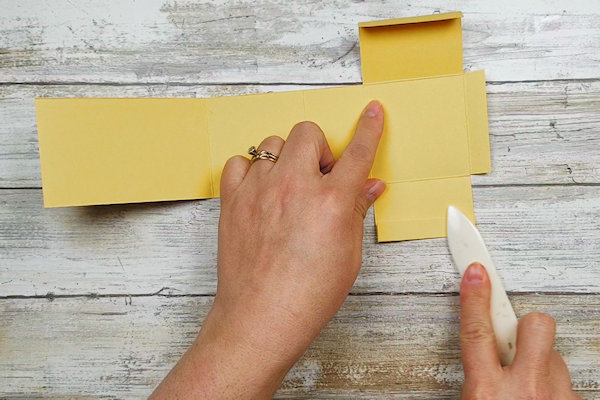
Step 5
Turn the piece over so the “hills” of the score lines are facing up. Burnish all of the score lines by folding the score lines towards the front using a bone folder.
-
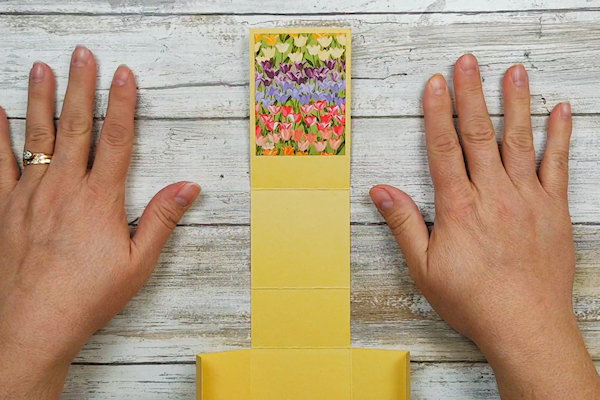
Step 6
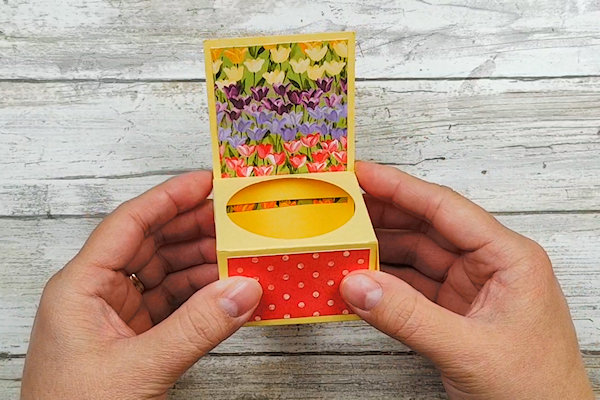
Attach a 2 1/4” x 3” piece of patterned paper onto the top of the piece. The cardstock border on the top and sides of the patterned paper should be about the same width.
-
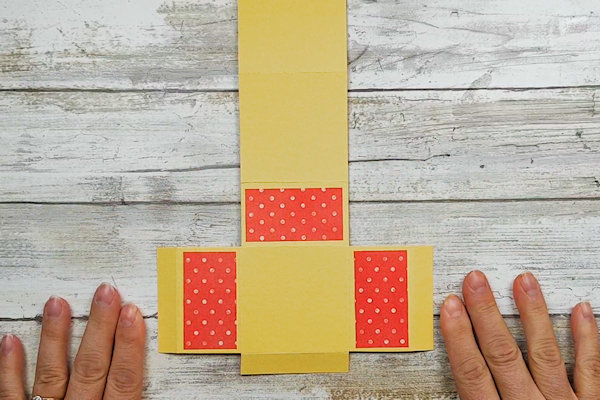
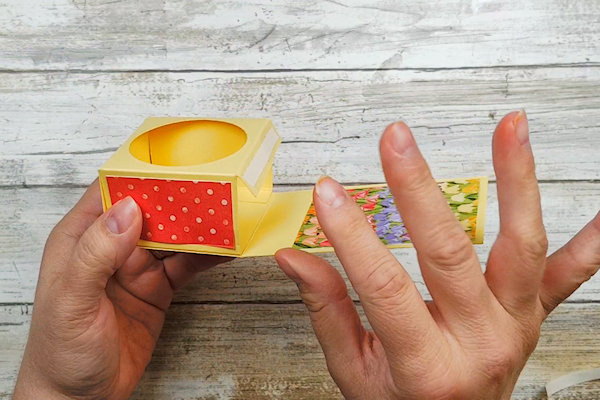
Turn the piece over. Cut three 2 1/4” x 1 1/4” pieces of patterned paper. Attach a piece of the pattered paper to each section pictured.
-
Step 7
Put a piece of strong adhesive onto each of the narrow sections pictured.
-
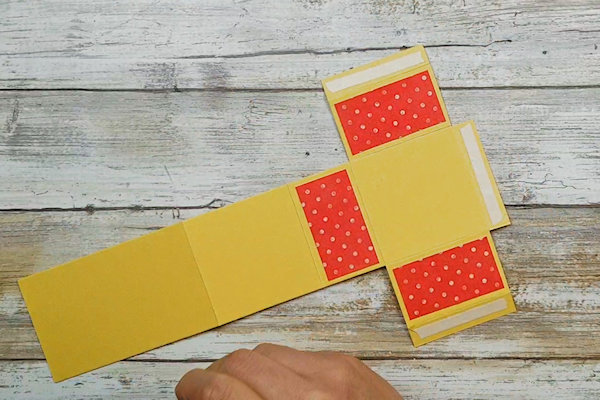
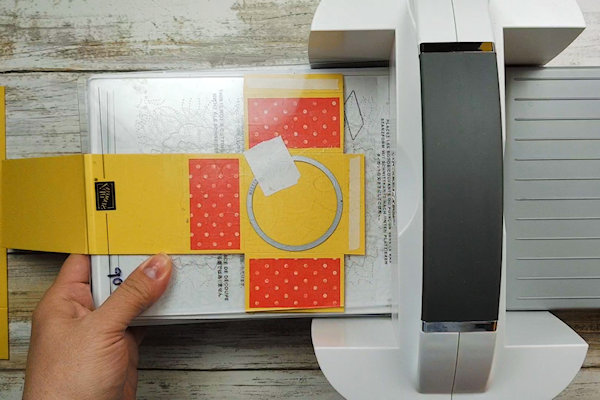
Fold the two narrow sections on each side of the piece down, under the piece so it can go through a die-cutting machine. Die-cut about a 2-1/8” circle out of the center square section. It shouldn’t be any larger, but it can be smaller, if needed.
-
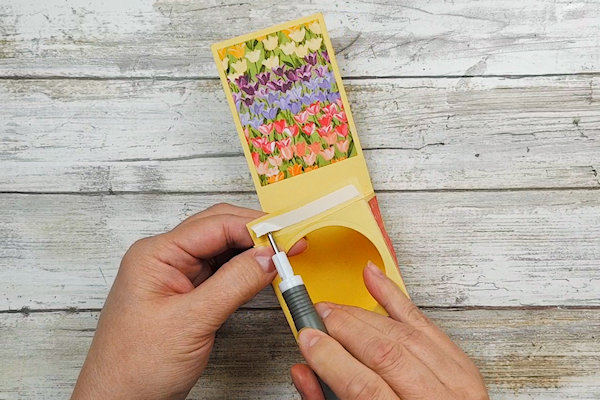
Step 8
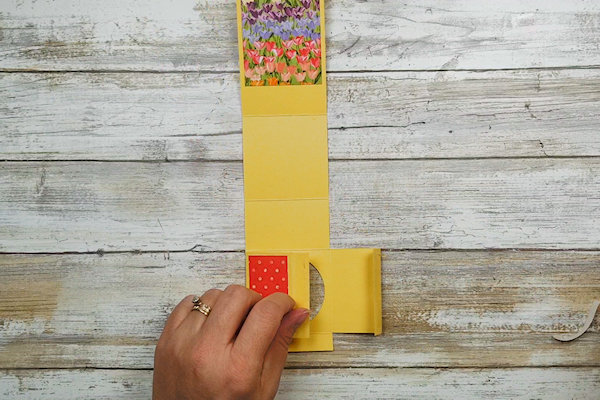
Remove the paper backing from the strong adhesive on the right and left narrow sections.
-
Attach one of the narrow sections along the side edge of the section underneath the larger patterned paper section. Make sure to line the score line of the narrow section along the edge of the larger section. Attach the other narrow, side section along the other side edge of the same section the same way.
-
Step 9
Remove the paper backing from the last piece of strong adhesive.
-
Attach it to the larger patterned paper back piece, making sure to line the folds with the side edges of the back piece.
-
Step 10
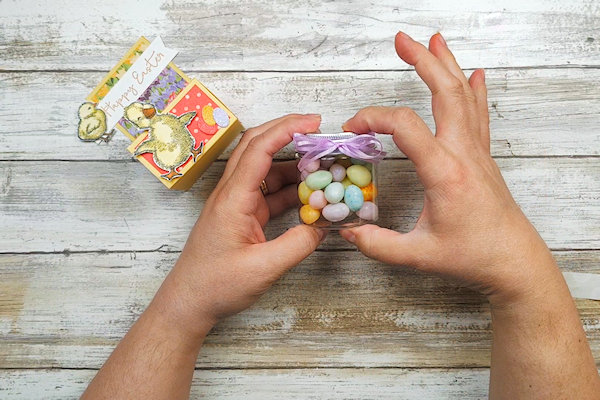
Fill the jar up with some candy. Wrap an 18” piece of ribbon around the lid of the jar, and tie into a bow.
-
Insert the jar into the circle opening to complete the project.


Video!
Your Turn
You've seen the tutorial, now you try it! We've got a section of the gallery set aside for Mini Jar Treat Holder. Try this technique, then upload your artwork to the gallery. Show us your creations!
***Please note - Internet Explorer/Edge is not a supported browser, and will not allow you to see the videos. Please use Chrome, Firefox or Safari to view our tutorial videos.

Questions and Comments
We'd love to get your feedback or questions. Leave your comment below.
(Lyn)
Page 1 of 1 pages