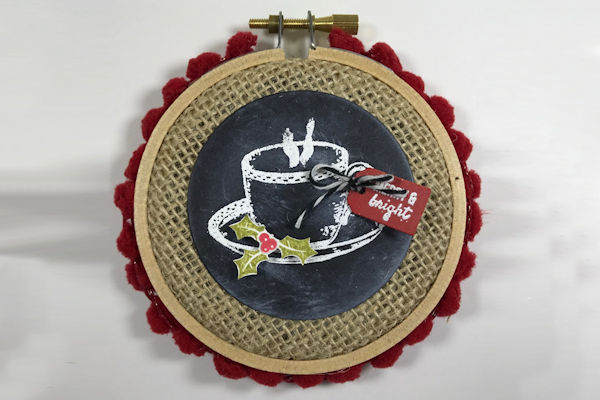
Mini Hoop Ornament
by Becky Roberts
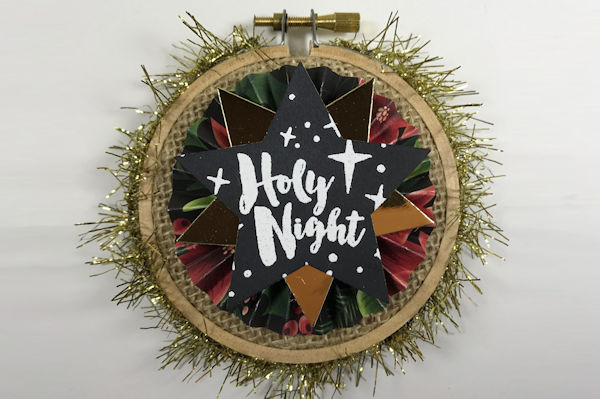
Make a chalk board ornament with an embroidery hoop frame.
Supplies
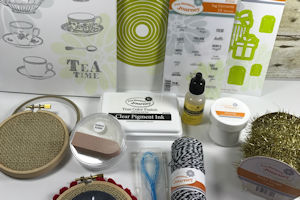
- 3” embroidery hoop (purchased from etsy seller CraftyWoolFelt) Burlap (6” square)
- Black cardstock (Fun Stamper’s Journey Black Licorice, Candy Apple, and Whip Cream cardstock used here)
- Embossing ink (FSJ Clear Pigment Ink and Refill used here)
- White ink (FSJ Whip Cream Ink used here)
- Stamps (FSJ Tea Time, Tag Elements (words), Holiday Wishes (holly) sets used here)
- Circle punch or die (FSJ Journey Circles, For You (tag), and 1/16” Hole Punch used here)
- White embossing powder
- Heat tool
- Adhesives (FSJ Craft Glue, Journey Glue Dots, and Journey Foam Squares used here)
- Trim (Red Pompom Trim used here)
- Other supplies as needed to complete the project (used here: FSJ Green Olive, and Candy Apple inks; PanPastel Colorless Blender, Journey Licorice Twist Twine, Journey Blending Brush, trimmer)
Step-by-Step
-
Step 1
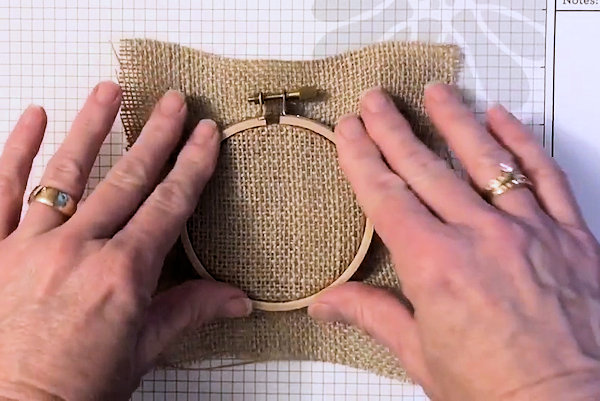
Unscrew the embroidery hoop so you can separate the 2 hoops. Cut about a 6” square piece of burlap. Place the smaller piece of the hoop under the burlap and the larger piece on top. Sandwich together, trapping the burlap in between. Tighten the hoop.
-
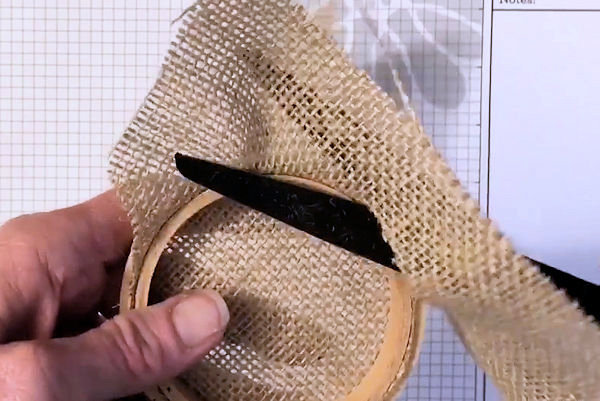
Turn the hoop over and trim the excess burlap off with scissors.
-
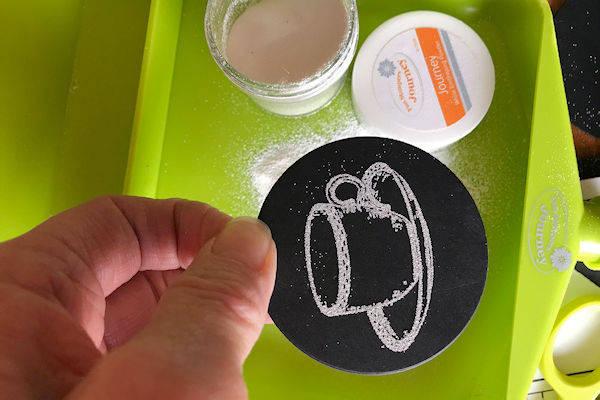
Step 2
Cut a circle of black cardstock using a die that is about 2-1/4” in diameter. Prepare the piece for embossing. Stamp with embossing ink and emboss with white embossing powder.
-
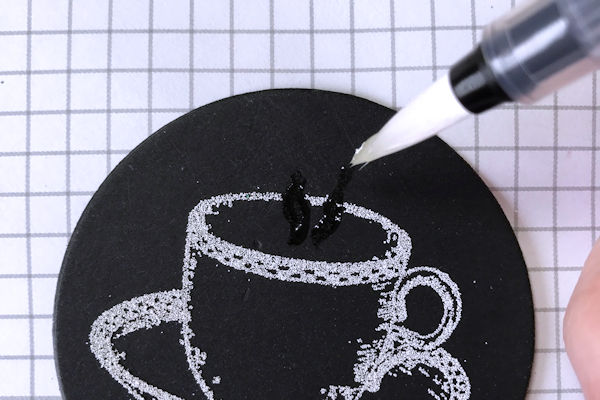
Step 3
Add extra details as needed by brushing embossing ink onto the image. Sprinkle with white embossing powder and heat set.
-
Step 4
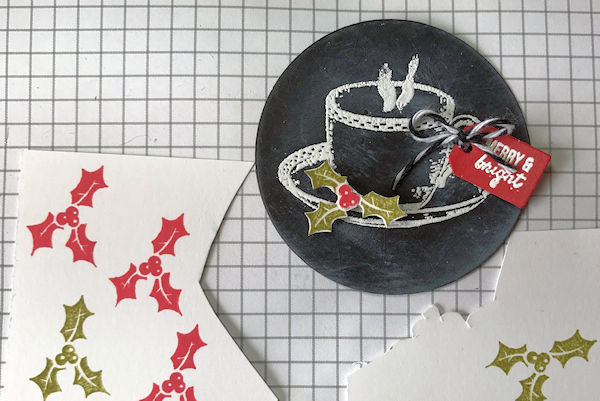
Using an old washcloth or dry brush, lightly smear white ink across the black to make it look more like a chalkboard. This step is optional.
-
Embellish the panel as desired.
-
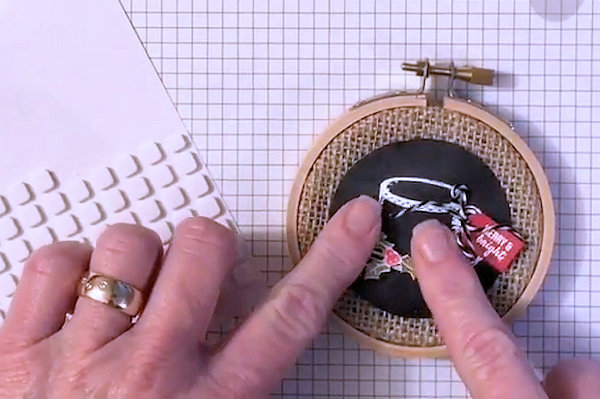
Step 5
Use either Foam Squares or Glue Dots to adhere the circle to the embroidery hoop.
-
Step 6
Lay a strip of double-sided tape around the outside of the hoop. Peel the white backing off, exposing the adhesive. Adhere the trim to the ornament.
-
Step 7
Complete the project.


Video!
Variations
-
For a different look, create a rosette. Cut cardstock to 12” x 1-1/4” and score every 1/4”. Fold the piece accordion style and adhere it end to end in a circle, then press it down flat to create the rosette. For complete instructions on creating a rosette, click HERE. Embellish as desired.
Your Turn
You've seen the tutorial, now you try it! We've got a section of the gallery set aside for Mini Hoop Ornament. Try this technique, then upload your artwork to the gallery. Show us your creations!
***Please note - Internet Explorer/Edge is not a supported browser, and will not allow you to see the videos. Please use Chrome, Firefox or Safari to view our tutorial videos.

Questions and Comments
We'd love to get your feedback or questions. Leave your comment below.
Keep up the good work, and I'm glad to have stumbled upon you.
Renee D. B.
Page 1 of 1 pages