Magic Snowflake
by Vickie Maduzia
Combine two easy techniques for a pretty look.
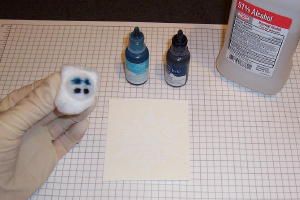
Supplies
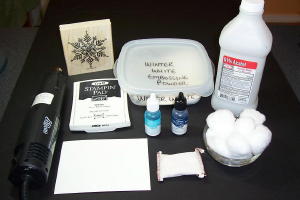
- White Glossy Cardstock
- Embossing Buddy™
- Rubber Stamps
- White Craft Ink
- White embossing powder
- Heat Tool
- Classic Re-inkers (two colors)
- 91% Volume Rubbing Alcohol
- Cotton balls
Step-by-Step
-
Step 1
Rub your Embossing Buddy™ over the piece of White Glossy Cardstock to reduce static.
-
Step 2
Stamp your image onto the glossy cardstock using White Craft ink.

-
Step 3
Sprinkle with White Embossing Powder and heat set with Heat Tool.
-
-
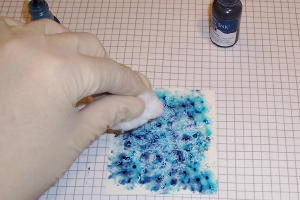
Step 4
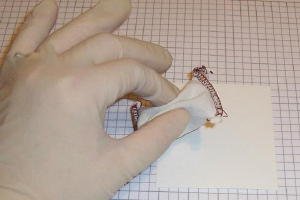
Put some rubbing alcohol onto the cotton ball (saturate it about half-way).

-
While holding the wet cotton ball face up, carefully squeeze out 2 drops of your first color of re-inker onto the top left portion of the cotton ball, then 2 drops of your second color of re-inker on the right.
-
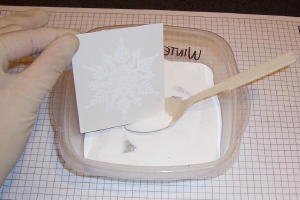
Step 5
Start dabbing the wet cotton ball all over the entire stamped piece, until the square is completely covered with color. The stamped image will disappear under the ink.
-
Step 5
Start dabbing the wet cotton ball all over the entire stamped piece, until the square is completely covered with color. The stamped image will disappear under the ink.
-
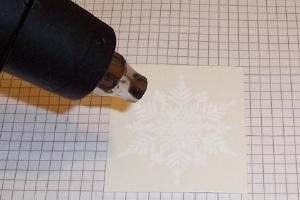
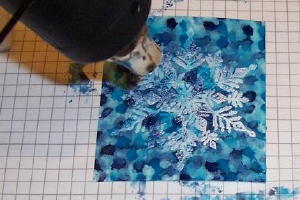
Step 6
Now here's the magic part! Use your heat gun again, point it right at the center of the snowflake and watch as the snowflake emerges out of the murky, inky mess - it really does look and feel like magic when you do it!
Continue slowly moving the heat gun around, heating completely until the ink evaporates and the snowflake looks white and pretty again.
-
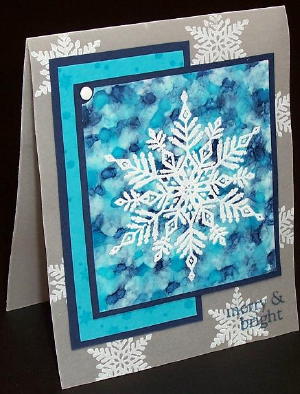
Step 7
Finish your card.
-
Step 7
Finish your card.
Video!
Variations
-
Tips:
Do NOT use metallic Encore ink with this technique, or the metallic ink will get embedded into the image and will look very icky.
Although you can use any colors of re-inkers, I have found it's best to stay with coordinating colors (next to each other on the wheel) rather than contrasting colors. Better yet, use two shades of the same color (2 pinks, 2 greens, 2 blues, etc).
Sepia look
Use two brown tones for a sepia look.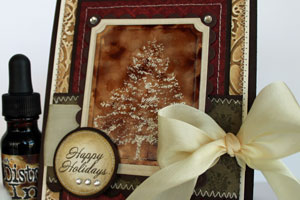
Your Turn
You've seen the tutorial, now you try it! We've got a section of the gallery set aside for Magic Snowflake. Try this technique, then upload your artwork to the gallery. Show us your creations!
***Please note - Internet Explorer/Edge is not a supported browser, and will not allow you to see the videos. Please use Chrome, Firefox or Safari to view our tutorial videos.

Questions and Comments
We'd love to get your feedback or questions. Leave your comment below.
Magic Snowflake card. I love it. Thanks!
Nancy
Page 1 of 1 pages