Magic Card
by Beate Johns
Wow everyone with this nifty card.
Supplies
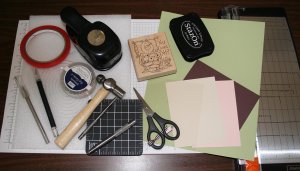
- One piece of cardstock 4 ¼ " x 5 ½ " for card base (here Chocolate Chip)
- One piece of cardstock 8 ½" x 10 ½" for slide cover (here Certainly Celery)
- One piece of cardstock 3 ¾" x 5 ¼" for slider (here Natural Ivory)
- One piece of light colored cardstock 3 ½" x 5" for behind window (here Blush Blossom) (Optional)
- Two pieces of window sheets or other acetate 4" x 5 ¼"
- Stamp-a-majig®
- Coluzzle™
- Paper cutter with scoring and cutting blade
- Stazon™
- Material to color your image
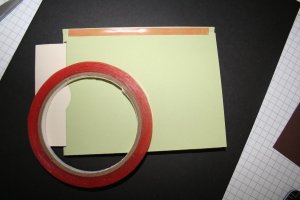
- Sticky Strip™
- Eyelet and eyelet setting tools (optional)
- Circle punch (optional)
- Ribbon or other embellishments
Step-by-Step
-
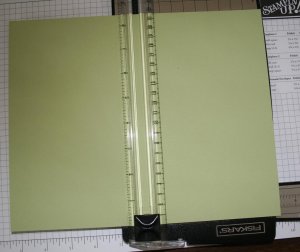
Step 1
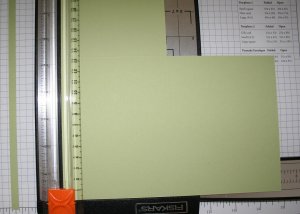
Take your 8 1/2" x 10 1/2" piece of cardstock, slide it into the paper cutter horizontally and score it at 5 1/4".
-
Step 2
Now slide the cardstock in vertically and score it at 4 1/4".
The two scores you've made have now separated the cardstock into four separate "panels". We'll refer to these panels in the next steps.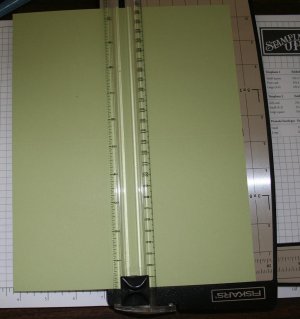
-
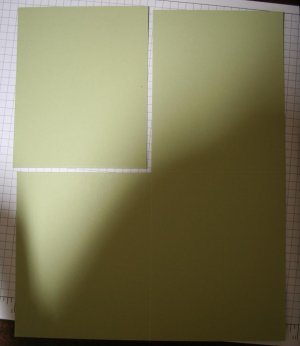
Step 3
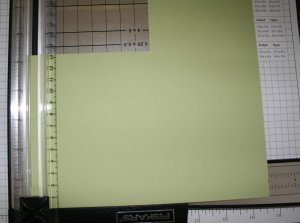
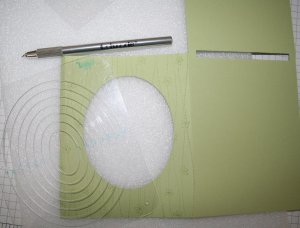
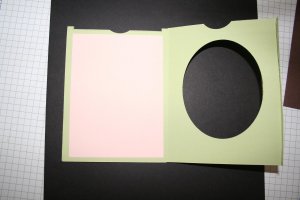
Switch your scoring blade for the cutting blade and cut out the upper left panel of the cardstock.
-
Step 4
Cut off 1/4"off the long side of the right panels (top and bottom).
-
Step 5
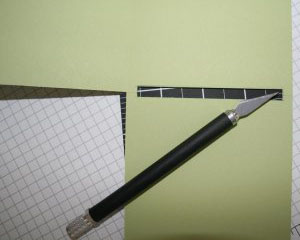
Switch the cutting blade for the scoring blade. Score 1/4" on the long outside edge of the single panel on the left side.
-
Step 6
Take your hobby knife and cut a 1/4" thick slot on the score between the right side panels. Leave ¼" margin on each side.
-
Step 7
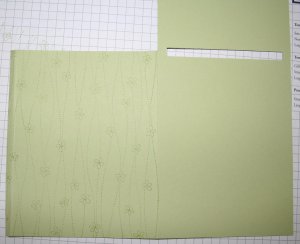
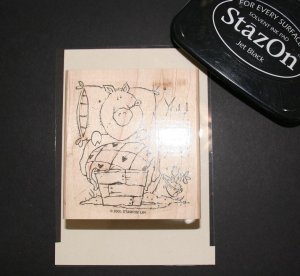
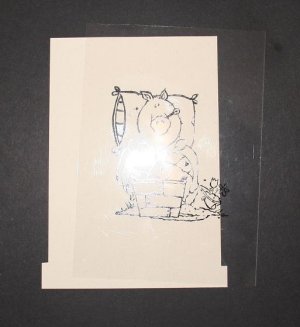
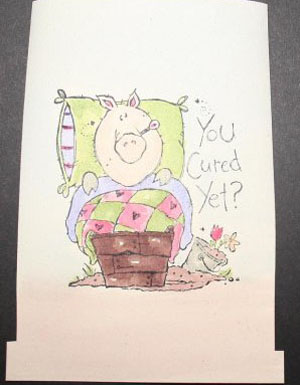
Stamp your left hand panel.
-
Step 8
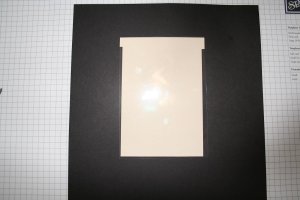
Cut a window out of your left panel.
-
Step 9
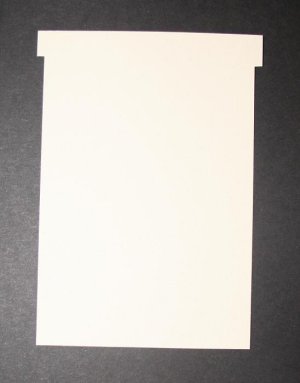
Take your 3 3/4"x 5 1/4" piece of cardstock. Cut thin strips 1/8" in from the bottom all the way up to 4 3/4" on both sides.
Cut the thin strips off, leaving the T-shaped cardstock as shown. This is your slider.
-
Step 10
Take one of your window sheets and center it over the slider.
-
Step 11
Stamp your image in the center of the window sheet with StazOn™.
-
-
Step 12
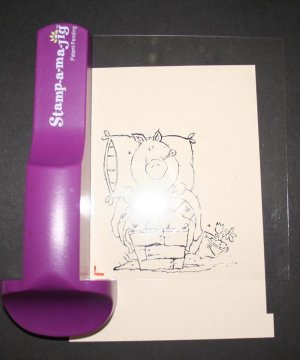
Take your other piece of window sheet and your Stamp-a-Majig™. Line one corner of the window sheet up with the corner of the Stamp-a-Majig™. Mark that corner.
Ink up your image again with Stazon™. Slide the corner of the wood into the corner of the Stamp-a-majig™. Stamp the image on your second piece of window sheet. This is your placement guide.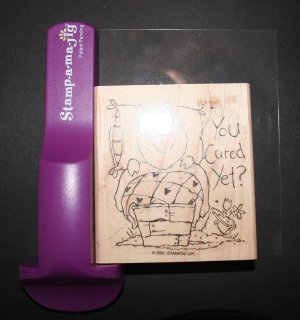
-
Step 13
Center the stamped window sheet over your slider.
Slide your placement guide under the window sheet until the images lay on top of each other.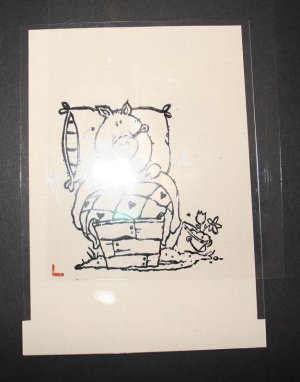
-
Step 14
Carefully remove the top window sheet, leaving only the placement guide over your slider.
Line up the Stamp-a-majig™ with the marked corner of the placement guide.
-
Step 15
Remove the placement guide, ink up your stamp and slide it in the corner of the Stamp-a-Majig™. Stamp your image.

-
Step 16
Color your image.
-
Step 17
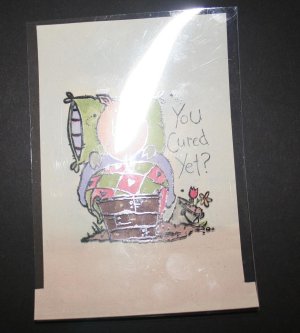
Line up the stamped image on the window sheet with the colored image on the cardstock.
-
Step 18
Hold both pieces together tightly and trim the acetate to the same size as your cardstock. Be careful that your acetate doesn't move during the trimming.

-
Step 19
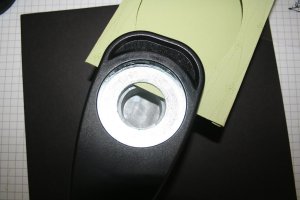
Fold your slider cover up and use your circle punch to punch a half-circle on the top (where the fold is).
-
Step 20 (Optional)
For a different color cardstock under your image on the acetate than the one you have made the slider cover with, take the cardstock color of your choice, cut a piece of 3 1/2" x 5" and tape it to the side on the opposite of the window.
-
Step 21
Slide your colored image through the slot between the top and bottom panels. You will have your window on the right, and the panel that will hide your colored image on the left. Push your image out as far it will go. The tabs we made in Step 9 will prevent it from coming out completely.
Take your window sheet image and lay it on top. Line it up exactly and add a thin strip of tape on the top to keep them together.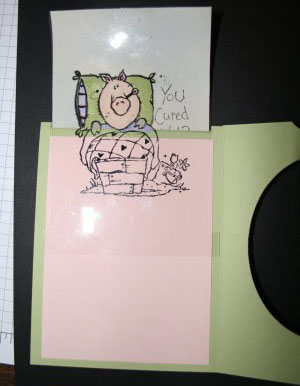
-
Step 22 (Optional)
To make sure the cardstock and window sheet images are secure, punch out a piece of coordinating colored cardstock with your circle punch, fold in half and tape over both pieces.

-
Step 23 (Optional)
To secure them even more, add an eyelet.

-
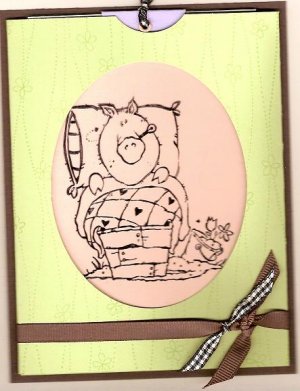
Step 24
Push sliding images all the way in, fold window panel over and tape together on the back.
-
Step 25
Add embellishments if wanted, then tape your entire magic card on your 5 1/2"x 4 1/4"piece of cardstock.
-
Step 26
Finish your card!

Video!
Your Turn
You've seen the tutorial, now you try it! We've got a section of the gallery set aside for Magic Card. Try this technique, then upload your artwork to the gallery. Show us your creations!
***Please note - Internet Explorer/Edge is not a supported browser, and will not allow you to see the videos. Please use Chrome, Firefox or Safari to view our tutorial videos.
Questions and Comments
We'd love to get your feedback or questions. Leave your comment below.
I am new to this website and to tell you the truth I am a do-it-all card maker, from the background paper to ...everything in a card, plus I dont have access to all these great resources like the embossing or even the Stamp-a-Majig. It would be great if you could explain more about the uses of all of these tools... Well, forgive me, I guess that would be advertisement for the product, but I think it would be great for me to see if it is worth getting it. Or you know what? it would be even better if you could suggest a different way of doing it without buying the tools.
I am sorry this was too long. Keep up the awsome job.
Thanks!!!!!
Thanks!!!
Pam
Pam
Jan
Thank you for putting so much effort into this. I know every thing is spelled out for us...but I just can't get this straight! Is there any chance you will be making a video tutorial on it?
Thank you so much!
Traci S.
I want to make a magic card and I wonder if I can make one with a stamp.
Who does have the answer for me?
Thank you very much,
with kind regards,
Marga.
Page 1 of 1 pages