Loopy Flower

by Tosh Leyendecker

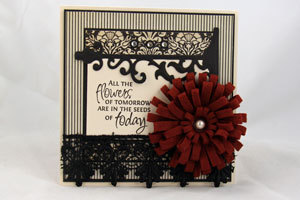
Create a gorgeous flower out of felt.

Supplies
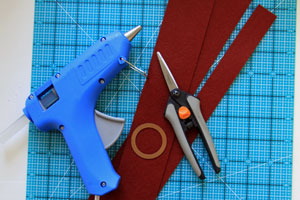
  • Felt
  • Hot glue gun
  • Scissors
  • Cutting tool
  • 1 1/2" circle die
  • Sewing machine

Step-by-Step

  1. Step 1

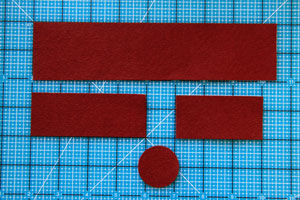
    Cut felt into strips:
    2" x 8 1/2"
    1 1/2" x 4"
    1" x 3"

    Using a circle die, cut one 1 1/2" circle out of the same color of felt.
  2. Step 2

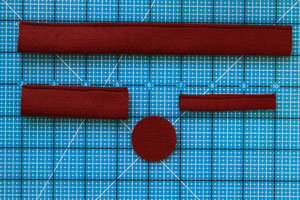
    Fold strips in half lengthwise and sew ends together.
  3. Step 3

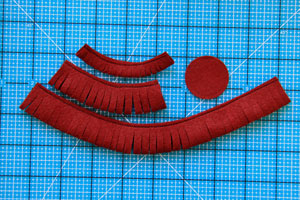
    Cut the felt tubes in approximately 1/8" strips from the non-sewn end up to, but not over, the sewn end.
  4. Step 4

    Hot glue the largest looped piece to the outside edge of circle until you have two layers.
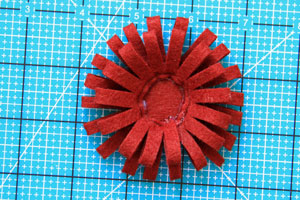
  5. Step 5

    Glue one layer of the second largest loop to the inside of the first two.
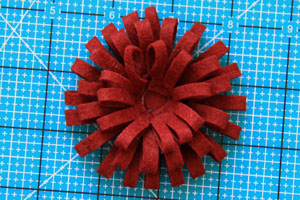
  6. Step 6

    Glue one layer of the smallest loop on the inside of the other layers.
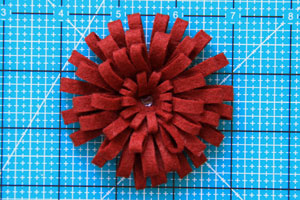
  7. Step 7

    Add a button, rhinestone, pearl, etc. to the center with hot glue.
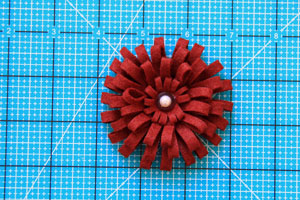
  8. Step 8

    Attach your loopy flower to a card.
Video!

Your Turn

You've seen the tutorial, now you try it! We've got a section of the gallery set aside for Loopy Flower. Try this technique, then upload your artwork to the gallery. Show us your creations!

***Please note - Internet Explorer/Edge is not a supported browser, and will not allow you to see the videos. Please use Chrome, Firefox or Safari to view our tutorial videos.

Questions and Comments

We'd love to get your feedback or questions. Leave your comment below.

Fantastic tutorial, Tosha. A brilliant and totally "do-able" design. Thanks for sharing it with us.
Lynn Mercurio  |  Wed Jun 22, 2011 at 4:40 AM
I love your tutorials, they are so helpful, with demonstrations of wonderful ideas and techniques. Unfortunately I can only watch on the small screen, as my whole pc screen turns white when I try to enlarge the demo screen, does this happen to everyone, or is it just me? If so, has anyone any idea how to rectify it? Love it all anyway, thank you. xx
Christine  |  Wed Jun 22, 2011 at 5:14 AM
Super! Beautiful flower and nice and straight forward. Looking forward to giving it a try.
Sandra K  |  Wed Jun 22, 2011 at 5:14 AM
I LOVE this Tosh! Made one a little while ago when I saw it on your blog. Forgot about it on my shelf! Ack! Thanks for the awesome tutorial. Will be putting a card together this evening!
Dawn Easton  |  Wed Jun 22, 2011 at 5:33 AM
Wonderful tutorial! Can't wait to try this one! It should mail a lot better than paper flowers! I always look forward to Wednesdays wink!!
Suzanne  |  Wed Jun 22, 2011 at 5:36 AM
wonderful tut! Can't wait to give this a try!
~amy~  |  Wed Jun 22, 2011 at 5:37 AM
This is AWESOME and I can't wait to try it! Tip--chopsticks are super cheap and they work well in place of fingers when using hot glue! I was feeling your pain! THanks for suffering--er, sharing--for us! ; ) Blessings, Sharon
Sharon Russell  |  Wed Jun 22, 2011 at 6:35 AM
FAB tutorial, Tosh! You make it look so easy!! I can hardly wait to try it out~!
Judy Rzoema  |  Wed Jun 22, 2011 at 6:37 AM
Tosh! I love your tutorial- you make it look so easy. Your cards are gorgeous and I can't wait to give this a try! LYMI
Pat Smethers  |  Wed Jun 22, 2011 at 6:58 AM
Lovely flower, I haven't got any felt so was wondering if this would work with paper? x
Katy Szwarc  |  Wed Jun 22, 2011 at 7:18 AM
I am RUNNING to buy some felt now because I cannot wait to try making these flowers. So clever and fun. Great instruction.
Ann Biddle  |  Wed Jun 22, 2011 at 7:21 AM
Thanks so much for the great tutorial Beate and Tosh! Can't wait to try it. Do you think you could use fabric instead of felt?!
Leanne  |  Wed Jun 22, 2011 at 7:23 AM
great,and wonderful.
anila  |  Wed Jun 22, 2011 at 7:23 AM
I love your demo of the felt flower, you explain it so clearly.
I would really like to do this in a workshop but don't have multiple glue guns, is there another way of assembling the flower....perhaps sewing?
Liz Mitchell  |  Wed Jun 22, 2011 at 7:42 AM
Love the technique - there is a product called "Glubers" that would work well and take away the mess of a hot glue gun or using a glue. They are a round, adhesive, domed product - sticky on the back <for whatever you want to adhere it to> and on the top, so you could easily adhere the felt loops. You could run them through the die cut machine to get the size circle you need.
Joni  |  Wed Jun 22, 2011 at 8:06 AM
I love these, Tosha. Thank you so much for a lesson on how to make them. Your card is so amazing and I am a BIG fan of yours.
Liz  |  Wed Jun 22, 2011 at 8:21 AM
Thanks for sharing such a wonderful and inexpensive way to get a terrific embellishment
alma de la rosa  |  Wed Jun 22, 2011 at 9:55 AM
thanks for instruction on how to make these cute embellishments. I am going to make some of these. I can make them smaller sizes too and take a short cut with the MS Fringe Scissors. They are more even then I cut too. Now that I have a pattern I can do all sizes and colors. Yea!
Lori Kistler  |  Wed Jun 22, 2011 at 10:21 AM
Really cute and adorable project .Thank you for sharing
cecile  |  Wed Jun 22, 2011 at 10:25 AM
I absolutely love this technique!!!!! Thanks so much for sharing it with us. I to am going to run out and by some felt to play with. grin
Shelly  |  Wed Jun 22, 2011 at 10:27 AM

Page 1 of 3 pages  1 2 3 >

You need to be logged in to comment

GET OUR NEWSLETTER


Splitcoaststampers's privacy policy