Layered Gesso Background

by Jackie Pedro

Learn how to use gesso to create texture and depth in a layered mixed media background.

Supplies
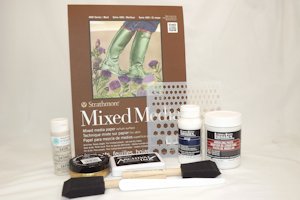
  • Mixed media paper
  • Liquid gesso
  • Archival ink (Ranger Archival Ink™ Jet Black used here)
  • Acrylic craft paint
  • Sponge brushes
  • Stencil (My Favorite Things Graduated Hexagons used here)
  • Modeling paste
  • Craft spatula or other straight-edged tool
  • Metallic finish (Viva Decor Inka Gold used here)
  • Soft cloth or paper towel
  • Stamps and embellishments (My Favorite Things Timeless stamps and dies used here)

Step-by-Step

  1. Step 1

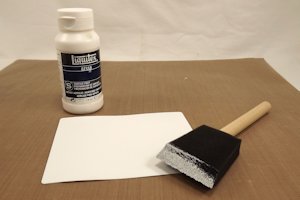
    Cut a piece of mixed media paper to fit your card front. Cover the surface of the paper with liquid gesso using a sponge brush. Let dry.

    Hint:
    Heavy cardstock (110# or more) and watercolor paper will also work well.
  2. Step 2

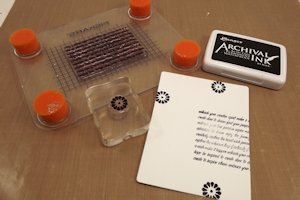
    Randomly stamp the paper with archival ink. Allow the ink to dry completely before the next step to avoid streaking.

    Note:
    Other water-resistant inks will also work, such as Versafine, Colorbox Fluid Chalk Ink, or Memento Luxe.
  3. Step 3

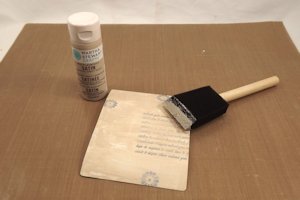
    Paint the paper with a light colored acrylic paint. The paint will soften the harshness of the ink while still allowing the images to show through. Let dry.
  4. Step 4

    Paint over random portions of the acrylic paint with liquid gesso using a sponge brush. Let dry.
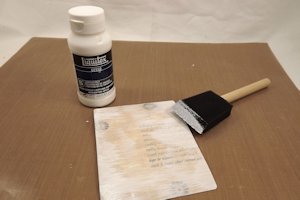
  5. Step 5

    Randomly apply a metallic finish to the paper with a soft cloth or paper towel, using a circular motion.
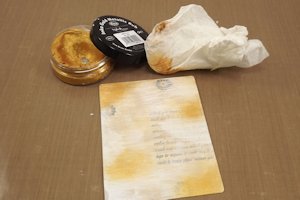
  6. Step 6

    Lay a stencil over the paper and apply modeling paste with a craft spatula. Scrape off any excess modeling paste before you remove the stencil. Let dry.
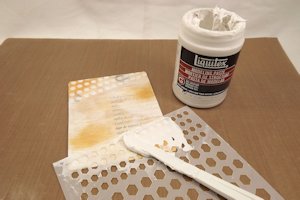
  7. Step 7

    Embellish the card front as desired.
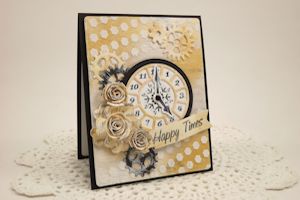
Video!

Your Turn

You've seen the tutorial, now you try it! We've got a section of the gallery set aside for Layered Gesso Background. Try this technique, then upload your artwork to the gallery. Show us your creations!

***Please note - Internet Explorer/Edge is not a supported browser, and will not allow you to see the videos. Please use Chrome, Firefox or Safari to view our tutorial videos.

Questions and Comments

We'd love to get your feedback or questions. Leave your comment below.

Thank you, I found this tutorial so well done and exactly what I have been wanting to learn for a while.
Lila Moran  |  Wed Jan 8, 2014 at 6:58 AM
This is an awesome tutorial. I especially appreciate that you gave us alternatives to use. I have ALL of the alternate products so I can try this technique before going out and buying a lot of expensive items and then finding out that the technique is not for me. Thank you! and I cannot wait to try this!
KONNIE WREN  |  Wed Jan 8, 2014 at 7:19 AM
Great tutorial with so many ideas and tips in a short time!! I am just dabbling in mixed media and find this very helpful and encouraging. Thank you!
Kay Hadley  |  Wed Jan 8, 2014 at 7:46 AM
Great tutorial. Thank you.
Loretta  |  Wed Jan 8, 2014 at 8:04 AM
This tutorial was very helpful. I've seen this mixed media done before but on a larger cancas area and I have been intimidated by it. After watching your tutorial I am going to try this today. You really helped explain a lot and I like that the project area wasn't so big. I think starting off small is sometimes better. :D
Thank you so much for tips and tricks too.
Deborah
Deborah  |  Wed Jan 8, 2014 at 8:07 AM
Nice! Thanks for the inspiration! Fondly, Tami
Tami HOwse  |  Wed Jan 8, 2014 at 9:19 AM
Great tutorial! I've been trying to do a bit more mixed media.

One question - is Dreamweaver Embossing Paste an okay alternative to Modelling Paste?

Thanks,
Susan
Susan Bridgman  |  Wed Jan 8, 2014 at 10:14 AM
Susan, Dreamweaver Embossing Paste would be a great alternative to modeling paste.
Jackie Pedro  |  Wed Jan 8, 2014 at 11:17 AM
Thank you for this awesome tutorial, Jackie...I finally "get it" thanks to you. Haven't totally understood the whole layering thing today until you laid it out perfectly!

Thanks again!
Lee-Anne  |  Wed Jan 8, 2014 at 12:42 PM
Gorgeous Jackie!!! Off to get some supplies this week! Thanks for the tutorial!
Dawn Easton  |  Wed Jan 8, 2014 at 12:43 PM
This is the first time someone has really given definitive information on MIXED MEDIA. Now I understand what it is. thanks!
Martie Rollin  |  Wed Jan 8, 2014 at 2:33 PM
Wow, this blew me away, especially using the tile caulking....who knew!! Thank you so much for the great tips.
Diane  |  Wed Jan 8, 2014 at 4:05 PM
This is the tutorial I've been waiting for! Thank you so much for taking us step by step through the layers.
Sue Kendrick  |  Wed Jan 8, 2014 at 8:19 PM
Great tutorial, I am looking forward to giving it a go. Your card is absolutely gorgeous. TFS
Susie Williams  |  Thu Jan 9, 2014 at 3:59 AM
This is GORGEOUS Jacks!!! LOVE LOVE LOVE this!!
Jodi Collins  |  Thu Jan 9, 2014 at 12:46 PM
How beautiful! Wonderful job on your tutorial, too!!!
Rosy Newlun  |  Fri Jan 10, 2014 at 12:02 AM
Simply stunning!
Pam Stang  |  Sat Jan 11, 2014 at 7:42 AM
Great tutorials, ladies! Love all the options the video gives.
Amy Rohl  |  Sat Jan 11, 2014 at 11:37 AM
This IS my new adventure in crafting---great simple clear video-thanks for sharing!
Susanne Gleason  |  Sat Jan 11, 2014 at 2:40 PM
Thanks for the step by step instructions complete with suggested alternatives. This is definitely on my 'to do' list, can't wait to play!
Helen Cooke  |  Sun Jan 12, 2014 at 4:47 PM

Page 1 of 2 pages  1 2 >

You need to be logged in to comment

GET OUR NEWSLETTER


Splitcoaststampers's privacy policy