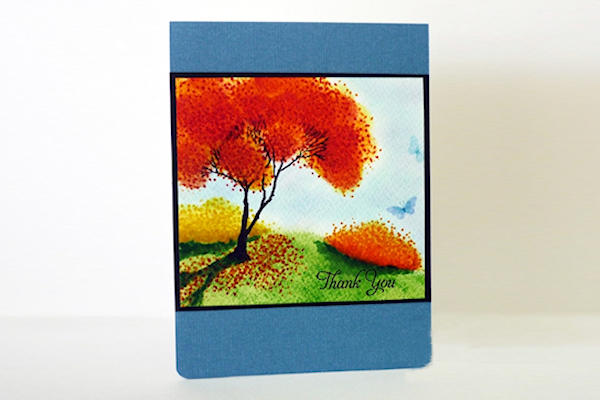
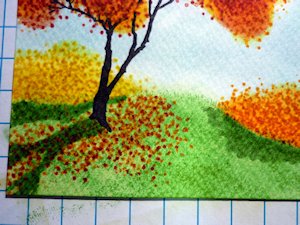
Layered Autumn Trees
by Cindy Gilfillan
Sponge and stamp layers of ink to create a beautiful autumn scene.
Supplies
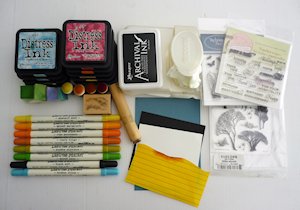
- Watercolor paper or heavy cardstock
- Stamps (Stampendous Winter Trees, Stampscapes Tall Grass Sm. and Stamps by Judith Dots Stubbie used here)
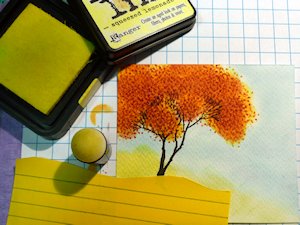
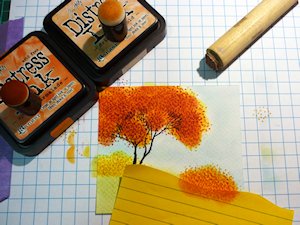
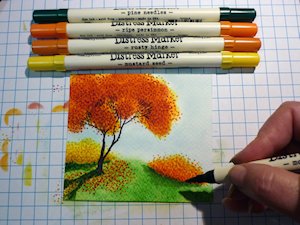
- Inks (Ranger Distress Inks & Markers (Shabby Shutters, Mowed Lawn, Tumbled Glass, Shaded Lilac, Squeezed Lemonade, Mustard Seed, Dried Marigold, Spiced Marmalade, Fired Brick) and Archival Black Ink used here)
- Sponges (wedges & daubers)
- Baby wipe
- Sticky notes for masking
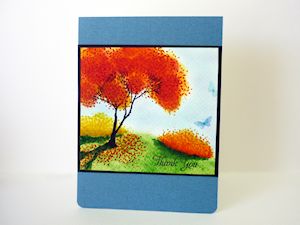
- Other supplies as needed to complete the card (black & denim blue cardstock, Technique Tuesday Wildflowers Butterfly; Flourishes Tag Lines ‘Thank You’ stamps used here)
Step-by-Step
-
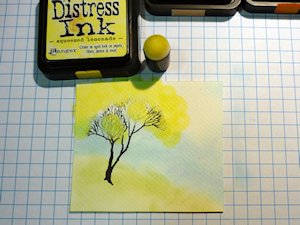
Step 1
Lightly sponge light green ink along the bottom of a watercolor panel to create land for the tree to stand on. Sponge light blue and light purple ink in the sky area, avoiding the top left-middle area where the tree foliage will be.
NOTE:
Sponge colors sparingly in this step, as you will layer and intensify the colors later.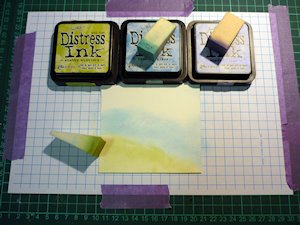
-
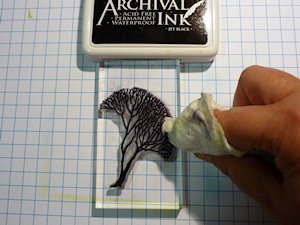
Step 2
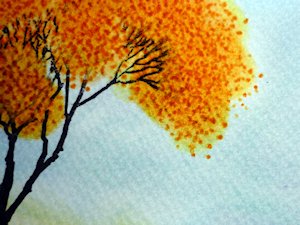
Ink a tree stamp with black ink, and using a baby wipe, dab off the harsh outline edges of the branches and two small spots in the middle of the branches. Stamp the tree on the left side of the panel.
-
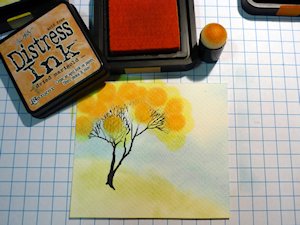
Step 3
Using a sponge dauber, apply yellow ink to the tree foliage area.
-
Repeat this step with a light orange and then a darker orange ink, ensuring the yellow is still visible around the edges and all three colors are visible in varying degrees.
-
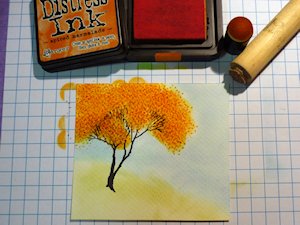
Step 4
Stamp dots onto the sponged tree foliage area in yellow ink. (A marker can be used if a dot stamp is not available.)
Repeat this step with the orange inks, building up each color. Allow some of the dots to go outside the sponged area onto the blue sky.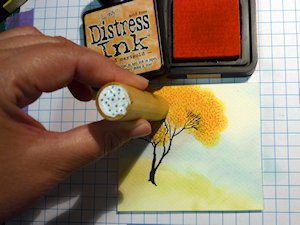
-
Finally, use a dauber to sponge in red ink sparingly, and stamp the dots in red ink into the foliage.
-
Step 5
Re-sponge the light blue in the sky to intensify the color, if necessary.
-
Step 6
Mask a small area around the tree base and sponge in yellow ink to create a yellow shrub. Sponge in a darker yellow ink at the base. Stamp the dots in both ink colors, allowing some dots to creep beyond the sponged area and onto the blue sky.
-
Move the mask over to the right side and repeat the above step with orange inks to create a second shrub, this time in orange.
-
Step 7
Re-sponge the grassy area in light green ink to intensify the color. Sponge medium green ink sparingly in, concentrating along the bottom.
To add more texture, stamp grass in medium green ink over the green area.
-
Step 8
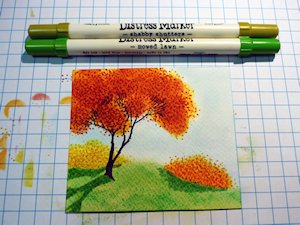
Create shadows for the tree and shrubs with a light green marker, then deepen the shadow color with medium green marker.
-
Step 9
Repeatedly stamp the dots at the base of the tree in orange and red inks, to create fallen leaves. Darken the tree trunk with a black marker, if necessary.
-
Step 10
Deepen the color at the base of the shrubs with markers, using quick, short flicking motions.
-
Step 11
Use the panel to complete a card or other project.
Video!
Your Turn
You've seen the tutorial, now you try it! We've got a section of the gallery set aside for Layered Autumn Trees. Try this technique, then upload your artwork to the gallery. Show us your creations!
***Please note - Internet Explorer/Edge is not a supported browser, and will not allow you to see the videos. Please use Chrome, Firefox or Safari to view our tutorial videos.

Questions and Comments
We'd love to get your feedback or questions. Leave your comment below.
Wow.
It would be nice if you would do more tutorials.
I can't wait to give it a go.
Also I noticed Impression Obsession has one amongst their clear set "branches of the tree' that looks really good, plus you get a tree with it! If I was starting out, this is what I'd go for.
Happy Stamping.
Much appreciated.
Page 1 of 2 pages 1 2 >