Laced Luminaria
by Lynn Pratt
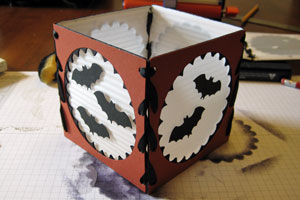
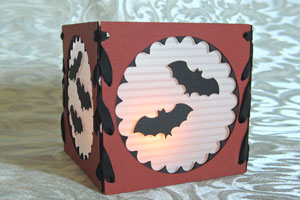
Create a Luminaria out of four coasters by lacing the pieces together.
Supplies
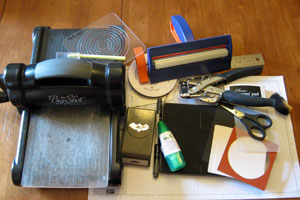
- Five 4" square coasters, or heavy cardstock
- Four 4" cardstock squares
- Four 3 9/16" x 4" pieces of vellum
- Die cut machine (Big Shot™ used here)
- Shape die (scalloped and regular circles used here)
- Paper crimper
- Adhesive, regular and dimensional
- Sponge
- Black ink
- Crop-a-Dile™
- Four 14" pieces of ribbon
- Battery operated tealights
Step-by-Step
-
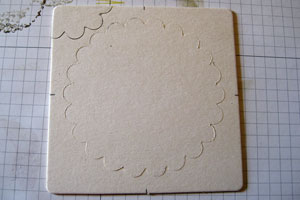
Step 1
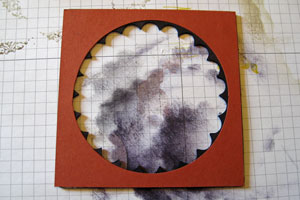
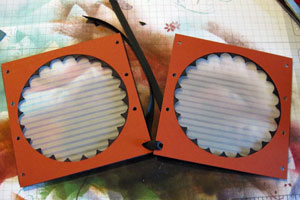
Cut a scalloped circle into the center of each coaster.
-
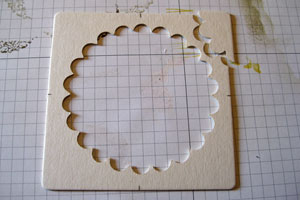
Step 2
With the Scallop #2 Big Shot die, part of a smaller scallop will be cut off on the edge of the coaster. Adhere this piece back onto the coaster.
-
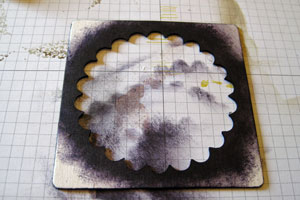
Step 3
Sponge the inside edge of the coaster with black ink.
-
Step 4
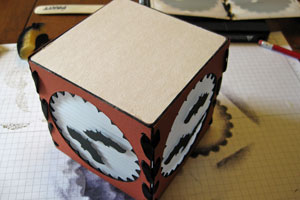
Cut a circle, slightly larger than the scallop in the coaster, into the center of each of the 4" cardstock squares. Adhere these to the coasters.
-
Step 5
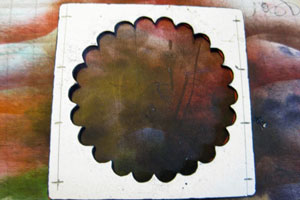
On the back of each coaster add a mark at 5/16", 1 7/16", 2 9/16" and 3 11/16" on opposite sides. The marks are 1 1/8" apart. This should be the same on both sides of each four coasters.
-
Step 6
Punch a hole about 3/16" into the coasters at each of the markings with the Crop-a-Dile. After punching one coaster, use it as a template for the other three pieces.

-
Step 7
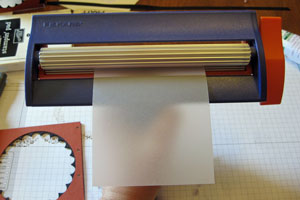
Run the vellum pieces through the crimper so it crimps the long side to be shorter.
-
Step 8
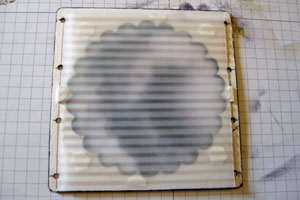
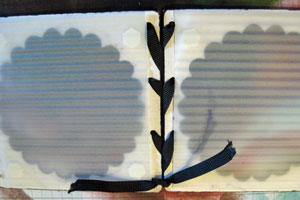
Adhere the vellum with dimensionals to the back of the coaster pieces. Adhere it so the crimped lines run horizontally between the punched holes.
-
Step 9
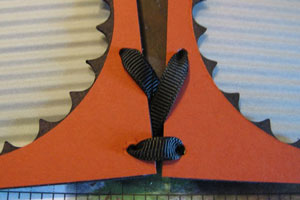
Lace ribbon through holes in two coaster pieces to connect them together. Come from the front to the back on the bottom two holes.
-
Wrap those around the front and go in the second hole from the front to the back again.
-
Step 10
Continue lacing from the front to the back through each hole.
-
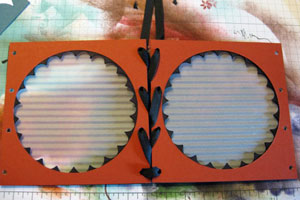
The ribbon will finish on the back. Tie a double knot. Before cutting the excess ribbon off, add a bit of glue to the inside of the knot to make sure it won't come undone.
-
Step 11
Once you have laced all four sides together, lay them out flat and decorate the windows.

-
Step 12
Bring the two ends together and lace them into a square.
-
Step 13
Adhere the last coaster to the bottom of the luminaria.
-
Step 14
The candle holder is finished. Keep in mind, since it is made out of paper - only use it with battery operated tealights.
Video!
Your Turn
You've seen the tutorial, now you try it! We've got a section of the gallery set aside for Laced Luminaria. Try this technique, then upload your artwork to the gallery. Show us your creations!
***Please note - Internet Explorer/Edge is not a supported browser, and will not allow you to see the videos. Please use Chrome, Firefox or Safari to view our tutorial videos.

Questions and Comments
We'd love to get your feedback or questions. Leave your comment below.
Wanted you to know I posted a link to this tutorial/video today on my blog, PaperFriendly.
Nancy Ward
PaperFriendluy
http://www.nancywardcrafts.com
What's the name of the circle punch that you used? I can't wait to get started on this project!!! Thanks a bunch for the video!
Page 1 of 1 pages