Kraft Bag Gift Card

by Beverly Gerard

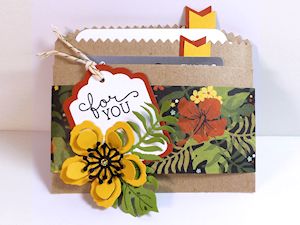
With a few simple folds, a gift bag becomes a gift card holder.

Supplies
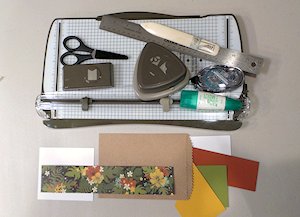
  • Kraft Bag, 4 3/4” X 7” (Stampin’ Up!® Kraft Tag a Bag Gift Bag used here)
  • Patterned paper, cut to 2” X 10 1/2” (Stampin' Up! Botanical Gardens DSP used here)
  • White or neutral cardstock, 3 3/4” X 4 1/4” (Stampin' Up! Whisper White cardstock used here)
  • Scoring tool
  • Bone folder
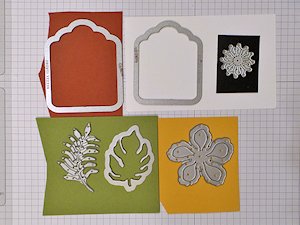
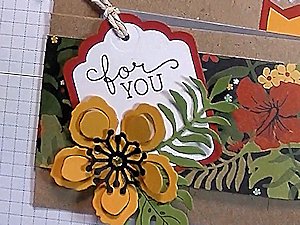
  • Corner rounder (optional - Stampin' Up! Curvy Corner Trio punch used here)
  • Adhesives
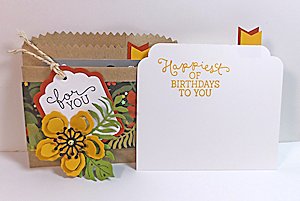
  • Other supplies as needed to complete the project (Stampin' Up! products used: Birthday Blooms stamp set; Crushed Curry and Archival Basic Black inks; scraps of Basic Black, Cajun Craze, Crushed Curry and Old Olive cardstock; Tags and Labels and Botanical Builder Framelits dies; Banner punch; Gold Metallic Baker's Twine, Basic Jewels Rhinestones

Step-by-Step

  1. Step 1

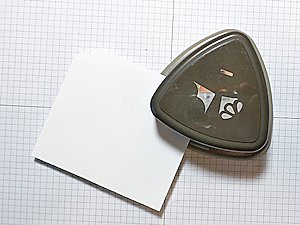
    Cut plain cardstock to 3 3/4" X 4 1/4" for the insert. Punch the top two corners with a corner rounder, if desired.
  2. Step 2

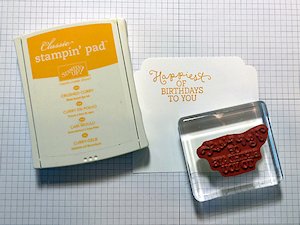
    Stamp a greeting on the insert card.
  3. Step 3

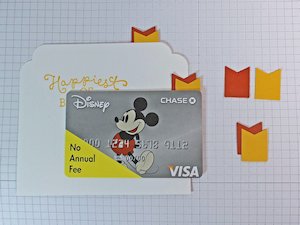
    Create pull tabs for the card insert and gift card using dies or punches. Adhere to the backs of the insert and gift card.
  4. Step 4

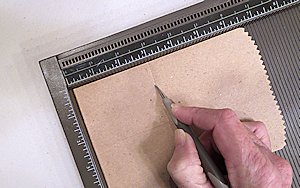
    Score 3" up from the bottom of the kraft bag.
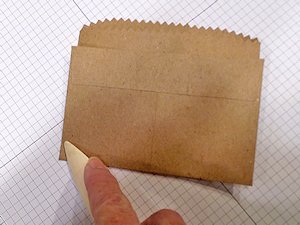
  5. Fold the bottom of bag upward, and crease on the fold line with a bone folder.
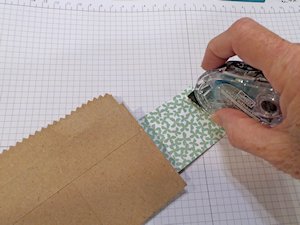
  6. Step 5

    Lay the folded bag atop the strip of patterned paper. Apply adhesive to one end of the paper.
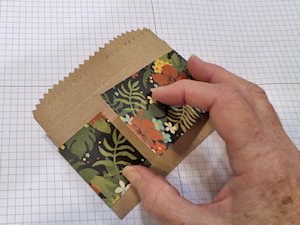
  7. Fold the patterned paper around on each side of the bag to create the belt or belly band. Adhere.

    TIP:
    Offset the seam a bit if needed to hide it behind the tag or other front treatment.
  8. Step 6

    Create a tag or other treatment for the front.
  9. Stamp a greeting on the tag and embellish as desired. For the sample, a dimensional blossom coordinates with the patterned paper.
  10. Step 7

    Complete the project and tuck in a gift card, cash or tickets for gift-giving.
  11. The gift card holder will fit in a standard A2 envelope if the tabs are not too high.
Video!

Your Turn

You've seen the tutorial, now you try it! We've got a section of the gallery set aside for Kraft Bag Gift Card. Try this technique, then upload your artwork to the gallery. Show us your creations!

***Please note - Internet Explorer/Edge is not a supported browser, and will not allow you to see the videos. Please use Chrome, Firefox or Safari to view our tutorial videos.

Questions and Comments

We'd love to get your feedback or questions. Leave your comment below.

Whaaaat?! Just about the most brilliant and creative idea I've seen in a long time! I love a practical project that is also super cute Bev! Great tutorial, TFS!
Anne H.  |  Wed Feb 24, 2016 at 3:54 AM
WOW! Absolutely brilliant! Wonderful project that is so "do-able" and so versatile! I have so many ideas floating in my head now, Bev! LOL TFS
Joanne H  |  Wed Feb 24, 2016 at 5:13 AM
I love this! Thank you for sharing this clever project. I happen to have this same paper, so it really made this idea even more attainable.
TeachyBaby  |  Wed Feb 24, 2016 at 5:24 AM
Thanks Bev! I will try this after I get home today!
Kathy Kilgus  |  Wed Feb 24, 2016 at 6:13 AM
Adorable! Such a cute gift idea--thanks for sharing with us all at SCS-Bev!
Susanne Gleason  |  Wed Feb 24, 2016 at 6:55 AM
This is a wonderful idea...thank you so much. I give at Christmastime gift cards to my many nieces, newphews and their families...this would be so easy to convert with a white paper bag. Love your idea and clear instructions
Hope Mitchell  |  Wed Feb 24, 2016 at 7:31 AM
Wow Bev..these are fabulous! It would take no time to whip up a few of these if you were in a hurry. Great project..thanks
Sue Allen  |  Wed Feb 24, 2016 at 7:52 AM
Disney cards are on my grandkids wish lists for birthday's coming up--I will have to give this a try.
Sheila  |  Wed Feb 24, 2016 at 7:55 AM
Love this project..so useful and can be applied to so many events. Thanks
Eloise Luyk  |  Wed Feb 24, 2016 at 8:19 AM
I absolutely ADORE this ~
Thanks so much for the inspiration!

Jeannie T.
Dragonfly Journeys
Jeannie Thomas  |  Wed Feb 24, 2016 at 8:26 AM
Oooh I love this Bev, tfs!
Stacy Sheldon  |  Wed Feb 24, 2016 at 9:36 AM
Thank you all so much! I'm tickled to share again with you ... and you've made my face smile all over this morning! (((hugs))) from Texas to you!
~Bev
Bev Gerard  |  Wed Feb 24, 2016 at 10:03 AM
Fabulous, Bev! Such a clever idea! Beautiful! Thanks for sharing!
Fran Gumprecht  |  Wed Feb 24, 2016 at 12:47 PM
What a fun project! Love how these turn out.
Pssequimages  |  Wed Feb 24, 2016 at 4:31 PM
Awesome tutorial, Bev! Can't wait to try this out!
Thanks for sharing this!
Robin  |  Wed Feb 24, 2016 at 8:01 PM
Bev, love this idea. It's so attractive for gifting.
Benzi  |  Thu Feb 25, 2016 at 7:13 AM
What a fun~fun~fun project!
Great tutorial! I watched it and then made one right up! So much fun! Thank you, Bev!
Teresa  |  Thu Feb 25, 2016 at 12:18 PM
This is a fabulous idea. Thank you for sharing Bev.
Wendy Engel  |  Thu Feb 25, 2016 at 3:37 PM
Too cute, making lots of these,
Thanks for the share
Terri
Terri Bailey  |  Fri Feb 26, 2016 at 4:36 PM
I am so glad I found this tutorial! Bev, you are the best teacher. I think you did a fantastic job!
LYNN KIEFER  |  Fri Feb 26, 2016 at 7:30 PM

Page 1 of 2 pages  1 2 >

You need to be logged in to comment

GET OUR NEWSLETTER


Splitcoaststampers's privacy policy