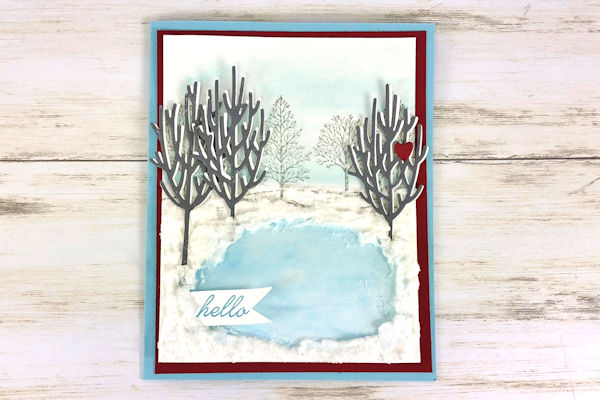
Ice Rink
by France Martin
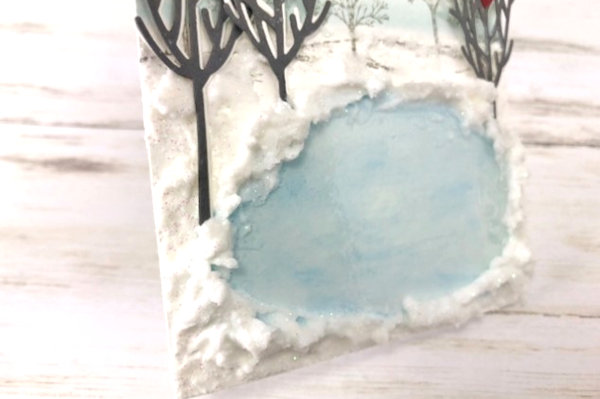
Create a chilly winter scene with a icy pond.
Supplies
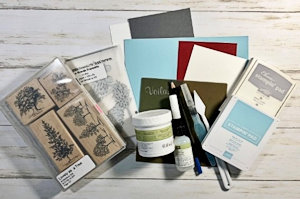
- Watercolor paper (Stampin’ Up® brand used here)
- Watercolor medium (SU watercolor pencils and ink used here)
- Watercolor brush (SU Aqua Painter used here)
- Scenic stamps (SU Lovely As A Tree set used here)
- Liquid glue or other glaze that dries clear and glossy (SU Fine Tip Glue used here)
- Embossing paste (SU Shimmery White Embossing Paste used here)
- Palette knives
- Ink (SU Balmy Blue and Smoky Slate used here)
- Other supplies as needed to complete the project (SU supplies used here: Balmy Blue, Basic Gray and Cherry Cobbler cardstock, In the Woods Framelits, Be Mine Stitched Framelits, Beauty Abounds stamp set, Aqua Painter )
Step-by-Step
-
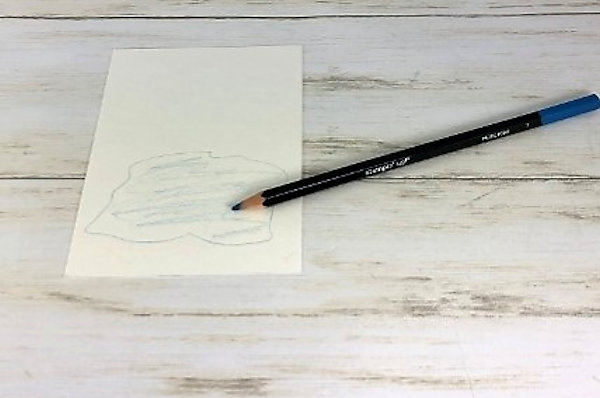
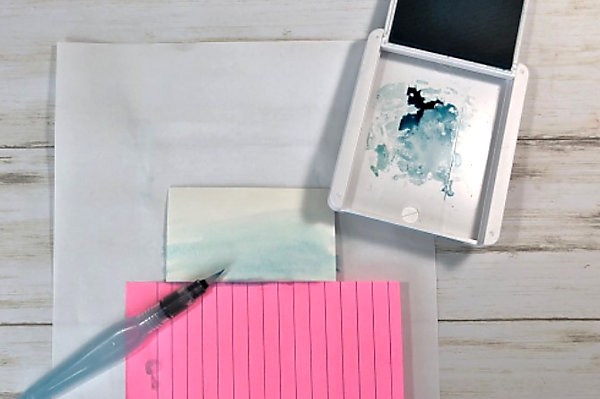
Step 1
Using a watercolor pencil (Pacific Point used here), draw a pond. Scribble lightly inside the drawing to fill in the area.
-
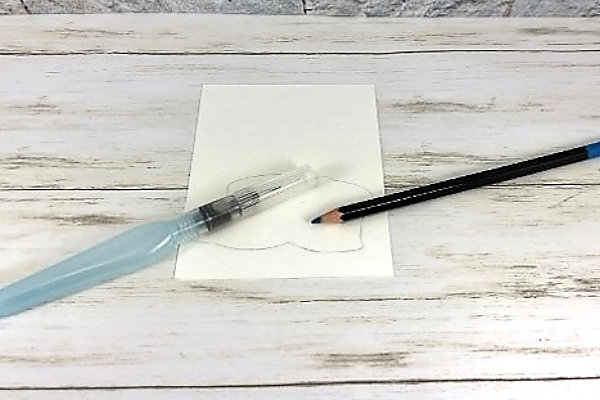
Step 2
Use a waterbrush or a wet brush to blend out the pencil and watercolor the pond.
-
Step 3
Place a piece of copy paper about 2” from the top as a mask. Use a waterbrush or wet brush and a light blue ink to apply a light tint of blue for the sky. Let dry completely before continuing.
-
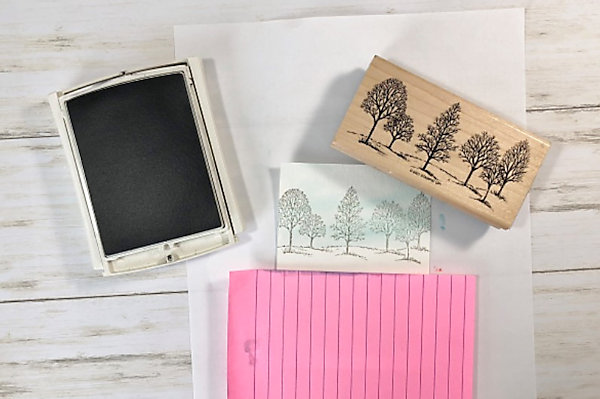
Step 4
Add stamped details to the scene.
-
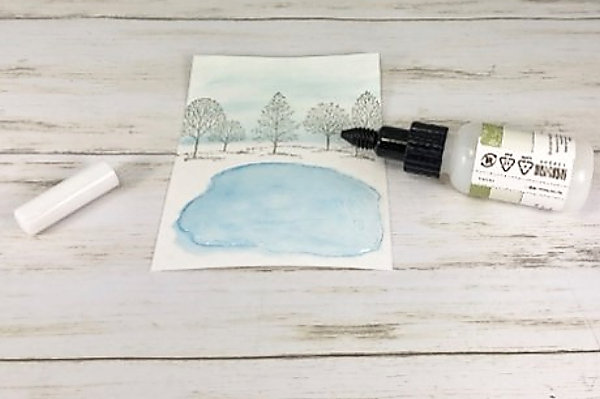
Step 5
Apply a heavy layer of fine-tip glue over the pond. Lay flat and let dry. This will take a few hours to dry, untouched.
-
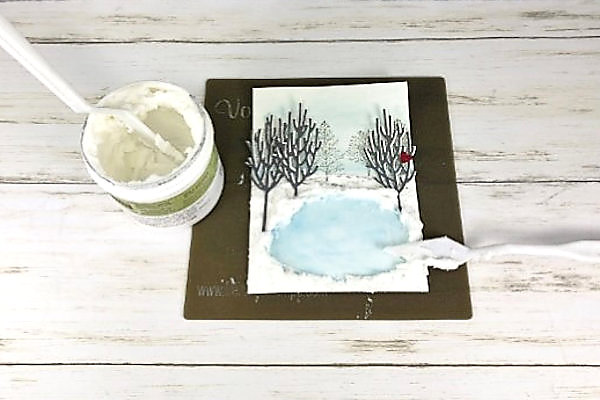
Step 6
Apply embossing paste all around the pond and at the bottom of the sky line.
-
TIP:
Die cuts can be tucked into the snow while the embossing paste is still wet. -
Step 7
Embellish the card to complete the project.
Video!
Your Turn
You've seen the tutorial, now you try it! We've got a section of the gallery set aside for Ice Rink. Try this technique, then upload your artwork to the gallery. Show us your creations!
***Please note - Internet Explorer/Edge is not a supported browser, and will not allow you to see the videos. Please use Chrome, Firefox or Safari to view our tutorial videos.

Questions and Comments
We'd love to get your feedback or questions. Leave your comment below.
Page 1 of 1 pages