Honeycomb Shapes
by Lydia Fiedler
Make three dimensional honeycomb shapes using symmetrical punches or dies.
Supplies

- Symmetrical punch or die shape, Heart Punch used here
- Leaf and stem punch or die shape, Bird Punch used here
- Dye Inks
- Bone Folder
- Adhesive
- Sponge
Step-by-Step
-
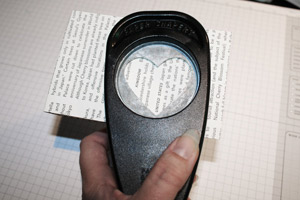
Step 1
With a heart punch or die, punch 25 shapes out of a lightweight patterned paper.
-
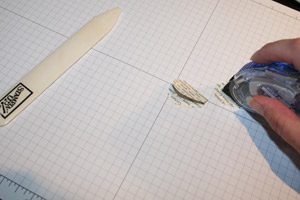
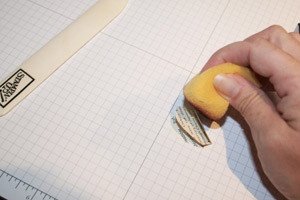
Step 2
Trim the point off the punched shapes, trimming about 1/4" from the bottom of the heart.
Hint:
Cut up to ten at a time to make them even, depending on thickness of paper.
-
Step 3
Fold each heart in half, being careful to fold precisely.

-
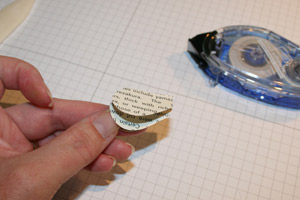
Step 4
Put adhesive on one side of each folded heart, and adhere next heart to it, being very careful to line up the shapes along the straight, folded edge.
-
Step 5
Adhere all 25 hearts together.
-
Step 6
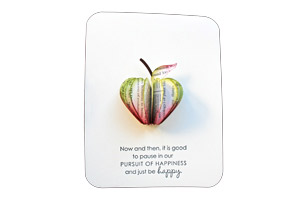
Sponge the edges of each heart, using Lucky Limeade ink on the top half of each apple shape, Cherry Cobbler on the bottom.
-
This is what your apple will look like when it's finished.

-
Step 7
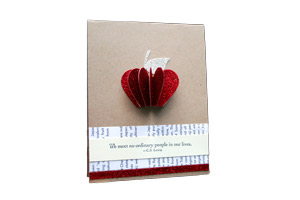
Holding your patterned paper and brown cardstock together, punch just the leaf and stem with the bird punch.

-
Step 8
Finish your card
Video!
Variations
-
Use heavy weight glimmer paper with fewer shapes for a glittery honeycomb shape.
Your Turn
You've seen the tutorial, now you try it! We've got a section of the gallery set aside for Honeycomb Shapes. Try this technique, then upload your artwork to the gallery. Show us your creations!
***Please note - Internet Explorer/Edge is not a supported browser, and will not allow you to see the videos. Please use Chrome, Firefox or Safari to view our tutorial videos.

Questions and Comments
We'd love to get your feedback or questions. Leave your comment below.
When you mail it flat does it pop out when it is taken from the envelope ?
Thanks for sharing this wonderful technique! I can't wait to try it!
Cheers, Karen
the stamp is from a SU stamp set you can see here
Kathleen Mc x
Page 1 of 3 pages 1 2 3 >