Hexagon Punch Board Box
by Regina Andari
Use a Candy Box Punch Board to create a six-sided container.
Supplies
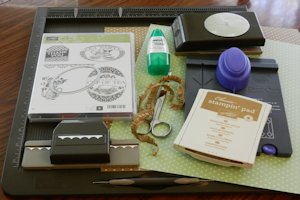
- Candy Box Punch Board by We R Memory Keepers
- Cardstock or patterned paper for box base (Stampin' Up! Pistachio Pudding polka dot used here)
- Coordinating cardstock or patterned paper for decorative band around box, if desired (Stampin' Up! Baked Brown Sugar polka dot used here)
- Scoring tool
- Strong adhesive (Tombow Multipurpose and ATG used here)
- Scissors
- Other supplies as needed to complete the project (Stampin' Up! Whisper White cardstock, Baked Brown Sugar Ruffle Stretch Trim, Baked Brown Sugar ink, Tea Party stamp set, 2-1/2" Circle and Scallop Edge Border, and Ovals Collection Framelits used here)
Step-by-Step
-
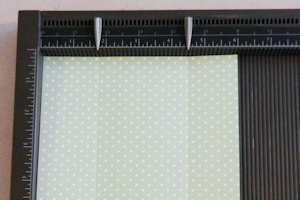
Step 1
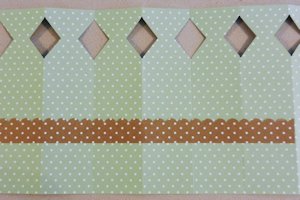
Cut cardstock to 6" x 10 1/4". Score along the short side at 1 3/4" and 4 1/2".
-
Step 2
Place the paper horizontally at the purple start line on the Candy Box Punch Board with the 1 3/4" scored section at the top of the board. Press the purple punch mechanism.

-
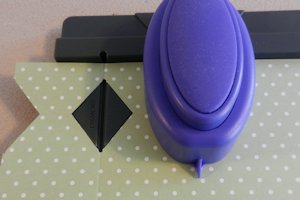
Step 3
Slide the paper to the left so that it bumps against the raised diamond shape on the punch board, and punch.

-
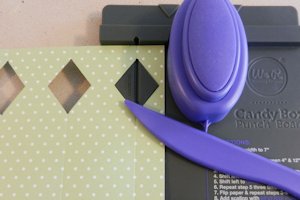
Step 4
Slide the paper to the left, and place the punched diamond shape around the raised diamond shape on the board. Use the scoring tool to score the paper in the track on the board, and press the purple punch mechanism to create a new diamond shape in the paper.
-
Step 5
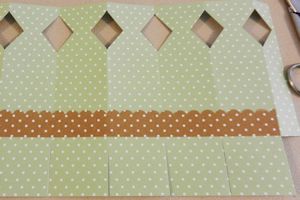
Continue the process of sliding the paper to the left, punching, and scoring. The last score line that you make will leave a 1/2" strip that you will use to close the box.
-
Step 6
Fold on all of the scored lines. If desired, add a decorative border to the box along the lower score line.
-
Step 7
Use scissors to cut all of the vertical score lines below the lower score line to create the bottom flaps for the box. The 1/2" section on the end can be removed as shown in the photo.
-
Step 8
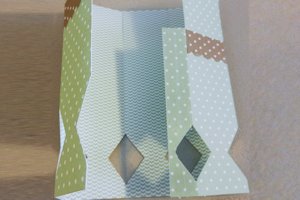
Place adhesive on the 1/2" flap, and fold it inward.
-
Bring the other side of the paper so that it lays on top of the adhesive strip and press together.
-
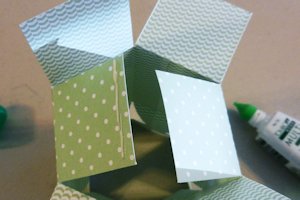
Step 9
Carefully pinch the scored line at the top of the paper to shape it.

-
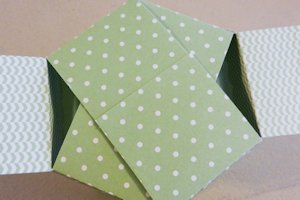
Step 10
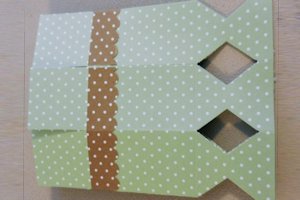
To close the bottom of the box, place adhesive on one of the flaps and then adhere it to the flap that’s directly across from it.
-
Continue the process until all flaps have been adhered.
-
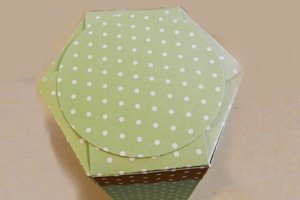
Step 11
Adhere a 2 1/2" die cut circle to the bottom of the box to close in and secure the bottom.
-
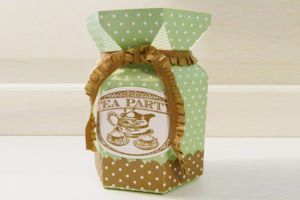
Step 12
Decorate the box as desired.
Video!
Your Turn
You've seen the tutorial, now you try it! We've got a section of the gallery set aside for Hexagon Punch Board Box. Try this technique, then upload your artwork to the gallery. Show us your creations!
***Please note - Internet Explorer/Edge is not a supported browser, and will not allow you to see the videos. Please use Chrome, Firefox or Safari to view our tutorial videos.

Questions and Comments
We'd love to get your feedback or questions. Leave your comment below.
Smiles, Laura
Page 1 of 1 pages