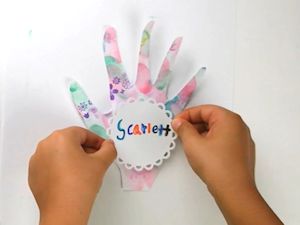
Handprint Name Tag
by Dana Tatar
Teach a child to create a collage stamped background for a personalized name tag.
Supplies

- Cardstock
- Stamps (My First ColorBox® Barnyard, Boho, Family, Meow, and School Mini Stamps used here)
- Ink (My First ColorBox® Boat, Candy, Mint, and Pixie Inkpads and Lime/Green, Pink/Turquoise, and Red/Boat 2-Color Inkpads used here)
- Ink applicators (ColorBox® Stylus and Tips used here)
- Pens or markers (My First ColorBox® Mini Markers used here)
- Safety pins
- Tape
- Glue stick
- Scissors
- Shaped punch or die
- Pencil
Step-by-Step
-
Step 1
Apply several colors of ink onto a piece of white cardstock.
TIP:
Use light colored inkpads for this step so the stamping that will be added over the color in Step 2 will be visible.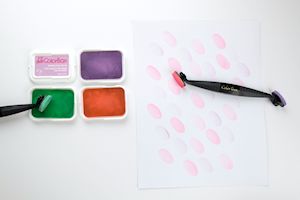
-
Step 2
Stamp the cardstock with an assortment of stamps.
Mix and match stamps from different sets to add your favorite images to your tag. (View our tutorial on Collage Stamping for more tips on layering images and inks.)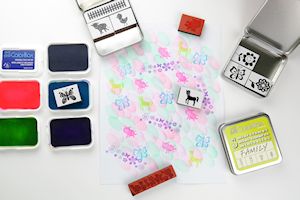
-
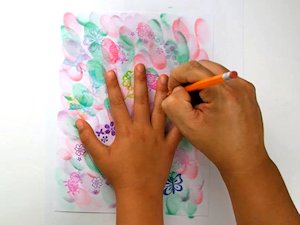
Step 3
Place your hand onto the stamped cardstock and use a pencil to trace your handprint onto the paper.
-
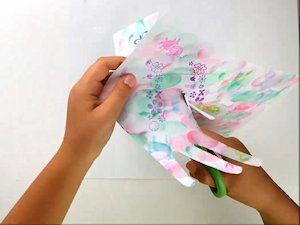
Use scissors to cut the handprint from the cardstock.
-
Step 4
Stamp or write your name onto a piece of white cardstock. Cut a name tag from the cardstock using a large punch or die. Any shape will work for a name tag.

-
Apply glue to the back of the name tag and press it onto the center of the handprint.
-
Step 5
Attach a safety pin to the back of the handprint with a piece of tape.

-
Step 6
Complete the project.

Video!
For more information on the ColorBox products used in the tutorial, click below.
Variations
-
Create a card instead of a name tag to give to your favorite teacher or coach.
Repeat Step 1 and Step 2 of the above tutorial. Then, fold the stamped cardstock in half, place the bottom of your hand along the folded edge of the cardstock and use a pencil to trace your handprint onto the paper.
-
Use scissors to cut the handprint out of the cardstock, being careful to leave the folded edge uncut.
Finish the card by writing a special message on the inside of the card.
Your Turn
You've seen the tutorial, now you try it! We've got a section of the gallery set aside for Handprint Name Tag. Try this technique, then upload your artwork to the gallery. Show us your creations!
***Please note - Internet Explorer/Edge is not a supported browser, and will not allow you to see the videos. Please use Chrome, Firefox or Safari to view our tutorial videos.

Questions and Comments
We'd love to get your feedback or questions. Leave your comment below.
Page 1 of 1 pages