Half Sheet Treat Bag
by Wendy Cranford
Create a treat holder using a half sheet of scrapbook paper.

Supplies
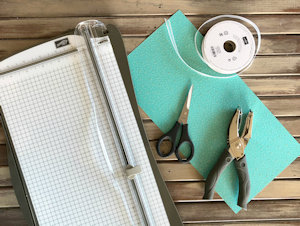
- Cardstock – 12” x 12”, cut in half (Stampin’ Up!® Myth and Magic Designer Series Paper used here)
- Paper trimmer
- Scoring tool
- Scissors
- Hole punch
- Trim or other ribbon
- Adhesive
- Other supplies as needed to complete the project (used here: ink, Copic markers, Magical Day stamp set, Magical Mates, Layering Circle, and Stitched Shapes framelits)
Step-by-Step
-
Step 1
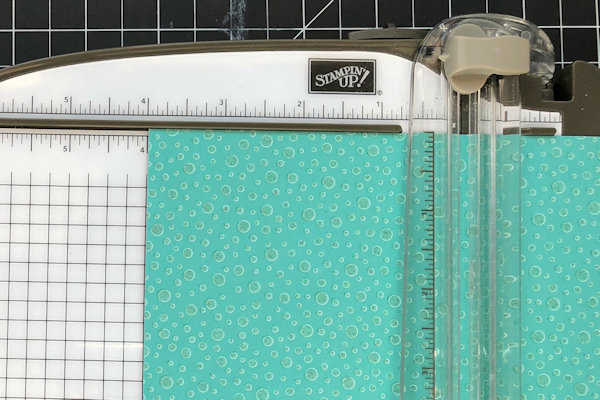
Score a 6” x 12” piece of cardstock on the long side at 4", 5 3/4", 9 3/4" and 11 1/2".
-
Step 2
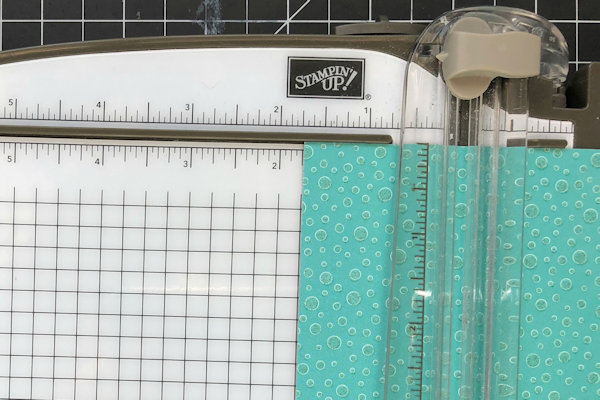
Turn the cardstock and score on the short side at 1 3/4".
-
Step 3
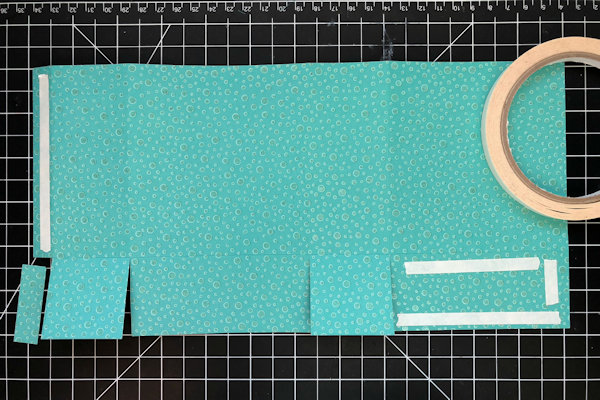
Fold on all the score lines. Below the 1-3/4” score line, trim away the bottom of the 1/2” tab and cut up each score line to the intersection.
Add adhesive to the outer 1/2" tab and first large bottom flap. Assemble the bag by adhering the 6” sides first. Fold in the smaller tabs and the large tab with adhesive, then close the base with the other large tab. -
Step 4
Push and pinch the sides of the bag at the top to close it.
-
Step 5
Use a hole punch to punch holes at top of bag. Thread ribbon through for a tie closure.
-
Step 6
Embellish the bag as desired to complete the project.


Video!
Your Turn
You've seen the tutorial, now you try it! We've got a section of the gallery set aside for Half Sheet Treat Bag. Try this technique, then upload your artwork to the gallery. Show us your creations!
***Please note - Internet Explorer/Edge is not a supported browser, and will not allow you to see the videos. Please use Chrome, Firefox or Safari to view our tutorial videos.

Questions and Comments
We'd love to get your feedback or questions. Leave your comment below.
Thanks so much for sharing!
Page 1 of 1 pages