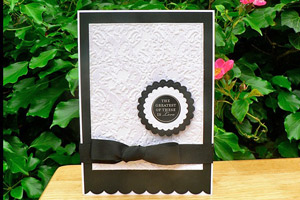
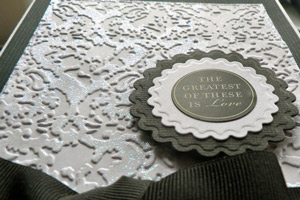
Glitter Highlighted Embossing

by Mary Anne Walters

Add glitter over dry embossed cardstock to create a sparkly background.

Supplies
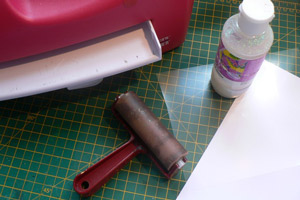
  • Glitter gel/glue
  • Embossing folder
  • Die cutting machine
  • Rubber brayer
  • Cardstock
  • Piece of acetate
  • Plain paper
  • Repositionable adhesive
  • Paper Cutter
  • Small Paint Brush
  • Flat Brush, optional

Step-by-Step

  1. Step 1

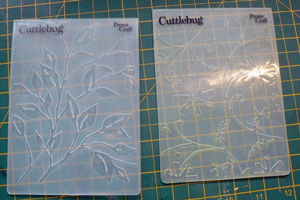
    A word about the embossing folders:
    Pick a folder with an edge to edge all over pattern, without wide open areas. These are good folders:
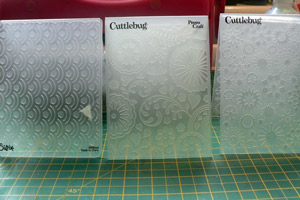
  2. These are less good - when brayering over the embossing, the brayer is more likely to apply the glitter into the wide open areas.
  3. Step 2

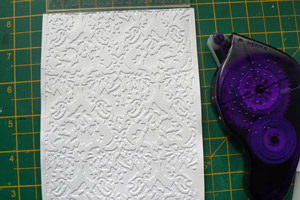
    Apply reposition-able adhesive to the inside back of the embossing folder. Stick the cardstock to be embossed to the folder. Run through your die cut machine to emboss.
  4. Step 3

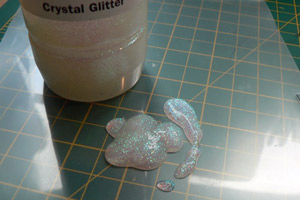
    Squeeze out a good blob of glitter gel onto the acetate.
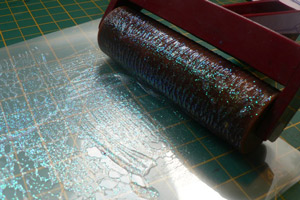
  5. Roll the brayer over it to load it with glitter gel.
  6. Step 4

    Quickly roll the brayer onto the plain paper to smooth out the glitter gel. You want a thin coating, with no obvious blobs on the brayer.
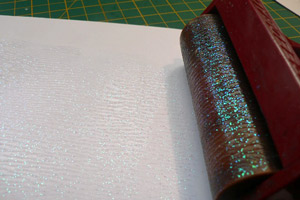
  7. Step 5

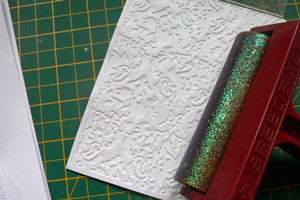
    With the embossed piece still in place in the folder, with a VERY light touch, roll the brayer over the raised embossing.

    DO NOT put too much pressure on the brayer, to keep the gel just on the raised areas. Two light coats are better than one thick coat!
  8. Step 6

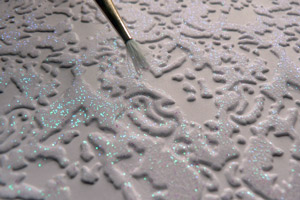
    If the gel slips into to recessed areas, you can whisk it away with a small paintbrush while it is still wet.
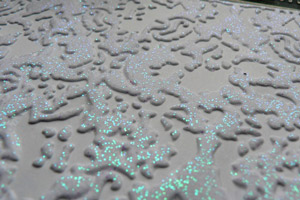
  9. Let it dry. This is what you will have:
  10. Step 7

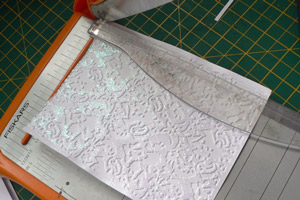
    Gently remove the piece from the embossing folder. Trim the edges just to the edge of the embossing.
  11. Step 8 (Optional)

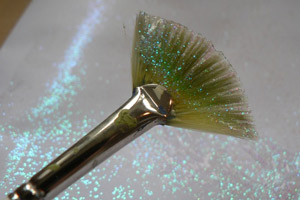
    For a nice finish, squeeze out another blob of glitter gel onto your acetate. Load a wide flat brush (a fan brush is great for this) with glitter gel.
  12. Step 9 (Optional)

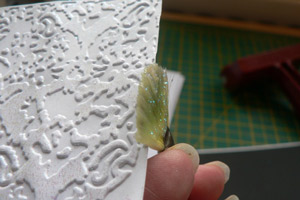
    Holding the brush upright against the edge, drag it DOWN to lay a thick coating of glitter gel along the edge.
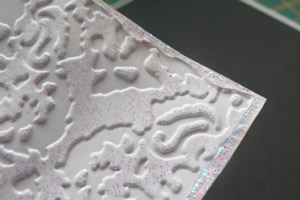
  13. Set aside to dry. This will take some time, as the coating should be thick.
  14. Step 10

    Finish your card.

Video!

Your Turn

You've seen the tutorial, now you try it! We've got a section of the gallery set aside for Glitter Highlighted Embossing. Try this technique, then upload your artwork to the gallery. Show us your creations!

***Please note - Internet Explorer/Edge is not a supported browser, and will not allow you to see the videos. Please use Chrome, Firefox or Safari to view our tutorial videos.

Questions and Comments

We'd love to get your feedback or questions. Leave your comment below.

Looks fantastic, but how do you clean your brayer?
Elisabeth  |  Wed Aug 29, 2012 at 2:47 AM
tr�s jolie carte j'aime beaucoup bise raymonde
raymonde  |  Wed Aug 29, 2012 at 2:55 AM
Oh this looks so elegant....will have to try this...thank you so much for the tutorial!!!!
Gloria Westerman  |  Wed Aug 29, 2012 at 5:16 AM
I love the elegant look of this card and that glitter really makes it look luscious. Thanks for sharing your talent!
Sharon  |  Wed Aug 29, 2012 at 6:00 AM
Super elegant technique Mary Anne, it's on my must try list. TFS
Kris  |  Wed Aug 29, 2012 at 6:29 AM
What a coincidence! I made a card last night, and uploaded it - I used Stickles to highlight some of the words on the Happy Birthday folder! I will try more of this in the future.
Dorothy  |  Wed Aug 29, 2012 at 6:37 AM
What a beautiful way to easily bring a card from nice to SPECTACULAR!
Lynn Mercurio  |  Wed Aug 29, 2012 at 7:27 AM
I absolutely luv this idea. Thanx so much for your creative sharing!
Vicki M  |  Wed Aug 29, 2012 at 7:44 AM
Thank you very much for the tutorial...What I don`t understand is where you use your tape runner...Very pretty love to try it...
MaryAnn  |  Wed Aug 29, 2012 at 8:08 AM
I'd also like to know what you use to clean the brayer and the brush.
Carolee  |  Wed Aug 29, 2012 at 8:31 AM
I did something similar to this. I stamped my image in versa mark and then i heat embossed the image with a glittery embossing powder. I then used a sponge dauber and colored over my image and fussy cut it out. It turned out very pretty and sparkly and the glitter seems to stay in place.
Lorna  |  Wed Aug 29, 2012 at 9:03 AM
I'm with Elizabeth......how do you clean the brayer after this? If the glue dries, does it come off with soap and H20?? Love the look of the sparkly embossed image smile
Monica Sallee  |  Wed Aug 29, 2012 at 9:34 AM
Thanks for this - will be really great for Christmas cards.

Your ideas are brilliant.
Brenda
Brenda  |  Wed Aug 29, 2012 at 10:09 AM
Elizabeth and Monica,
Just place it under running warm water and wash. I washed mine without soap. It comes off easily as long as you clean it immediately.
michela  |  Wed Aug 29, 2012 at 11:06 AM
Can't wait to try this. Who makes the glitter gel and is it available at Michaels or Joann's TIA
Lisa  |  Wed Aug 29, 2012 at 11:40 AM
What a great idea - with the Holidays coming up soon, would make very pretty Christmas cards.
Kathy S  |  Wed Aug 29, 2012 at 12:01 PM
I just wipe it with a baby wipe after applying the glue/gel. It cleans up very easily, but it may depend on the brand of glitter glue. Soap and water will take care of any excess. Popping off the brayer roller makes it easier to clean too! I know there was a discussion of this last year when I first did the original card. Look for "reeves glitter gel" in the title and you should find the post and all the previous discussion on it.
Ukmaryanne  |  Wed Aug 29, 2012 at 12:48 PM
Sorry, I forgot - the adhesive is used to stick the card stock to the embossing folder. After making lots of these, I found that applying the glitter with the cardstock still in place in the folder can help keep the glitter only on the raised areas. It isn't essential, and I don't always do it, but with some folders it seems to help.
UkmaryanneMa  |  Wed Aug 29, 2012 at 12:51 PM
http://www.splitcoaststampers.com/forums/tool-product-talk-f128/substitute-reeves-glitter-glue-t544252.html

That is the discussion thread!

MA
Ukmaryanne  |  Wed Aug 29, 2012 at 12:54 PM
I miss the personal touch. To me, I prefer a person rather than music. Just my thought.
Felice  |  Wed Aug 29, 2012 at 1:06 PM

Page 1 of 2 pages  1 2 >

You need to be logged in to comment

GET OUR NEWSLETTER


Splitcoaststampers's privacy policy