Gate Fold Card
by Beate Johns
Add two scores to create this simple trifold.
Supplies
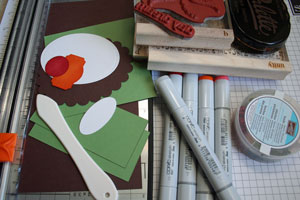
- 4 1/4" x 8 1/2" piece of cardstock for card base
- Two 1 7/8" x 4" pieces of cardstock for front panels
- Additional cardstock for main image, sentiment and layering
- Scoring tool
- Adhesive
- Stamps
- Ink
Step-by-Step
-
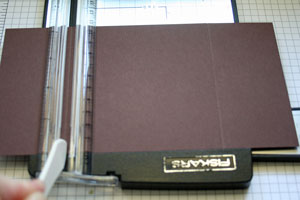
Step 1
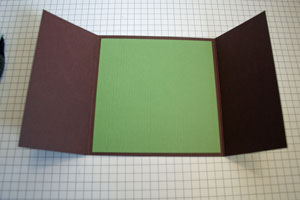
Score the 4 1/4" x 8 1/2" piece of cardstock at 2 1/8" and 6 3/8"
-
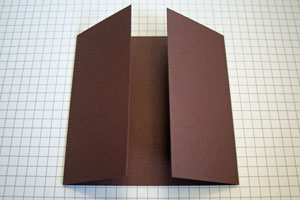
Step 2
Prefold scored lines.
-
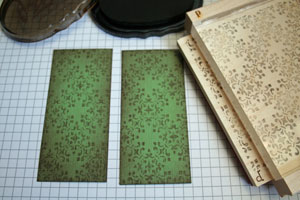
Step 3
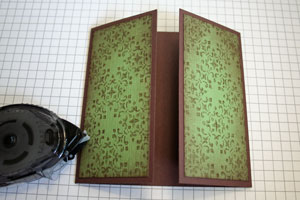
Stamp the two 1 7/8" x 4" pieces of cardstock if needed.
-
Step 4
Tape one of each panel to the sides of the card front.
-
Step 5 (Optional)
Add an additional cardstock layer on the inside of the card.
-
Step 6
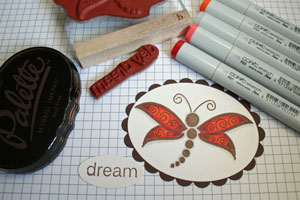
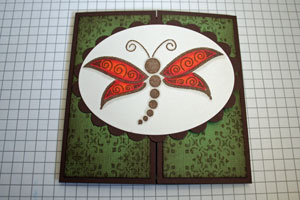
Stamp and color the main image and sentiment, then layer on additional card stock (optional).
-
Step 7
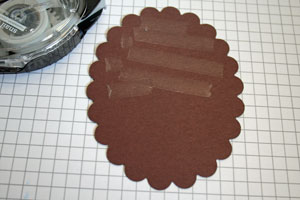
Apply adhesive to half of the main image's back side.
-
Step 8
Tape main image over the center fold, making sure the adhesive does not overlap the fold.
-
Step 9
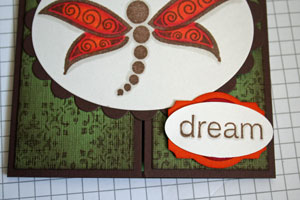
Adhere sentiment or a coordinating image with dimensional adhesive. Place it so it partly sits over the main image, keeping the card closed.
-
Step 10
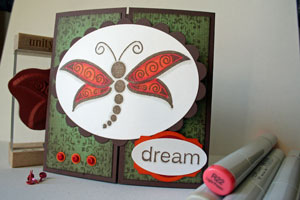
Finish your card.
Video!
Variations
Try different sizes
To figure out where your scores should be, divide your card width in 4 (eg. 6" x 4= 1 1/2") and score at 1/4 of your width (1 1/2") and 3/4 (4 1/2").
Your Turn
You've seen the tutorial, now you try it! We've got a section of the gallery set aside for Gate Fold Card. Try this technique, then upload your artwork to the gallery. Show us your creations!
***Please note - Internet Explorer/Edge is not a supported browser, and will not allow you to see the videos. Please use Chrome, Firefox or Safari to view our tutorial videos.
 *
*
Questions and Comments
We'd love to get your feedback or questions. Leave your comment below.
thank you for this idea
I wait the next project
bye
sylvie
I always list all my supplies in the gallery upload in the technique gallery section. Just click on the gallery link under the tutorial to get to it.
Try different sizes
To figure out where your scores should be, divide your card width in 4 (eg. 6" x 4= 1 1/2") and score at 1/4" of your width (1 1/2") and 3/4" (4 1/2").
Thanks for such a wonderful idea, and one that is so beautiful.
Oh well! Thanks for sharing it now.
This means if your piece of cardstock is 6 inches in total, you'd want to make two folds that are 1/4 of that total length (which would be 1 1/2") that way they will meet in the middle.
You could also do a variation of where the opening is by taking your total cardstock length (in this example, 6 inches) finding half of that (3 inches) which will be the main back wall of your card where you write your sentiment. The fold lines can occur anywhere as long as the two measurements add up to 3 inches. So to get your opening just one inch from the right side, you'd make your first fold at 2 inches and your second at 5 inches.
I always post all my supplies in the matching technique spotlight gallery listed on the bottom of the tutorial.
I did not use punches, but oval Nestabilities templates. I love those die cut templates. They work with most die cut machines. I use mine with my Cuttlebug.
Page 1 of 2 pages 1 2 >