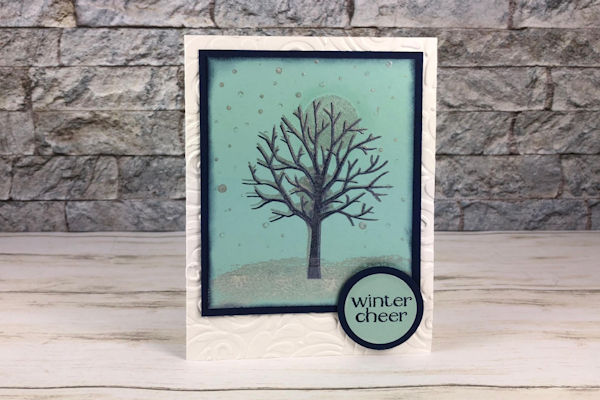
Frosted Trees
by France Martin
Create a frosty shimmer with stamped paint.
Supplies
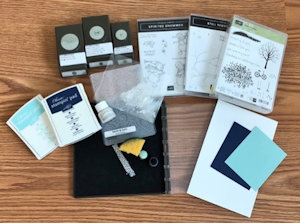
- Cardstock (Stampin’Up!® Whisper White, Night of Navy and Pool Party used here)
- Shimmer, pearl, or metallic paint (SU Frost White paint used here)
- Ink (SU Night of Navy and Pool Party inks used here)
- Detailed stamp image (Sheltering Tree by Stampin’Up! used here)
- Stamp positioner
- Other supplies as needed to complete the project (SU supplies used here: Still Night and Spirited Snowmen stamp sets, Swirls and Curls embossing folder, 1”, 1 1/4", and 1 1/2" circle punches, sponge, sticky note)
Step-by-Step
-
Step 1
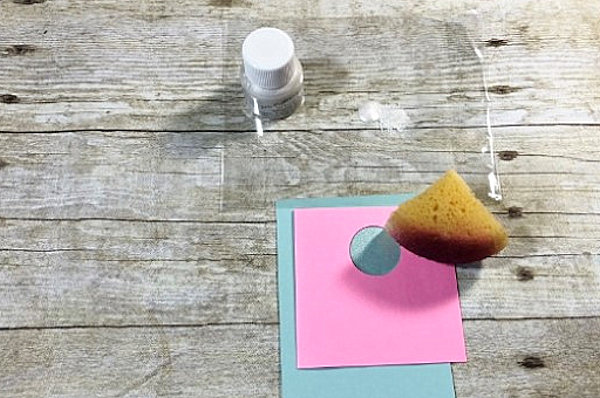
Shake the shimmer paint well. Add a few drops of paint onto a cello bag or other palette surface.
Punch out a 1” circle out of a sticky note to create a reverse mask. Lay it onto your focal panel (Pool Party cardstock used here). Sponge some shimmer paint lightly in the opening. Remove the sticky note and let the paint dry. -
Step 2
Using the sticky note circle punch out, mask the shimmer circle. Sponge ink around the mask. Remove mask.
-
Step 3
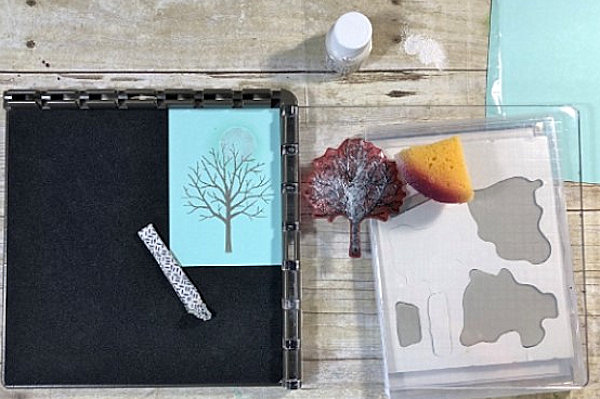
Place the cardstock panel onto the stamp positioner. Position the tree stamp on top of cardstock.
Stamp the tree using a dark ink (Night of Navy used here). Keeping the stamp in place on the positioner, clean it well. -
Step 4
Using a sponge and shimmer paint, sponge the tree stamp and stamp on the cardstock. Repeat about 3 times to have the full effect of frost. Let dry.
TIP:
Move the cardstock over just a hair so the frost appears to be on one side of the tree. -
Step 5
Stamp little dots with shimmer paint for snowfall.
Using a sponge and shimmer paint, sponge at the bottom to add some grounding to the scene.
NOTE:
It’s very important to wash all stamps under warm water to remove the shimmer paint. -
Step 6
Assemble the card to complete the project.


Video!
Your Turn
You've seen the tutorial, now you try it! We've got a section of the gallery set aside for Frosted Trees. Try this technique, then upload your artwork to the gallery. Show us your creations!
***Please note - Internet Explorer/Edge is not a supported browser, and will not allow you to see the videos. Please use Chrome, Firefox or Safari to view our tutorial videos.

Questions and Comments
We'd love to get your feedback or questions. Leave your comment below.
Shirl
Page 1 of 1 pages