Frosted Filter
by Erika Martin
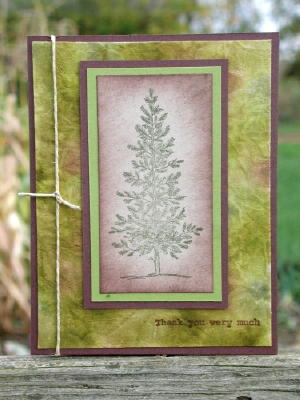
Create a one-of-a-kind background with just a few supplies.
Supplies

- Coffee filter
- Plate
- 2 or 3 colors of dye ink refills
- Embossing heat tool
- Spritzer bottle with water
Step-by-Step
-
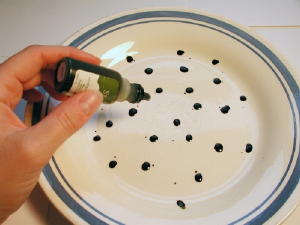
Step 1
Drop ink refills onto a plate in a random pattern. Make sure the reinkers cover the entire area for full coverage
-
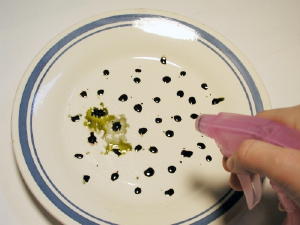
Step 2
Using a spritzer bottle filled with water, spritz the ink and let the colors blend together.
-
Step 3
Be generous with the water so they blend, but not so much that the colors become muddy.
-
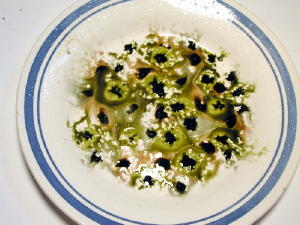
Step 4
Place the coffee filter over the blended inks and press on it to make sure it is completely covered with ink.
-
Step 5
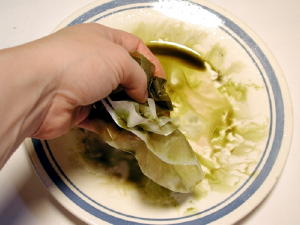
Gently crumple the coffee filter into a ball. Uncrumple it.
-
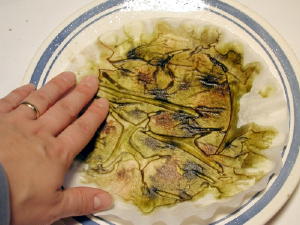
Step 6
Carefully dry the coffee filter using an embossing heat tool. Be sure to move the heat tool as you dry the filter to avoid burning it. You may see a little smoke here and there..

-
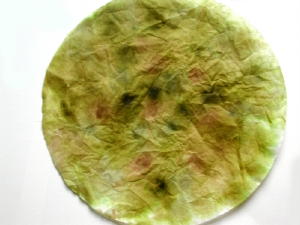
Step 7
Smooth some of the wrinkles out and then cut the coffee filter to whatever dimension needed for the project.
-
Step 8
Finished project.
Your Turn
You've seen the tutorial, now you try it! We've got a section of the gallery set aside for Frosted Filter. Try this technique, then upload your artwork to the gallery. Show us your creations!
***Please note - Internet Explorer/Edge is not a supported browser, and will not allow you to see the videos. Please use Chrome, Firefox or Safari to view our tutorial videos.

Questions and Comments
We'd love to get your feedback or questions. Leave your comment below.
Looking forward to playing with this technique!
Page 1 of 1 pages