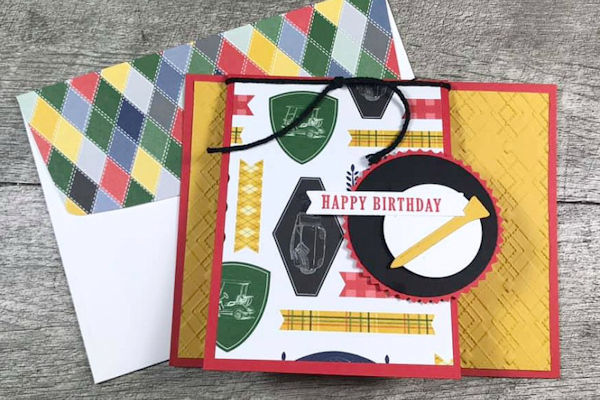
Front Flap Card
by Kelly Acheson
Create a panel card with a smaller front flap.
Supplies
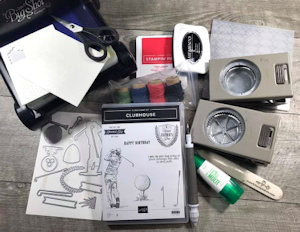
- Cardstock (Stampin’ Up!® supplies used here: Poppy Parade, Crushed Curry, Whisper White, Country Club Designer Series Paper, Basic Black used here)
- Adhesive (Multipurpose Liquid Glue, Stampin' Dimensionals used here)
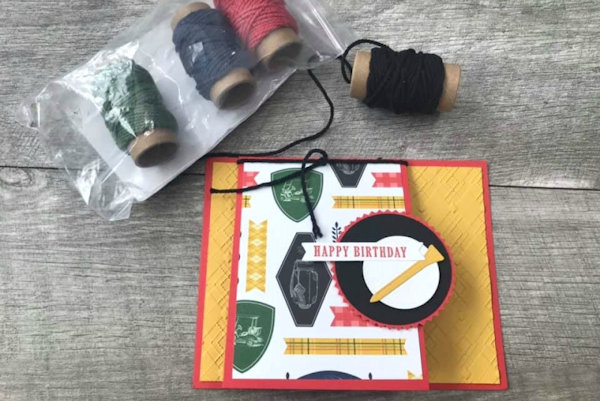
- Other supplies as needed to complete the project: (SU supplies used here: Memento Tuxedo Black Ink, Poppy Parade Ink, Starburst Punch, 2" Circle Punch, Clubhouse stamp set, Golf Club Dies, Country Club Designer Series Paper, Absolutely Argyle 3D Embossing Folder, Country Club Twine Combo Pack, Paper Trimmer, Snips, Take Your Pick Tool, Piercing Mat, Bone Folder, Die Cutting Machine)
Step-by-Step
-
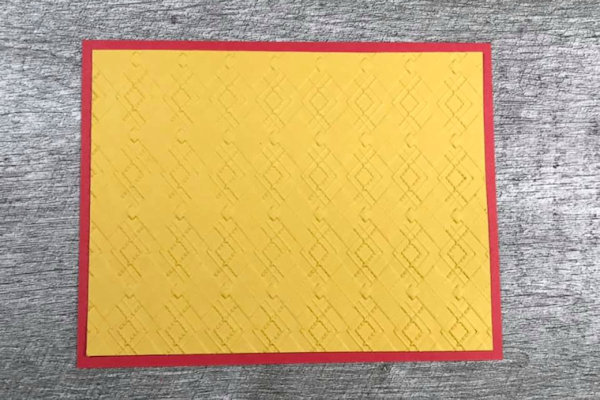
Step 1
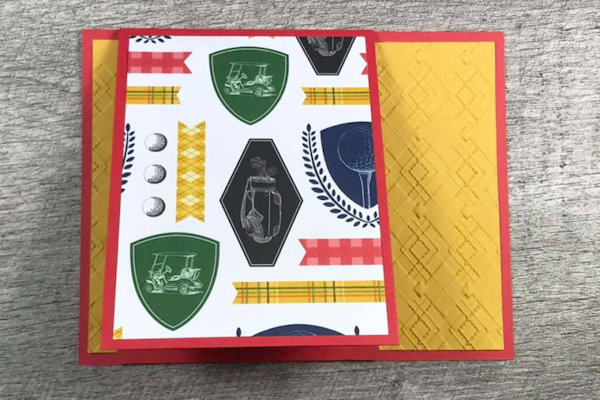
Prepare an A2 panel (4 1/4' x 5 1/2") with a layering panel (4” x 5 1/4"). The layering panel in the sample was embossed.
-
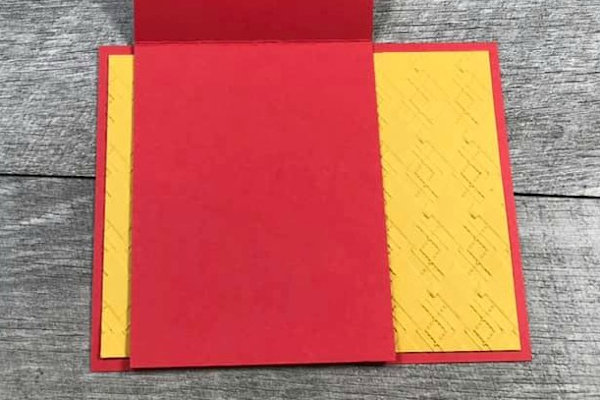
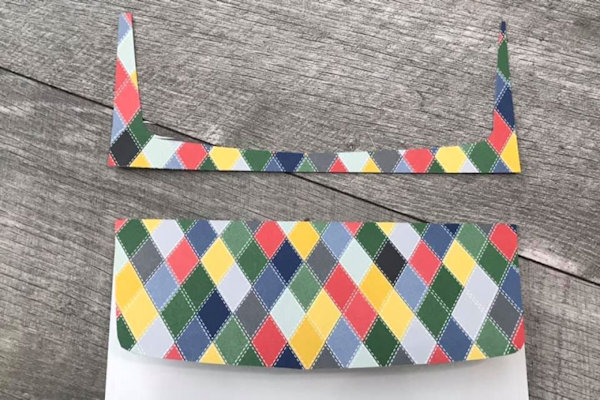
Step 2
Cut a 3 1/4"x 8 1/2" layer of cardstock. Score it at 4 1/4" and adhere it to the card front where shown.
-
Step 3
Adhere a 4" x 3" layer of paper to the front panel of the folded cardstock.
-
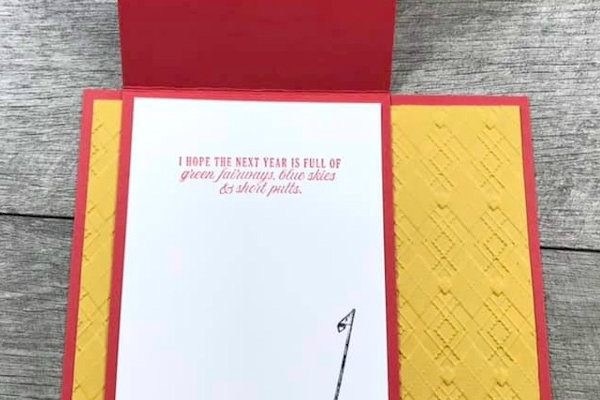
Stamp a second 4" x 3" layer of cardstock and adhere it to the inside panel of the folded cardstock.
-
Step 4
Embellish the card front as desired.
For the sample, a 2” die cut circle was layered and popped up with Dimensionals, then embellished with themed die cuts. The sentiment was stamped onto a banner die cut. Black twine was wrapped around the front panel and then tied in a knot. -
Step 5
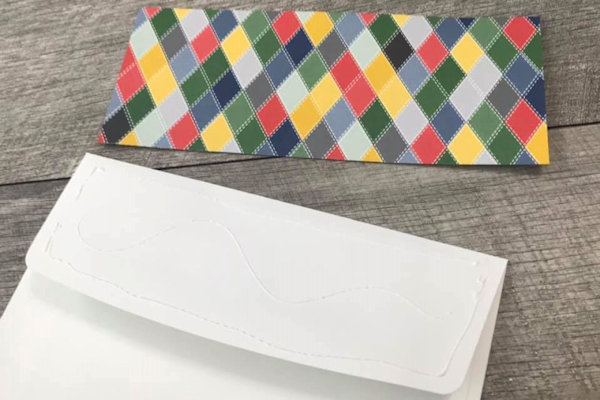
Create a coordinating envelope. Glue a 2 1/2" x 6" piece of designer series paper to the flap of an envelope.
-
Trim off excess by using the envelope flap as a guide.
-
Step 6
Complete the project.
Video!
Your Turn
You've seen the tutorial, now you try it! We've got a section of the gallery set aside for Front Flap Card. Try this technique, then upload your artwork to the gallery. Show us your creations!
***Please note - Internet Explorer/Edge is not a supported browser, and will not allow you to see the videos. Please use Chrome, Firefox or Safari to view our tutorial videos.

Questions and Comments
We'd love to get your feedback or questions. Leave your comment below.
Just a hint - I found it easy to make 4 cards at once, cutting one sheet into quarters for the bases, and then a second sheet across in 4 strips, 2.75" x 8.5" for the front flap. My cards are in the gallery!
Shirl
Page 1 of 1 pages