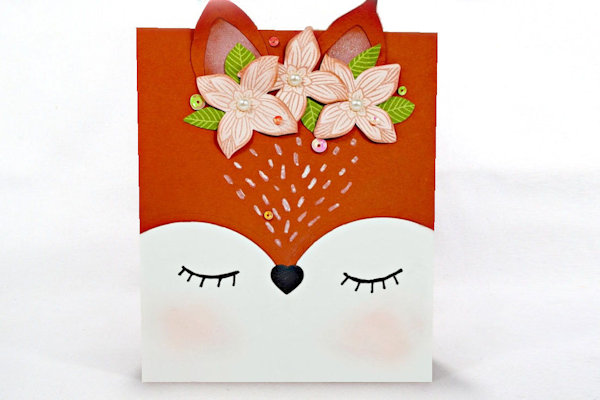
Fox Card
by Gloria Plunkett
Use everyday dies for this fox shaped card.
Supplies
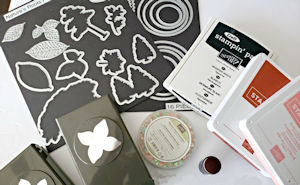
- White cardstock for card base (Stampin’ Up!® Thick Whisper White used here)
- Brown or dark orange cardstock for head and ears (SU Cajun Craze used here)
- Scrap cardstock for flowers and leaves (SU Blushing Bride and Pear Pizzazz used here)
- Circle dies (SU Layering Circle Framelits used here)
- Small heart die (SU Pretty Park Framelits used here)
- Flower stamps and/or dies (SU Pop of Petals stamp set and Four-Petal Punch used here)
- Leaf die or punch (SU Leaf Punch used here)
- Nesting leaf dies for ears (SU Nature’s Roots dies used here)
- Inks (SU Cajun Craze, Flirty Flamingo, Pear Pizzazz Classic Inks, and White Craft Ink used here)
- Scissors
- Adhesive
- White marker (SU White Stampin’ Chalk Marker used here)
- Other supplies as needed to complete the project (SU products used here: Iridescent Sequin Assortment, Basic Pearl Jewels, Stampin’ Dimensionals, sponge dauber, Clear Wink of Stella)
Step-by-Step
-
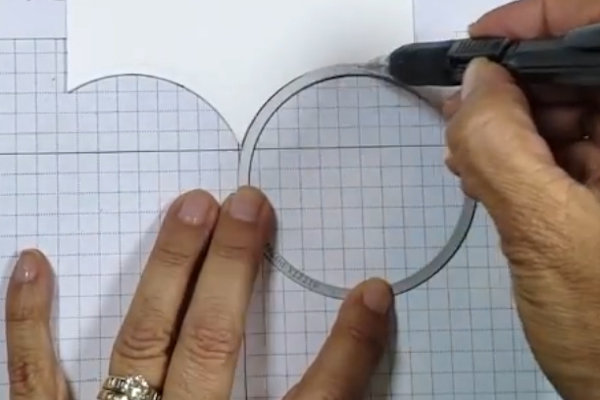
Step 1
Create a template for the fox face. Find the bottom center point of a 4 1/4" x 3 3/4" piece of cardstock. Line up a 2 1/2" circle die and trace an arc from the center point to a point about 3/4" up one side. Repeat on the opposite side. Use the markings to align the die for cutting.
-
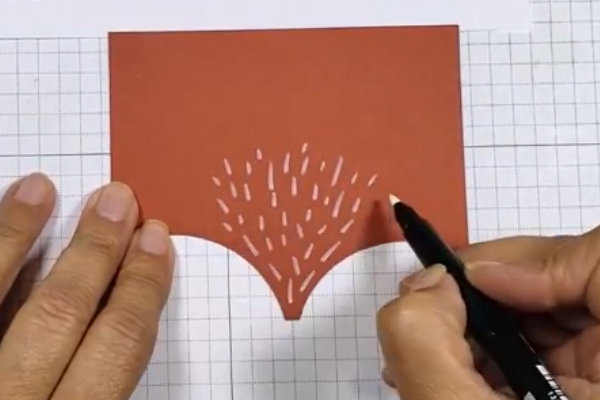
Use the template as a guide to cut a head piece for the fox card.
-
Step 2
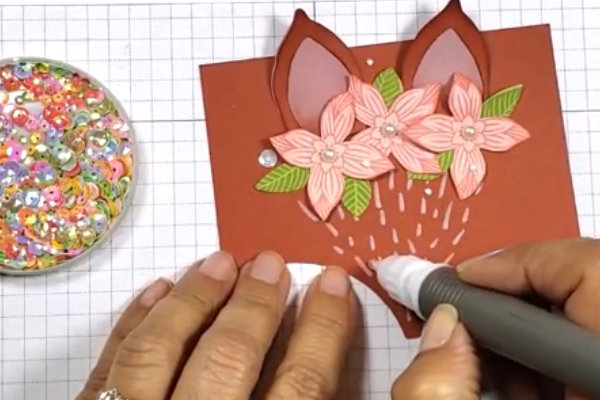
Add some fur texture with a white marker.
-
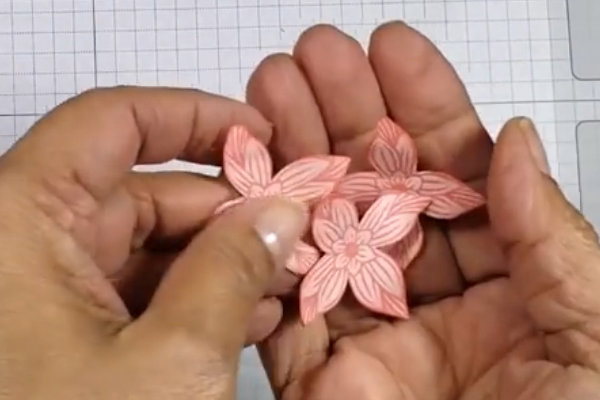
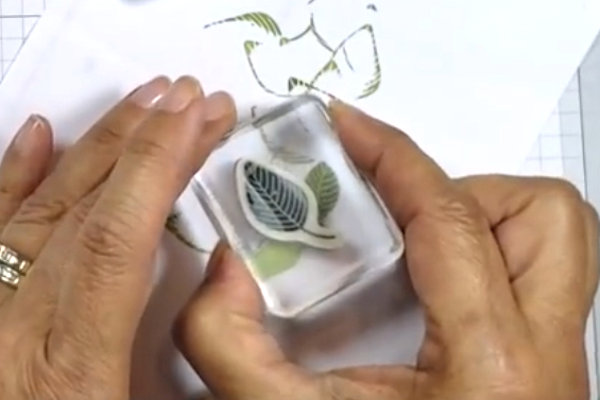
Step 3
Stamp and cut some flowers to embellish the card.
-
Cut and embellish some leaves as well. (For the sample, the leaves were punched and then stamped for added detail.)
-
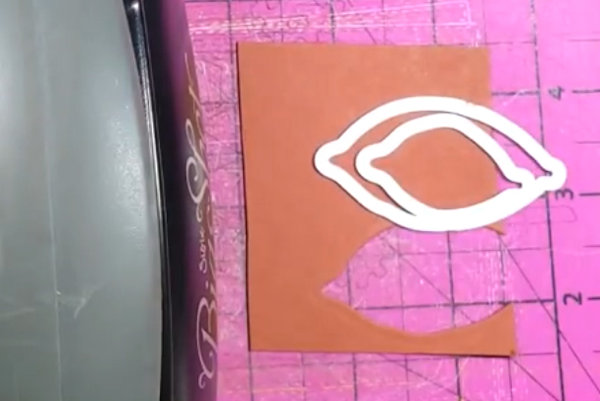
Step 4
Cut the ears, either by hand or using nesting leaf dies.
-
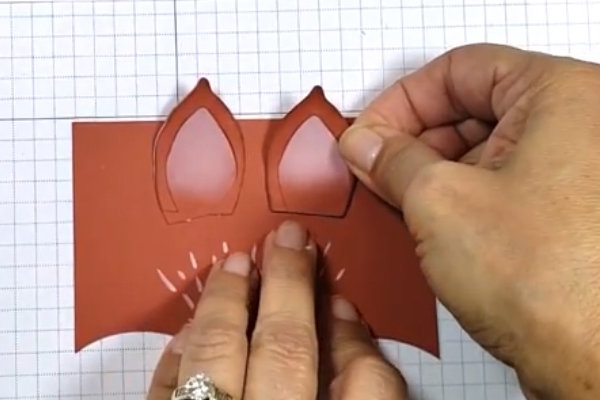
Step 5
Cut a second ear piece to layer behind. Sponge the inside with white craft ink for contrast.
-
Adhere the ears at the top of the head panel. Be sure they do not extend more than 1/2” from the edge of the card so it will fit in a standard A2 envelope for mailing.
-
Step 6
Adhere the flowers and leaves to your liking around the fox’s ears.
-
Add other embellishments as desired.
-
Step 7
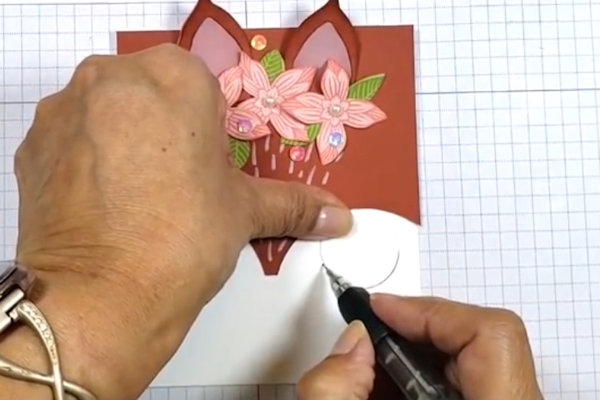
Cut a white card base that is 4 1/4" x 10". Score and fold at 5".
Line up the head panel for reference, and add eyes to the white card base.
TIP:
Use a circle die cut as a guide for the curve of the eyelid. -
Trace the curve with a marker and add some eyelashes using downward strokes.
-
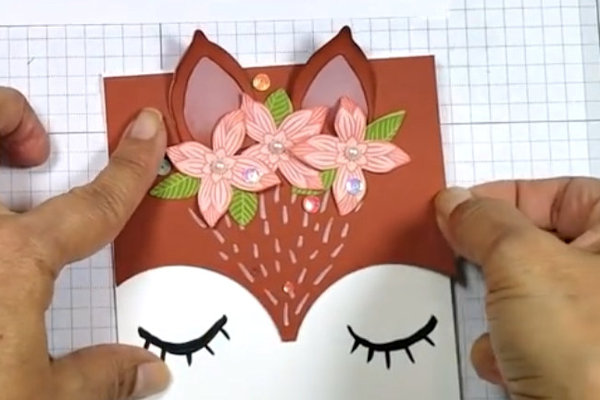
Step 8
Layer the head panel onto the base.
-
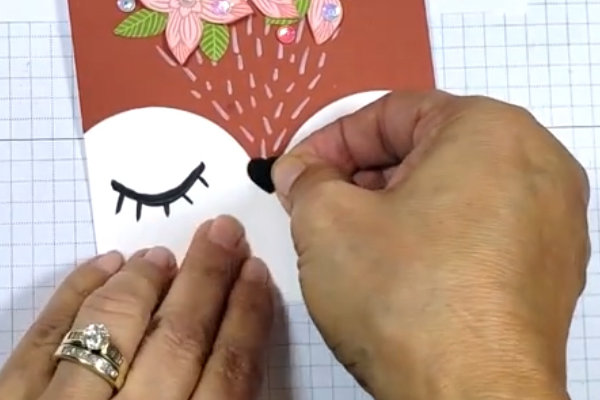
Add a small die cut heart as a nose.
-
Step 9
Complete the card.


Video!
Your Turn
You've seen the tutorial, now you try it! We've got a section of the gallery set aside for Fox Card. Try this technique, then upload your artwork to the gallery. Show us your creations!
***Please note - Internet Explorer/Edge is not a supported browser, and will not allow you to see the videos. Please use Chrome, Firefox or Safari to view our tutorial videos.

Questions and Comments
We'd love to get your feedback or questions. Leave your comment below.
Page 1 of 1 pages