Folded Christmas Tree
by Beate Johns
Create a Christmas tree out of half a paper circle.
Supplies
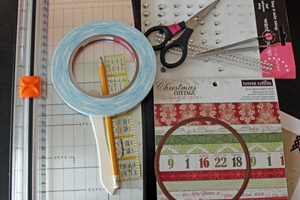
- Patterned paper or thin cardstock
- Circle die or circle pattern
- Paper cutter
- Ruler
- Scoring tool
- Adhesive
Step-by-Step
-
Step 1
Cut a circle out of patterned paper.
Hint:
It doesn't matter what size you choose. Bigger circles = bigger trees. I used the smallest of the Grand Circle Nestabilities dies.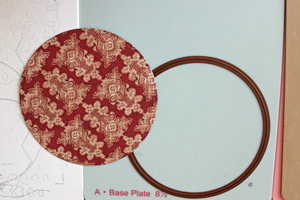
-
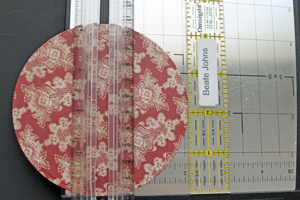
Step 2
Cut your circle in half.
-
Step 3
Mark the center of the half circle.
-
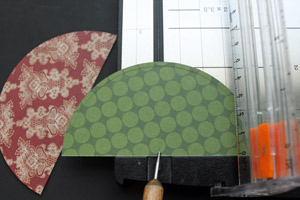
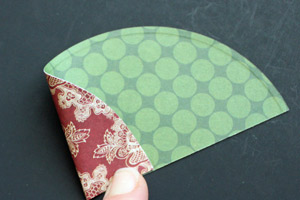
Step 4
Take corner of the half circle and fold it over to the half mark. You can fold it like that....
-
or let your edge overlap the diameter.

-
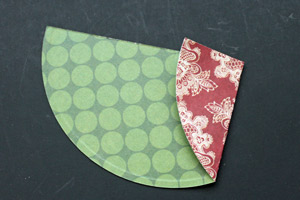
Step 5
Press your first fold line down.
-
Take the edge of the corner and fold it back. Line up the straight edge with the first fold line.
-
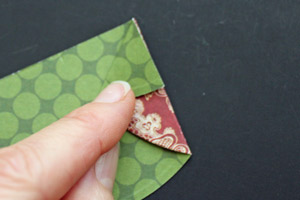
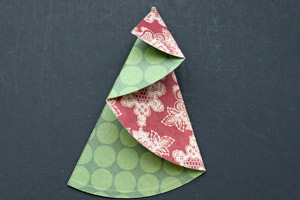
Step 6
Flip your tree over. Take the shorter edge and line it up with the longer edge on the opposite side.
-
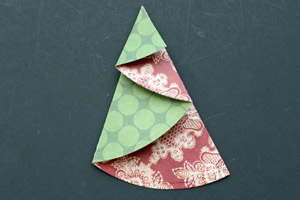
-
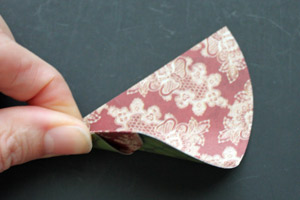
Step 7
You can leave the tree, or see if you like it better if you fold it the opposite way.
-
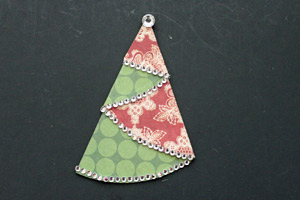
Adhere the layers down. Decorate if wanted.
-
Step 8
Use a stamp or a piece of paper to create your tree trunk.
-
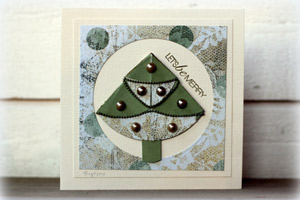
Step 9
Use your tree on a project.


Video!
Variations
-
Fold two trees and use them side by side like Birgit did here.
Your Turn
You've seen the tutorial, now you try it! We've got a section of the gallery set aside for Folded Christmas Tree. Try this technique, then upload your artwork to the gallery. Show us your creations!
***Please note - Internet Explorer/Edge is not a supported browser, and will not allow you to see the videos. Please use Chrome, Firefox or Safari to view our tutorial videos.
Questions and Comments
We'd love to get your feedback or questions. Leave your comment below.
Thank you so much.
Love the cards...ta for sharing Hugs..Denise (UK) x
Page 1 of 1 pages