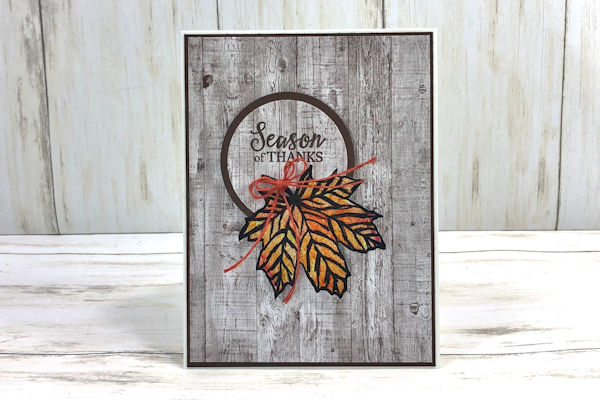
Foil Stained Glass
by France Martin
Layer colored acetate and foil for a stained glass effect.
Supplies

- Acetate
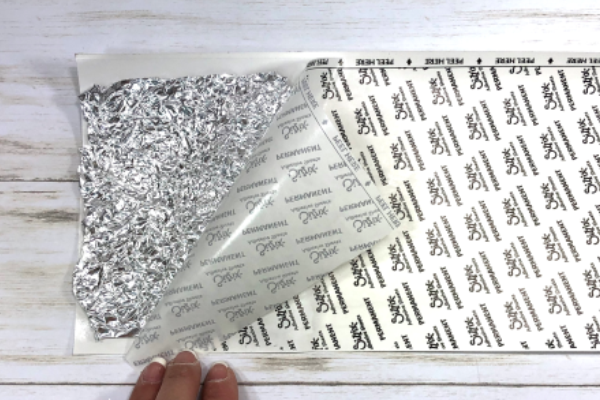
- Double-sided adhesive sheet
- Stamps
- Alcohol markers
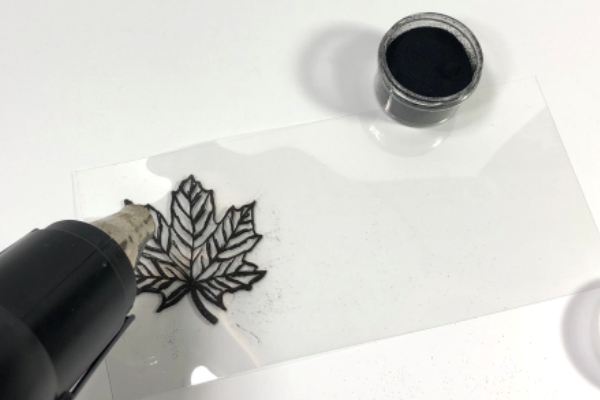
- Embossing Powder (Black works best)
- Embossing Buddy
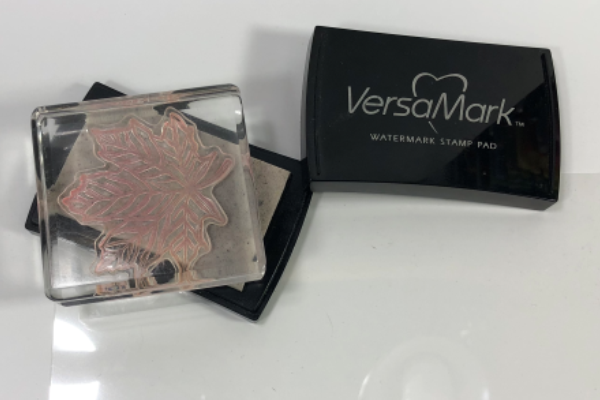
- Versamark
- Aluminum foil
- Bone folder
- Scissors
- Heat tool
- Silicone craft sheet
- Other supplies as needed to complete the project
Step-by-Step
-
Step 1
Ink stamp with Versamark ink. Stamp onto a window sheet.
-
Step 2
Heat emboss the stamped image with black embossing powder.
-
Step 3
Using alcohol markers, color the back of the embossed window sheet.
-
Step 4
Wrinkle a piece of aluminum foil and place it on an adhesive sheet. Place the top protection paper on top of the foil.
-
Step 5
Using a bone folder, press the foil into to the adhesive sheet. Go back and forth to secure the adhesive onto the wrinkled foil.
-
Step 6
Place the foil on a silicone craft sheet. Remove the backing of the adhesive sheet.
NOTE:
Do not pull up but roll off. DO NOT touch the adhesive on foil with your finger; if you need to hold the foil use the silicone sheet. If pulling up or touching the adhesive it will not remain on the foil but will stick to your fingers or the backing sheet. -
Step 7
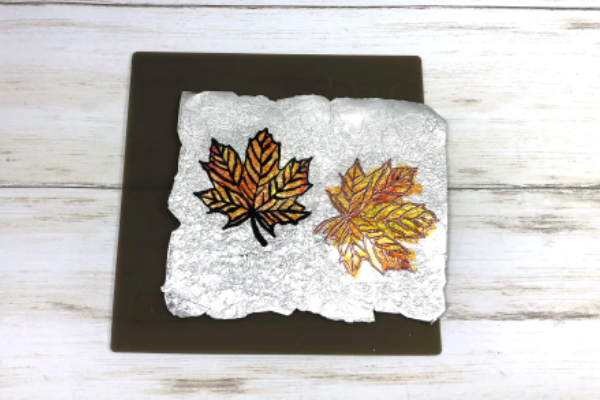
With the adhesive facing up, place the embossed window sheet onto to foil. The embossing should be face up with the colored side touching the foil.
-
Step 8
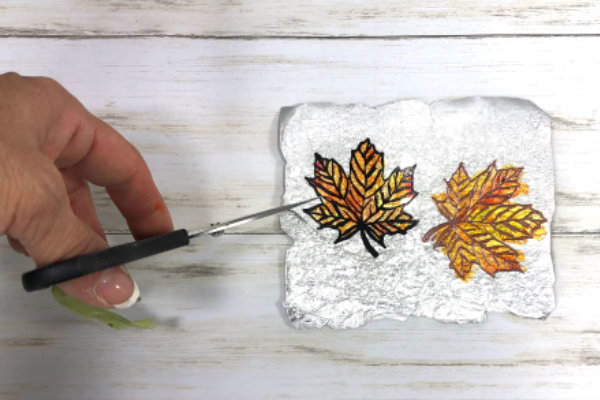
Using scissors, cut out the embossed image.
-
Step 9
Assemble and complete the project.


Video!
Your Turn
You've seen the tutorial, now you try it! We've got a section of the gallery set aside for Foil Stained Glass. Try this technique, then upload your artwork to the gallery. Show us your creations!
***Please note - Internet Explorer/Edge is not a supported browser, and will not allow you to see the videos. Please use Chrome, Firefox or Safari to view our tutorial videos.

Questions and Comments
We'd love to get your feedback or questions. Leave your comment below.
Page 1 of 1 pages