Foam Faux Leather
by France Martin
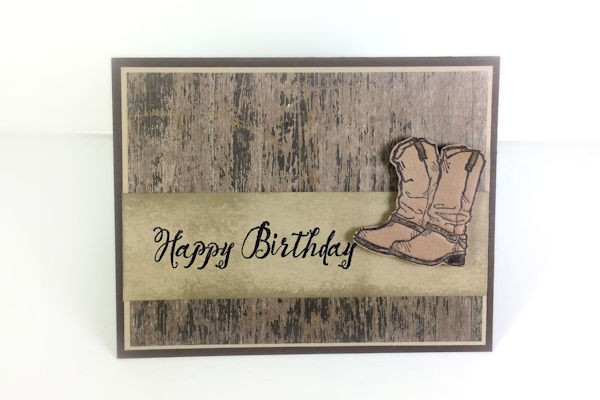
Create a faux leather embellishment with simple craft foam.
Supplies
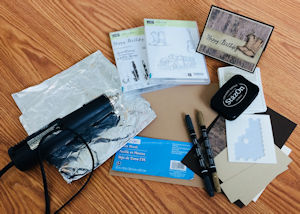
- Craft foam sheet
- Stamps (Stampin’ Up!® Country Livin’ set used here)
- Permanent ink (StazOn Jet Black ink used here)
- Heat tool
- Scissors
- Other supplies as needed to complete the project (SU supplies used here: Early Espresso, Crumb Cake, and Very Vanilla cardstock, Wood Textures Designer paper, Feather Together stamp set, Sahara Sand and Early Espresso inks, Black and Early Espresso markers, aluminum foil, Dimensionals, adhesive)
Step-by-Step
-
Step 1
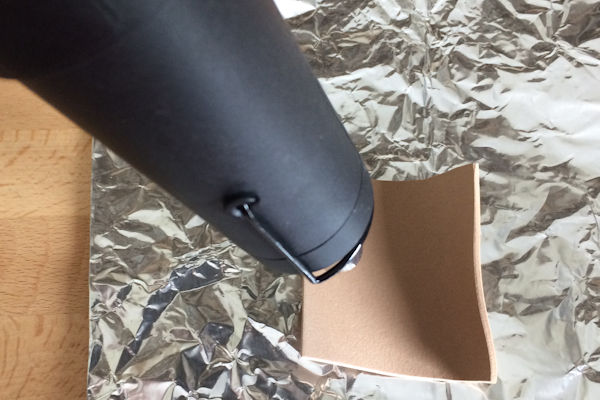
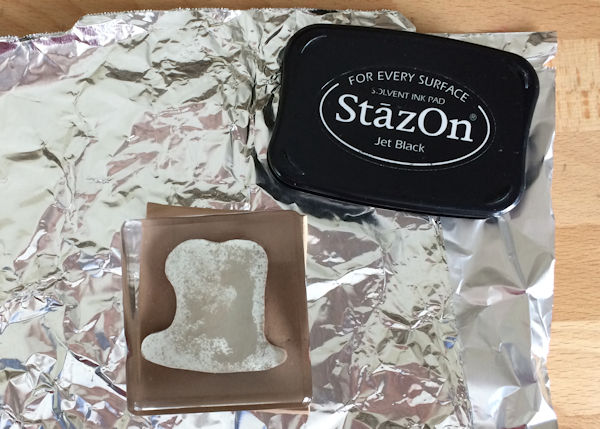
Ink stamp with permanent ink. Heat a piece of craft foam with a heat tool until all sides curl up.
-
Step 2
Stamp into the warm foam and keep pressure for about 15 to 20 seconds.
-
TIP:
Work over a piece of aluminum foil to protect your work surface. -
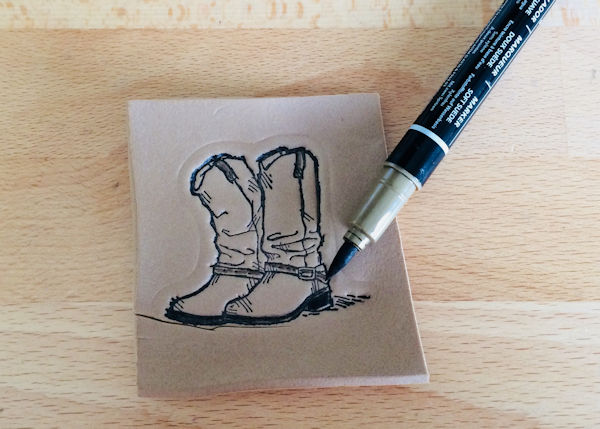
Step 3
Use markers to color the image as desire.
-
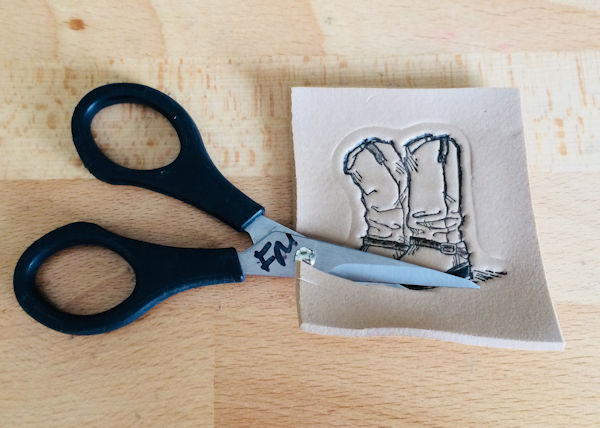
Step 4
Cut out the image with scissors.
-
Step 5
Assemble the card as desired.
-
Step 6
Complete the project.


Video!
Your Turn
You've seen the tutorial, now you try it! We've got a section of the gallery set aside for Foam Faux Leather. Try this technique, then upload your artwork to the gallery. Show us your creations!
***Please note - Internet Explorer/Edge is not a supported browser, and will not allow you to see the videos. Please use Chrome, Firefox or Safari to view our tutorial videos.

Questions and Comments
We'd love to get your feedback or questions. Leave your comment below.
Shirl
Page 1 of 1 pages