Faux Tin Tiles

by Dina Kowal

Recreate the look of vintage embossed tin.

Supplies

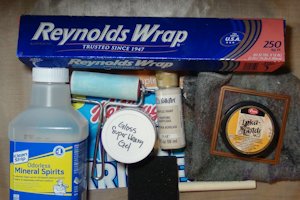
  • Chipboard (cut to 6” wide to fit in die cutting machine - cereal box used here)
  • Square dies (Spellbinders Nestabilities used here) or another shape that can be tiled
  • Aluminum foil (foil tape can also be used)
  • Spreadable adhesive medium (gel medium used here)
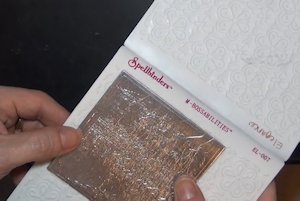
  • Embossing folder (Spellbinders M-Bossabilities Elegance folder used here)
  • Die cutting machine with embossing pads
  • Acrylic paint
  • Foam brush
  • Solvent, such as mineral spirits or rubbing alcohol
  • Paper towel or craft-dedicated rag
  • Metallic finish (optional)

Step-by-Step

  1. Step 1

    Spread a thin, even layer of adhesive or gel medium over a piece of chipboard.

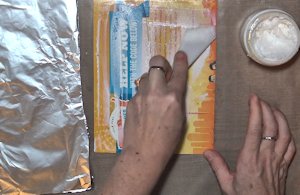
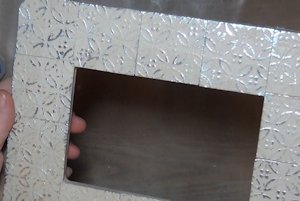
  2. Adhere aluminum foil to chipboard. A brayer can be used to smooth out wrinkles and bubbles.

    Be sure to allow the adhesive medium to dry completely. Trim edges or fold to back side.
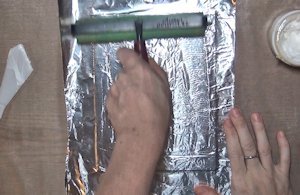
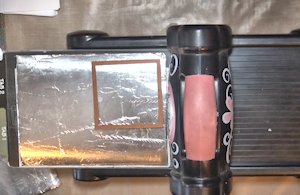
  3. Step 2

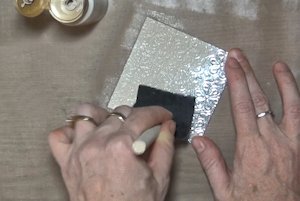
    Die cut the covered chipboard into squares. More than one pass through the die cutting machine may be needed.

  4. Step 3

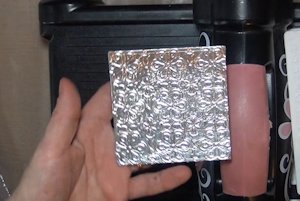
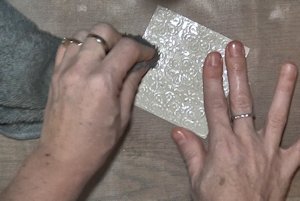
    Place covered chipboard squares in an embossing folder with a centered or repeating pattern, centering the die cut(s) over the design.

  5. Emboss according to machine instructions, adjusting as needed for the thickness of the material.

  6. Step 4

    Paint a layer of acrylic paint over the tile with a foam brush. Be sure paint gets into all the details of the pattern. Allow the paint to dry completely.

  7. Step 5

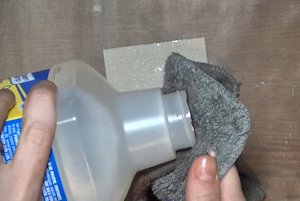
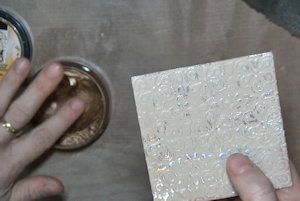
    Soak a small area of a paper towel or craft-dedicated rag with odorless mineral spirits or another solvent.

  8. Rub the solvent over the raised areas of the panel to remove some of the paint for a vintage look.

  9. Step 6 (Optional)

    Lightly rub a metallic finish over the raised areas of the panel to enhance the color of the exposed foil.
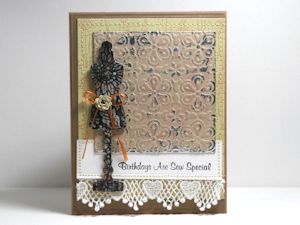
  10. Step 7

    Use the panel to complete a project.

Video!

Variations

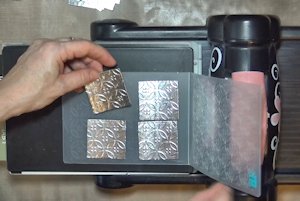
  1. Cut smaller pieces and emboss several at once.

  2. Piece them together to cover a frame or other altered object.

Your Turn

You've seen the tutorial, now you try it! We've got a section of the gallery set aside for Faux Tin Tiles. Try this technique, then upload your artwork to the gallery. Show us your creations!

***Please note - Internet Explorer/Edge is not a supported browser, and will not allow you to see the videos. Please use Chrome, Firefox or Safari to view our tutorial videos.

Questions and Comments

We'd love to get your feedback or questions. Leave your comment below.

What a great idea! I've just started to try out mixed media, and this has given me several other ideas. What fun I shall have! Thank you.
Bridget Keenor  |  Wed May 6, 2015 at 3:47 AM
What a great idea for embellishing a frame. I am curious about where you found this frame. It is exactly what I am looking for for my watercolor project. Thanks for making this video. It is really neat.
Dottie  |  Wed May 6, 2015 at 4:29 AM
Wow! Those look great and I especially love the frame idea. I just might have a thrift store frame or two (or 50) in my stash!
Gail  |  Wed May 6, 2015 at 6:27 AM
Dottie, the frame is an unfinished wood frame from Michael's, made by Walnut Hollow. I found 2 of them at my local Goodwill.
dina  |  Wed May 6, 2015 at 6:40 AM
My foil piece is already drying! Fun!
muscrat  |  Wed May 6, 2015 at 7:17 AM
Wonderful technique. Cannot wait to try it - looks like a quick trip to the store is in order. Thank you for your excellent tutorials.
Melanie Richards  |  Wed May 6, 2015 at 7:50 AM
Wow- Very cool tutorial! I can't wait to try it. smile
Nikki Hawver  |  Wed May 6, 2015 at 7:53 AM
I can't wait to try this! It sounds simple and I love the way it looks!
Kay Oxford  |  Wed May 6, 2015 at 7:58 AM
Beautiful!!!! And not too complicated to make either. Thank you so much for your great directions!
Catherine  |  Wed May 6, 2015 at 8:20 AM
This is beautiful, can't wait to try it out. I have been looking for something special to use with some old black and white photographs that will do the project justice and this is it. Thanks so much for all that you do for us.
Pamela Danielle  |  Wed May 6, 2015 at 9:20 AM
thank you for yet another! inspiring tutorial
Gayle L  |  Wed May 6, 2015 at 9:37 AM
Love this! Not sure when I will try this, but it is on my MUST TRY list!
Kim Padan  |  Wed May 6, 2015 at 10:10 AM
Love this! I have made similar projects just using multiple layers of foil and embossing them.
Valerie Doyle  |  Wed May 6, 2015 at 10:48 AM
Love this, it's a must try for me TFS.
Margaret Jenks  |  Wed May 6, 2015 at 12:23 PM
I love the card and the technique, what stamp did you use for the sentiment and is the dress form a stamp or did you create that on your own? Thanks
Shawna Shade  |  Wed May 6, 2015 at 1:42 PM
Thank you for this tutorial. I tried it immediately and loved the way my tile turned out pre-distressing that I left it as is. It reminded me of tiles (for lack of a better word) that were on the kitchen wall of the apartment I rented while in Verona, Italy.

Now I can recycle cereal boxes making tiles instead of putting them in the recycle bin!
Jeanne  |  Wed May 6, 2015 at 8:38 PM
I want to try this but I do not have a gel medium. What other adhesive mediums can be use? Can Modge Pod be used? Thanks.

Linda D.
Linda Duensing  |  Wed Jun 17, 2015 at 6:15 PM

Page 1 of 1 pages

You need to be logged in to comment

GET OUR NEWSLETTER


Splitcoaststampers's privacy policy